
If you want to store items for a customer without this being linked to a removal, you can easily do this by linking an existing storage unit to a customer. You can then also enter the costs directly and arrange the invoicing.
Linking storage to a customer
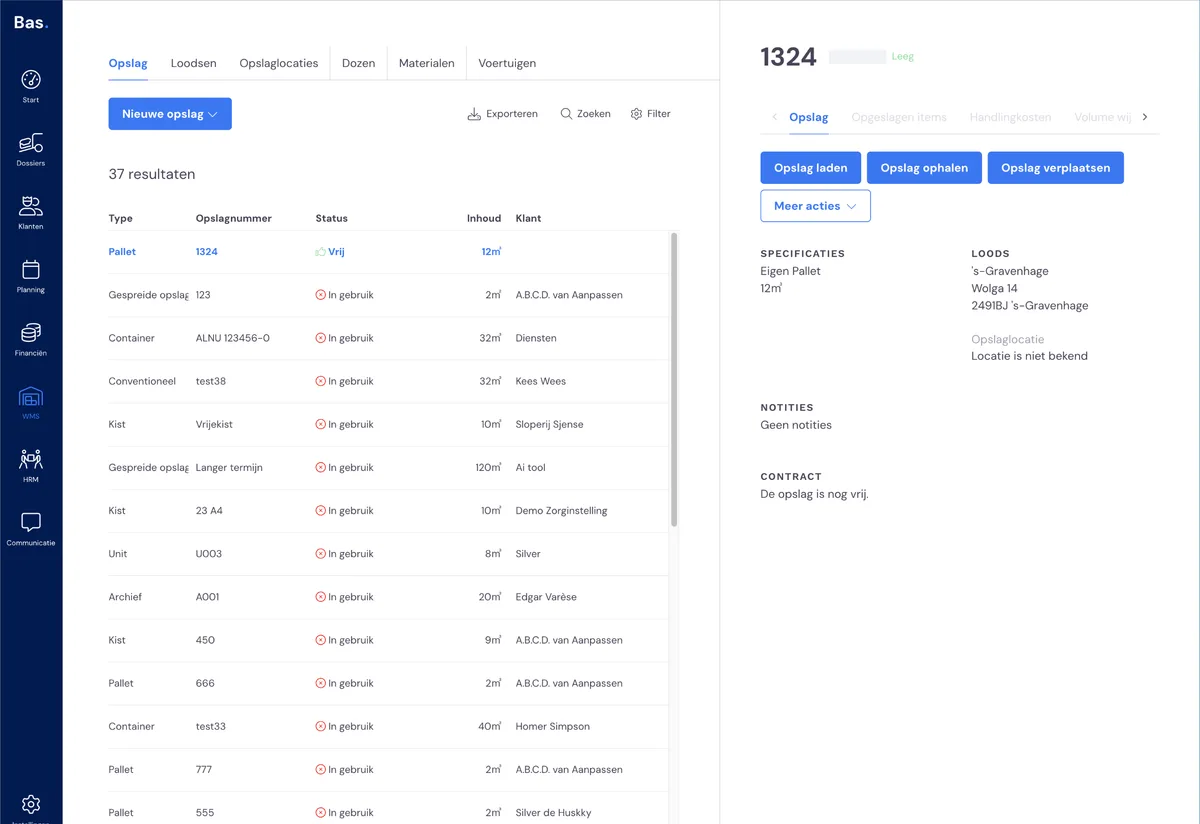
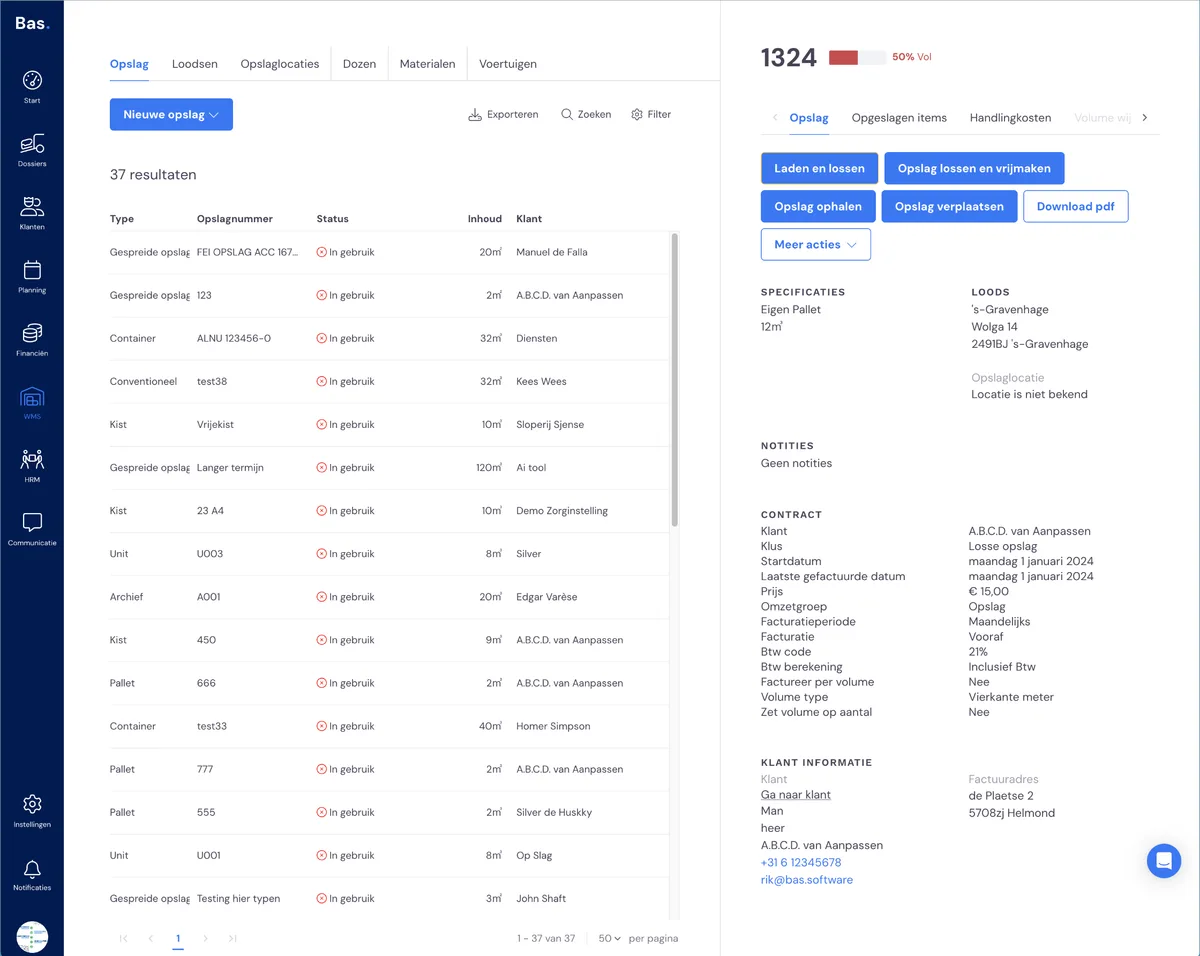
Go to WMS > storage. Choose one of the storage units in the list under 'storage'. Choose a storage unit that's 'free'. Check that the storage unit has the correct volume. Then choose 'load storage'.
Step 1 - choosing or creating a customer
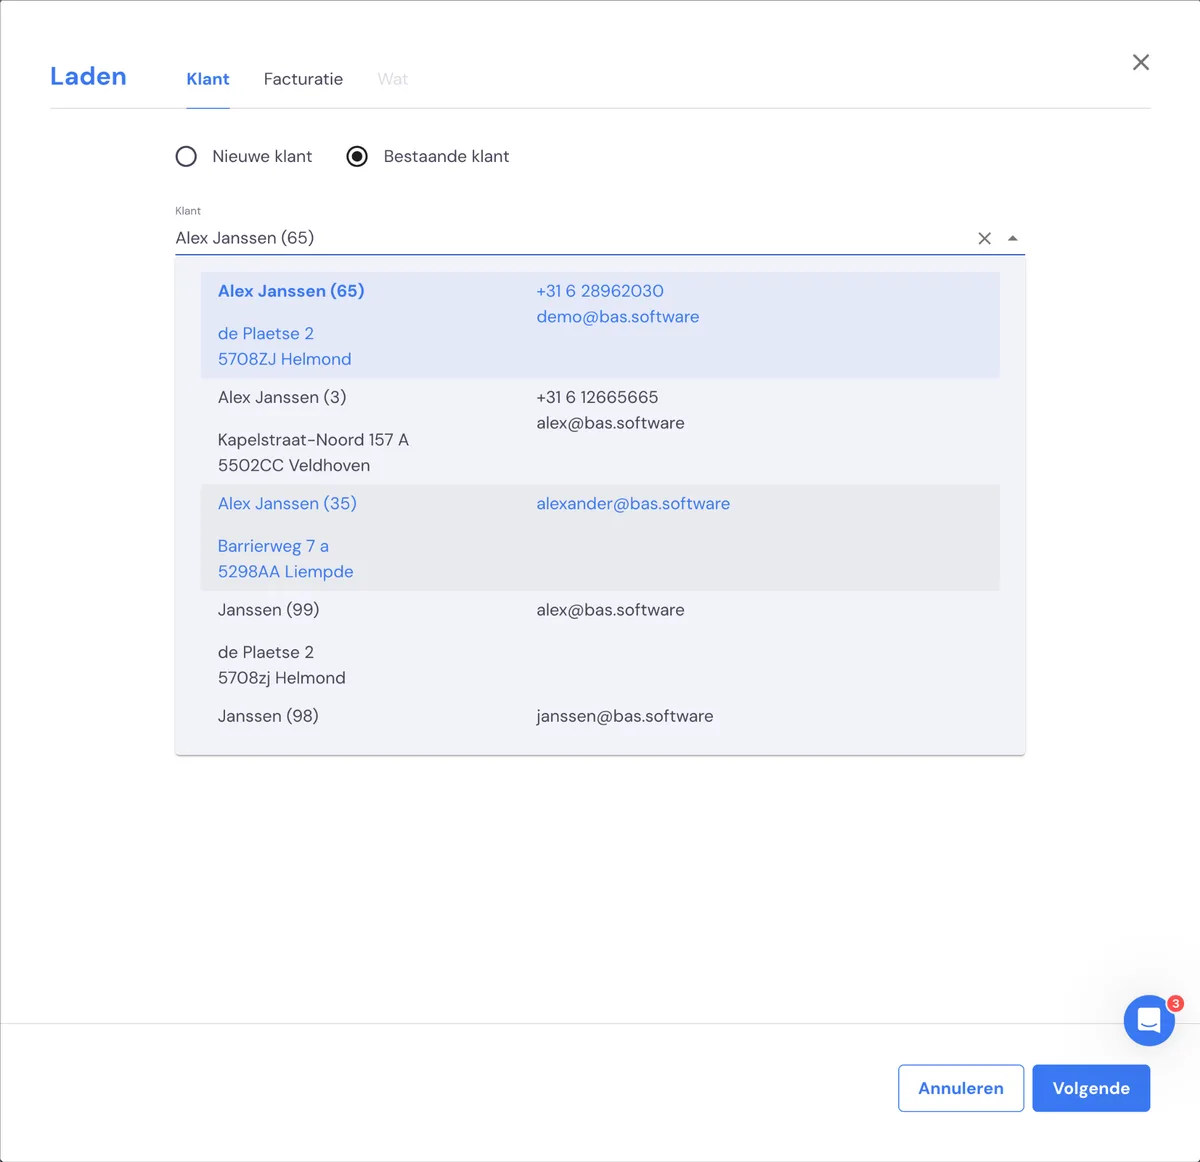
You're then guided through all the steps to put the storage unit into use for the customer. First choose whether you want to put the storage unit into use for an existing customer or a new customer. If you choose 'new customer', you can create a new customer straight away.
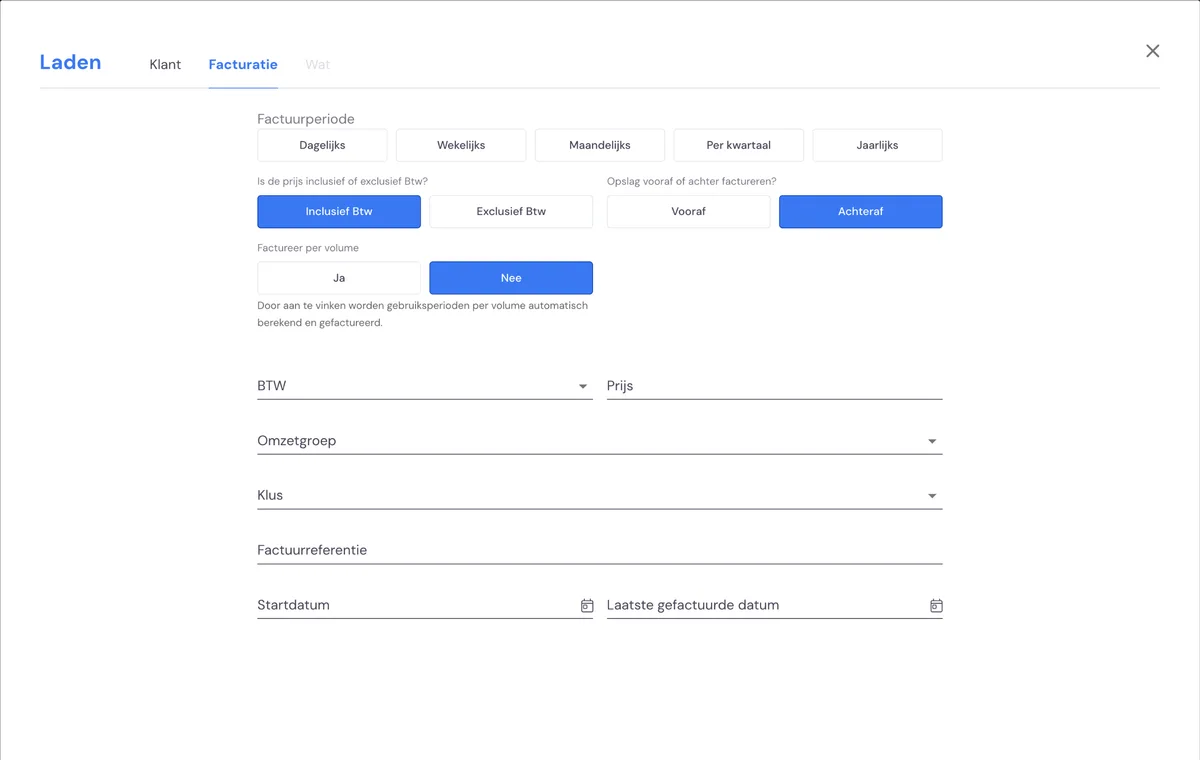
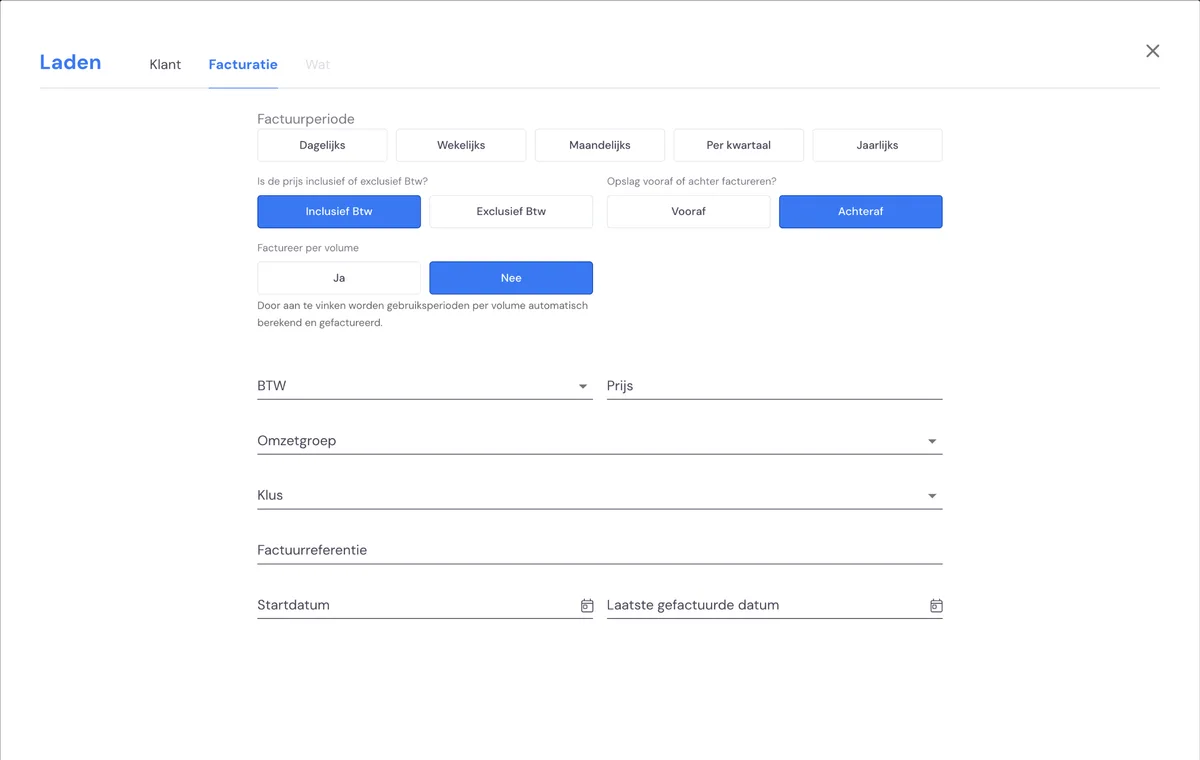
Step 2: setting up invoicing
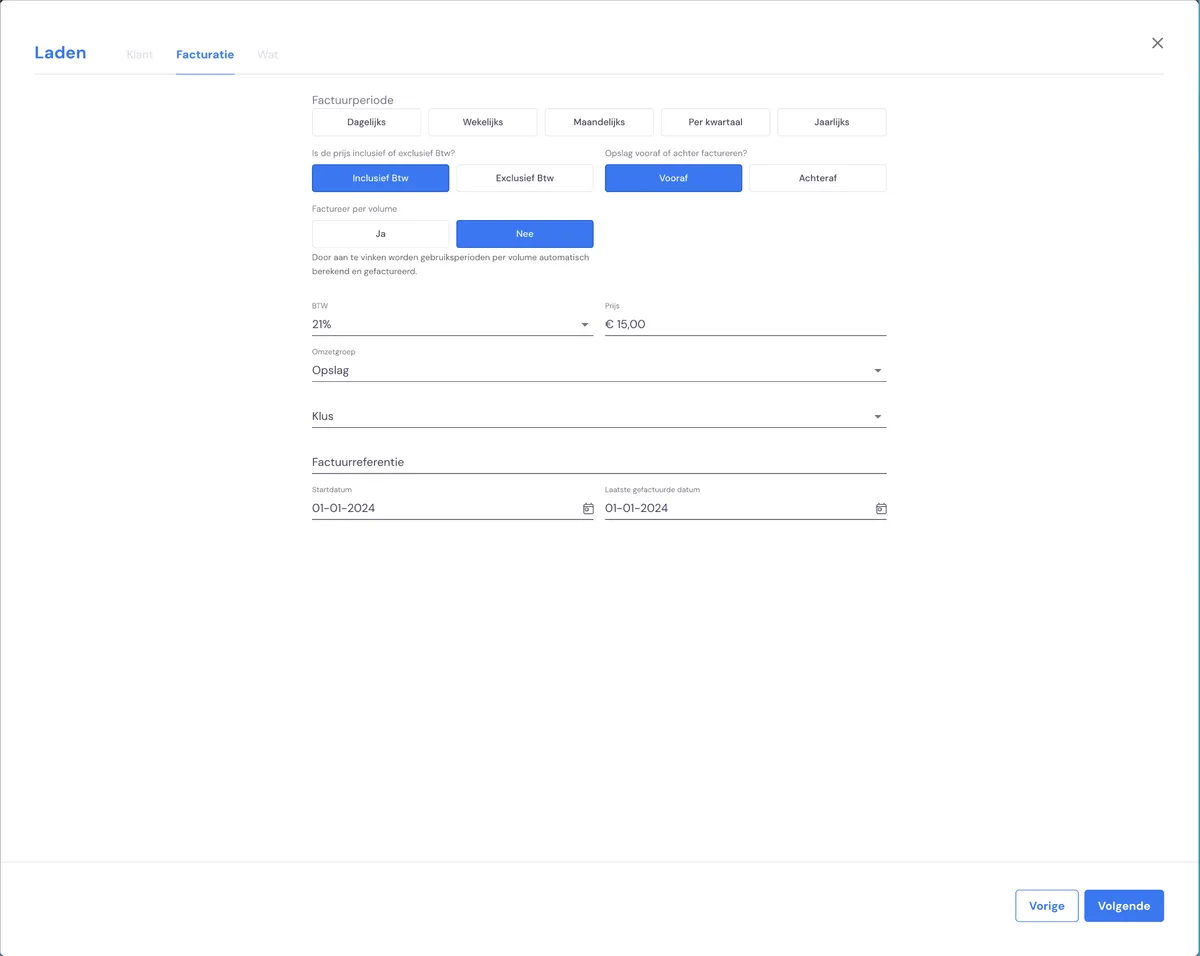
In the second step, set up the invoicing.
An important choice is whether you want to invoice based on volume or based on a fixed amount per period.
Invoicing based on volume
If you want to invoice based on the volume you're storing, choose volume. When managing your storage, you then enter the volume currently stored each time.
An invoice line is created on the invoice for every change in volume, so your customer is always aware of all changes.
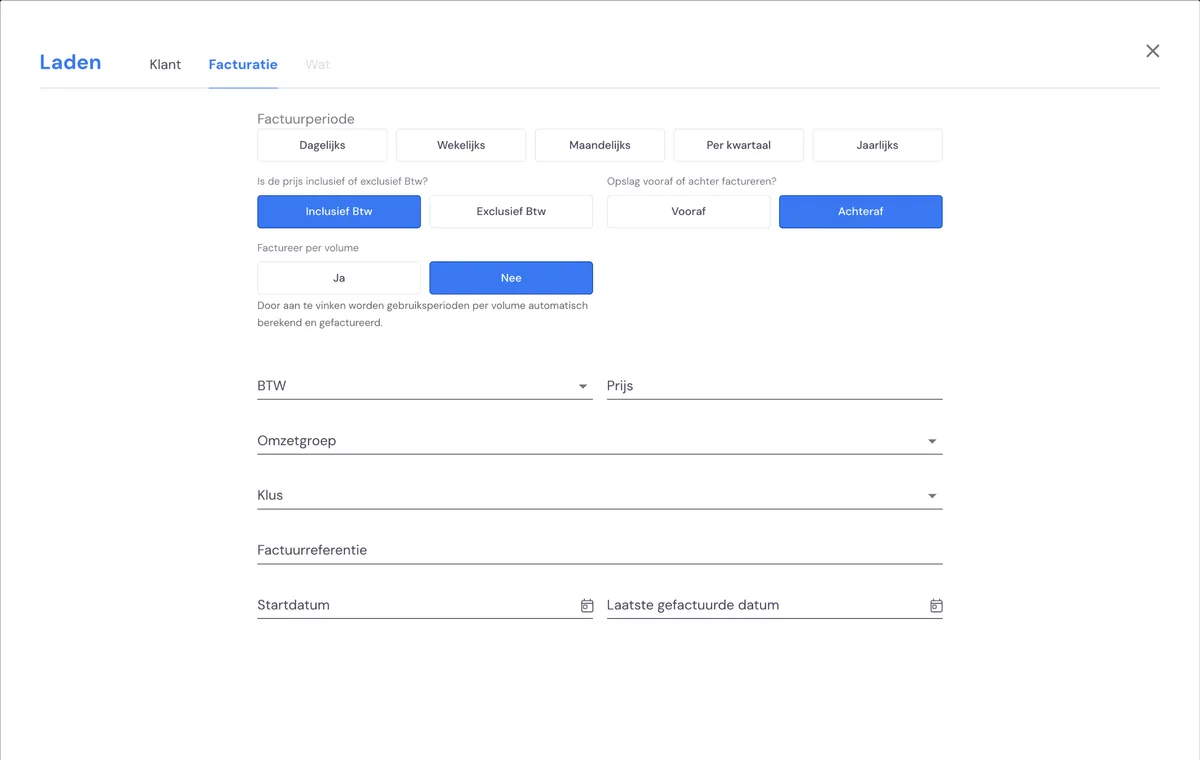
Invoicing based on a fixed amount per period
If you invoice based on a fixed amount, the volume isn't taken into account when invoicing. The chosen amount is invoiced periodically until you change it.
Step 3: entering lines
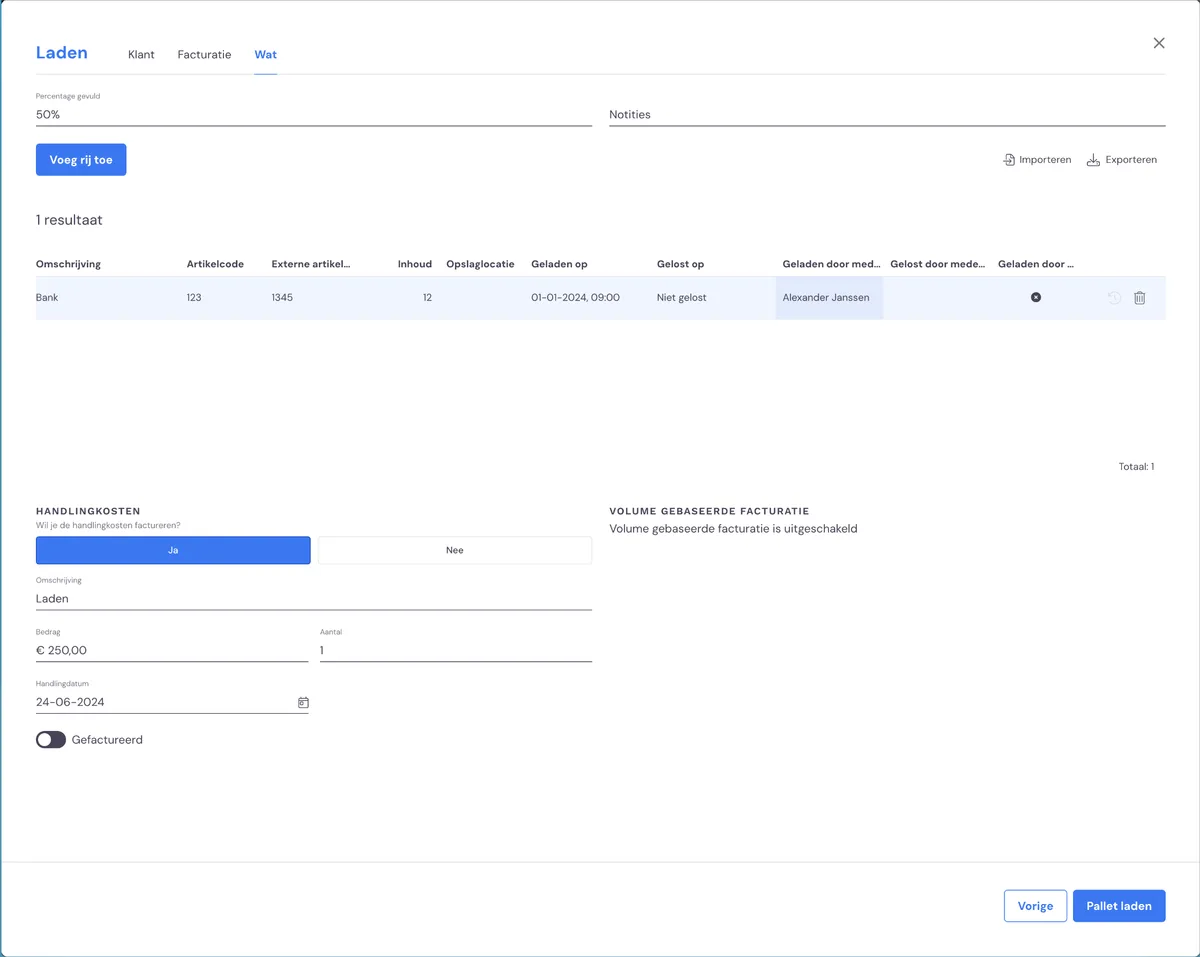
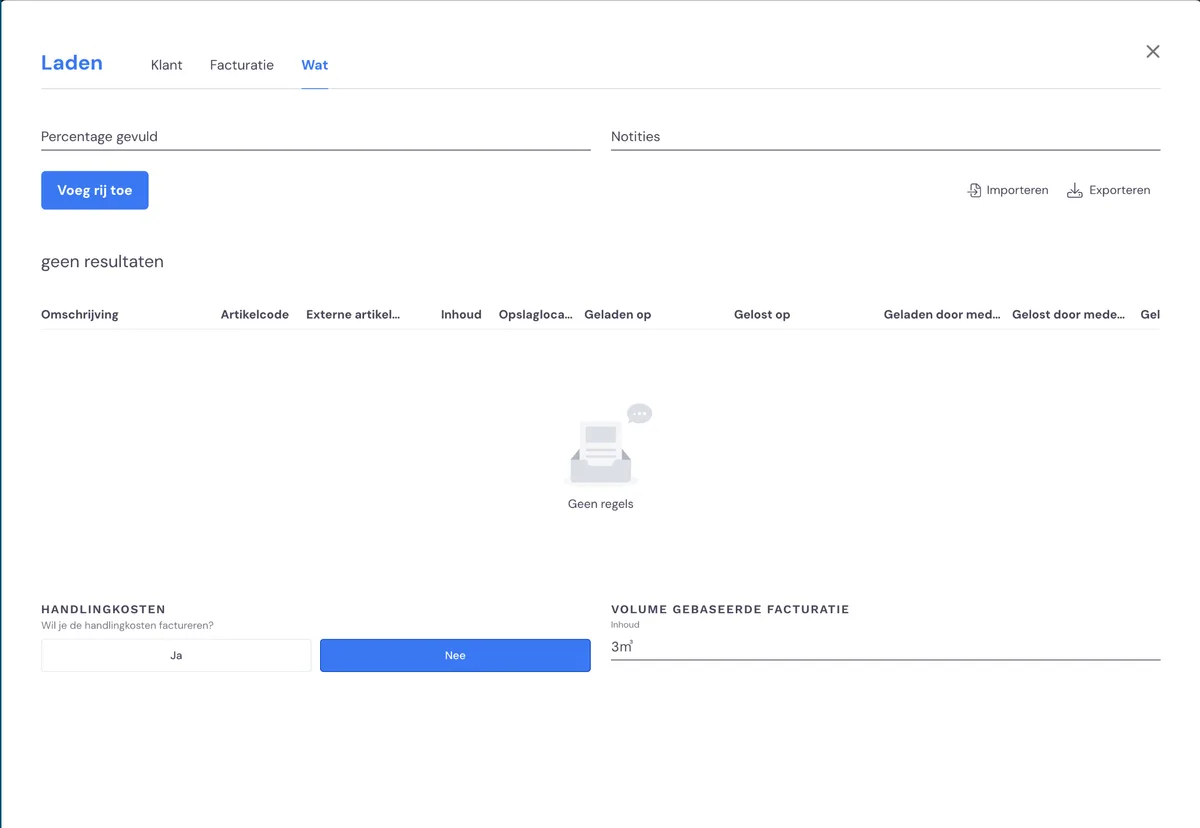
After this, you add the items that have been loaded. Adding handling costs is optional. After clicking 'load storage', the storage unit is put into use and the invoicing is arranged.
If you invoice based on volume, you enter the current volume directly here. This is then also included on the first invoice.
After this, the storage unit is loaded and ready for invoicing and ready for management.
Storage invoicing
Invoices are periodically prepared as draft invoices under 'finances'. Here you can check and send the invoices.
If you use multiple storage units for a customer, 1 (combined) invoice is created for all storage units.
If you don't want this, you can enter a unique invoice reference at the invoicing step. This creates a separate invoice based on that reference.
A separate invoice is also created if the VAT rate differs.
Grouping invoices
Invoices for storage are grouped when they're created. By default, all storage units for a customer are grouped per period, so your customer receives a clear invoice.
This is different in the following situations:
If you use different VAT rates for the customer, invoices are grouped by VAT rate.
If you use different invoice references, these are grouped per invoice reference.
Checking and finalising a draft invoice
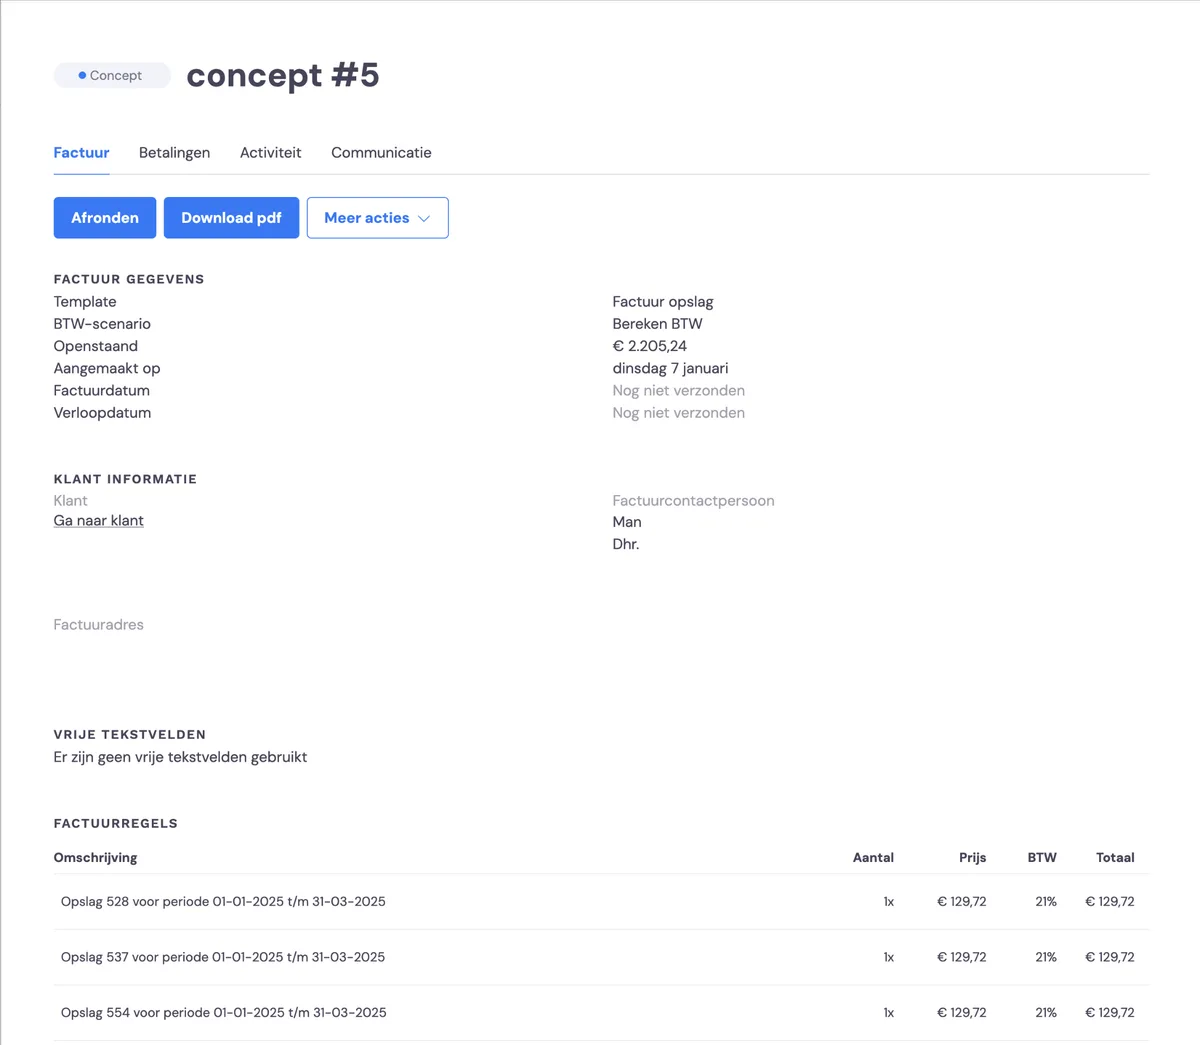
The draft invoice is ready for checking under the heading 'finances'. You can check the lines that have been created. If the content matches what you expect, you can finalise the invoice and then send it.
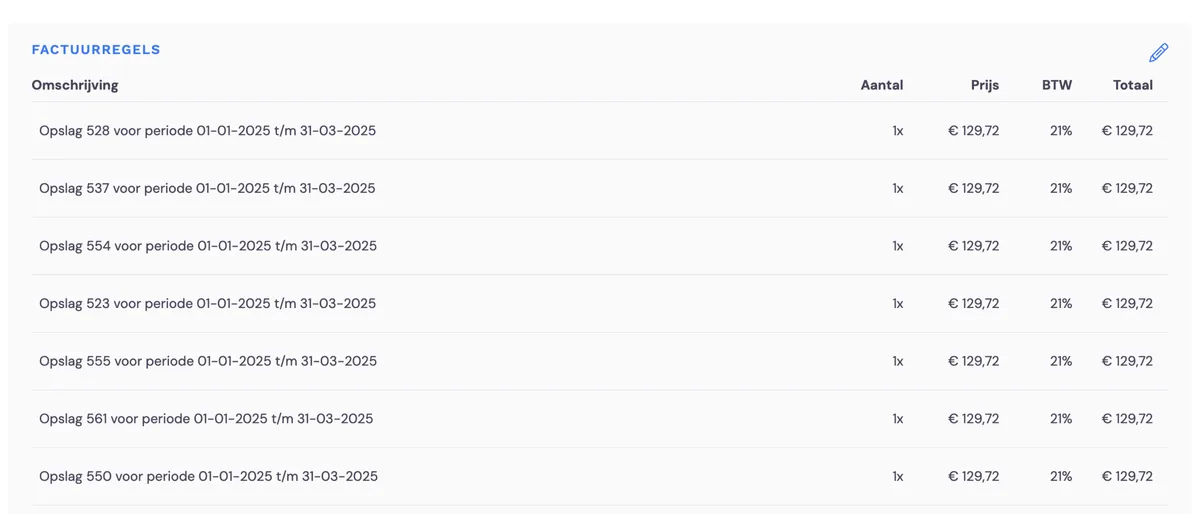
Want to make a change? Hover your mouse over the field you want to adjust, click the pencil icon and make the change. You can then still finalise and send the invoice.
More about invoicing
Want to know more about how invoicing works? Go to more about invoices >
Managing storage
After this, you can keep track of changes to storage (loading, unloading, clearing, moving) via the back office or via the app