
As a staff member with the 'Warehouse staff' skill, you can view information in the app about all items that have been recorded in storage. You can also easily use the app to move stored items, load storage, unload storage, and carry out all the other actions you need to perform. Of course, the storage must be fully labelled with stickers first!
Viewing information
With the app, you can quickly view stored information about your storage by scanning the QR code.
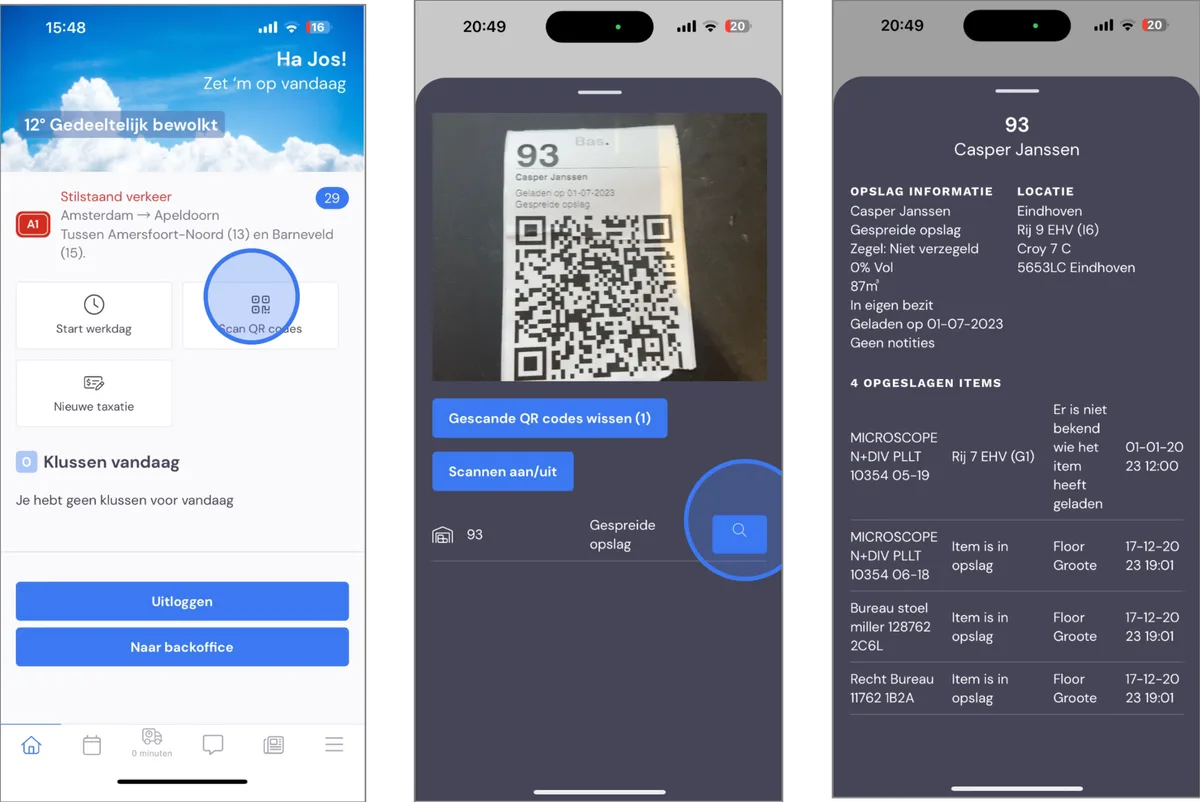
On the home page, go to 'Scan QR codes', scan the QR code of the item you want to know more about. Then click the magnifying glass. The stored details will then appear.
Moving stored items
You can easily move items in your storage from one storage location to another.
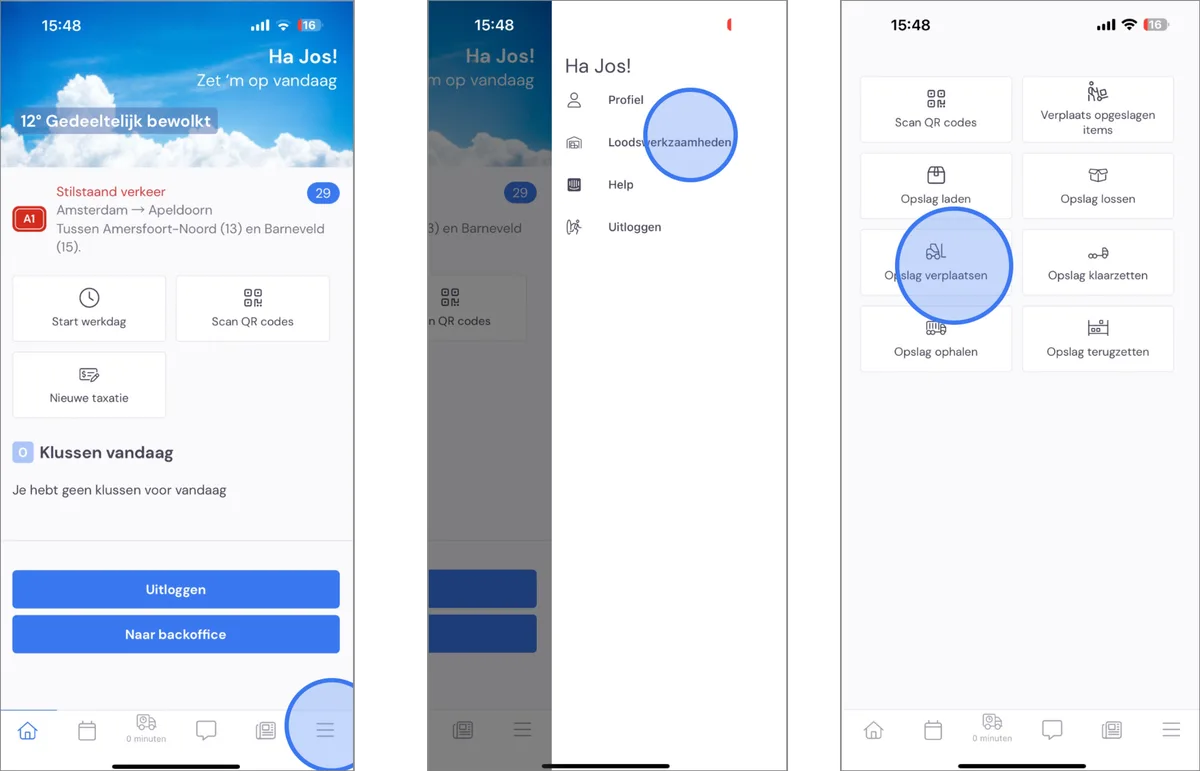
In the app, go to Warehouse tasks in the menu. Then select 'Move storage'.
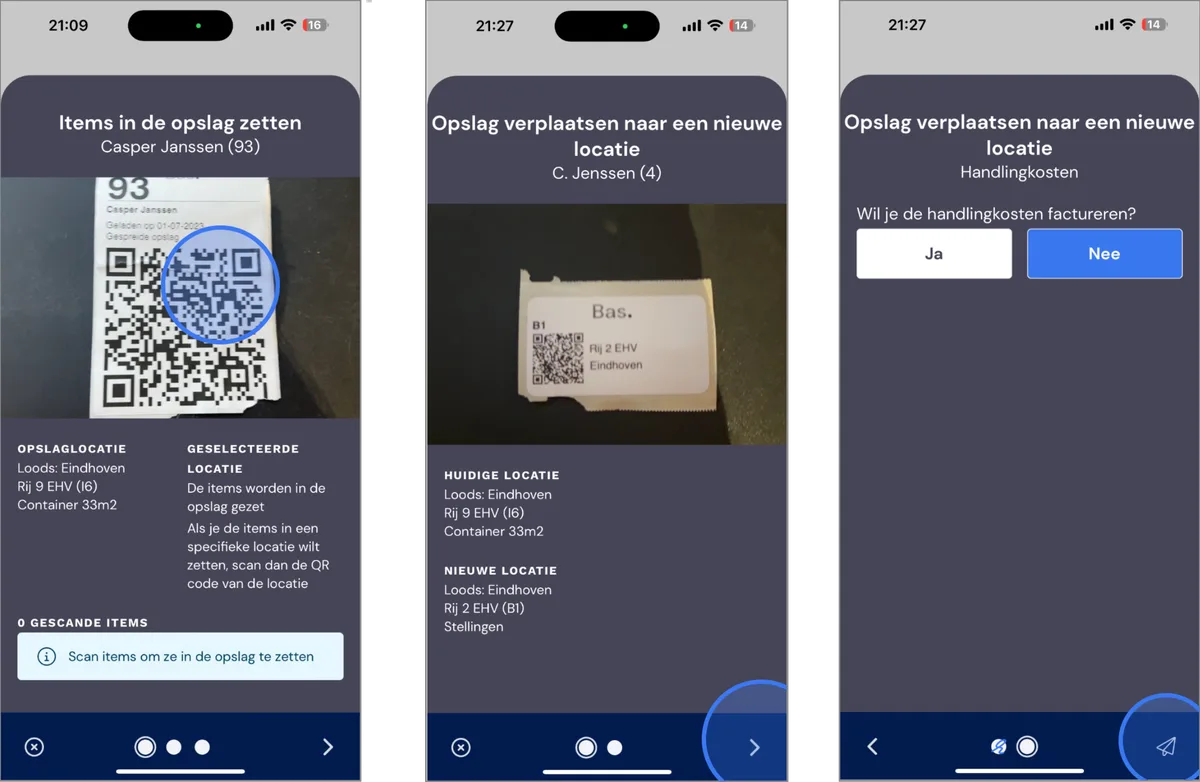
First scan the current storage location. Then scan the new storage location and click next. Then scan the items you want to move.
Finally, add any handling costs if applicable. Click next to move all the items to the new storage location. The scanned items will then be moved:

Decided not to move an item after all? Press and hold the button on the line for that item.
Loading storage
To load storage, start by scanning the storage QR code. After that, you can also scan a storage location if you want to place items in specific locations.
You can then scan all the items going into storage. If an item is not part of the selected storage, you will receive a notification and it will not be added.
If you want to place an item at a different location after all, scan the location first and then scan the item again. In the next step, you can add handling costs, and if storage is invoiced by volume, you can also submit the volume changes.
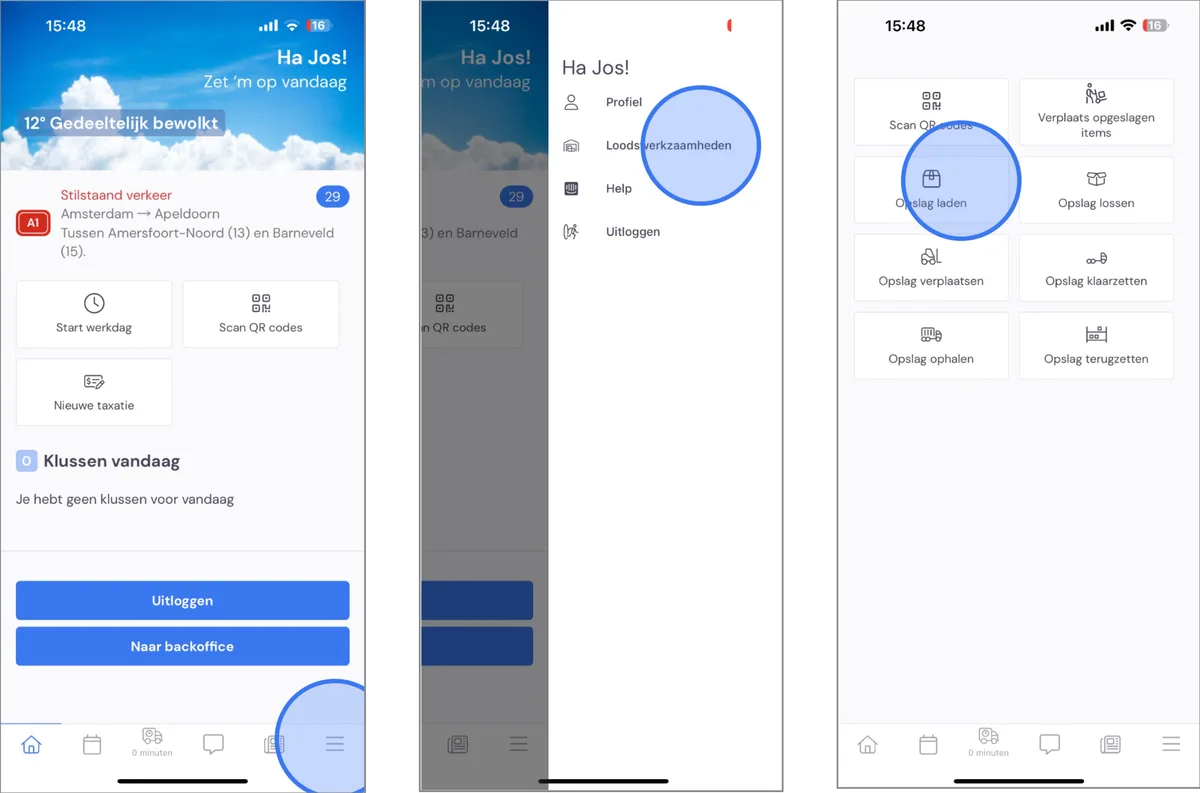
In the app, go to Warehouse tasks in the menu. Then select 'Load storage'.
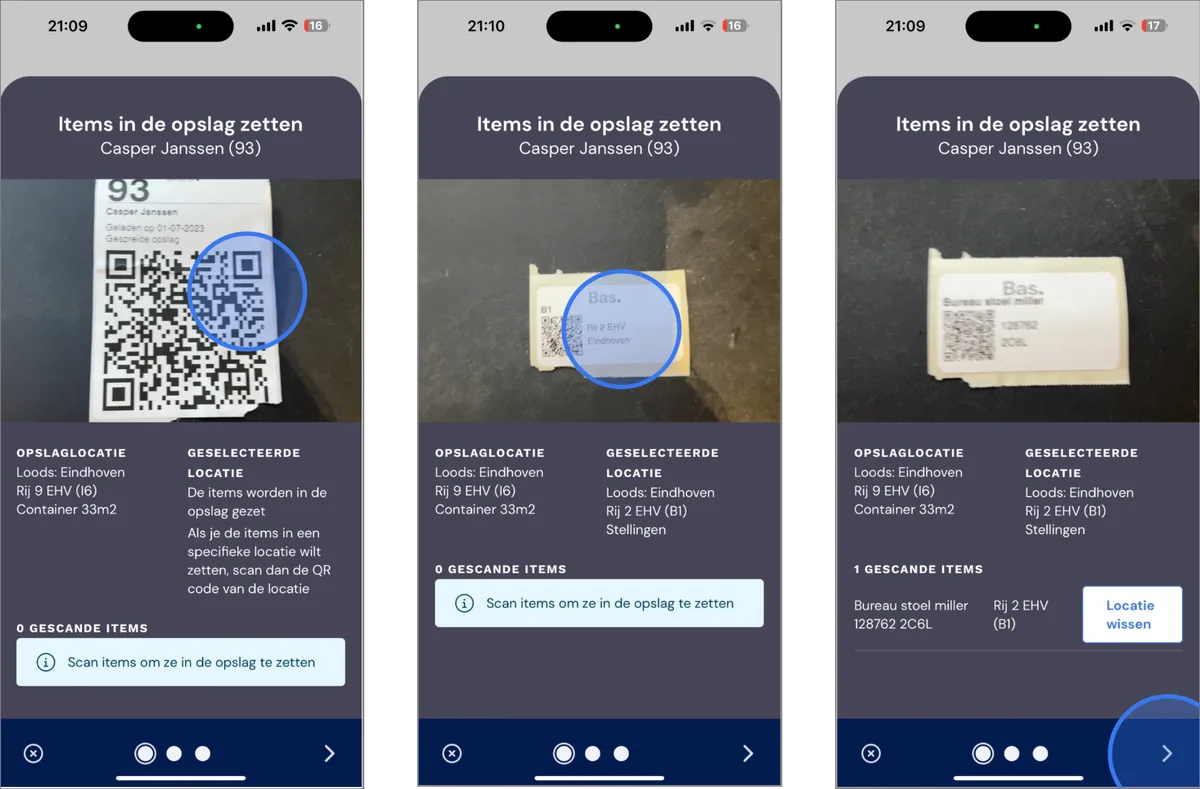
First scan the QR code of the storage, then scan the code of the storage location. Finally, scan the QR codes of the items and press 'next'.
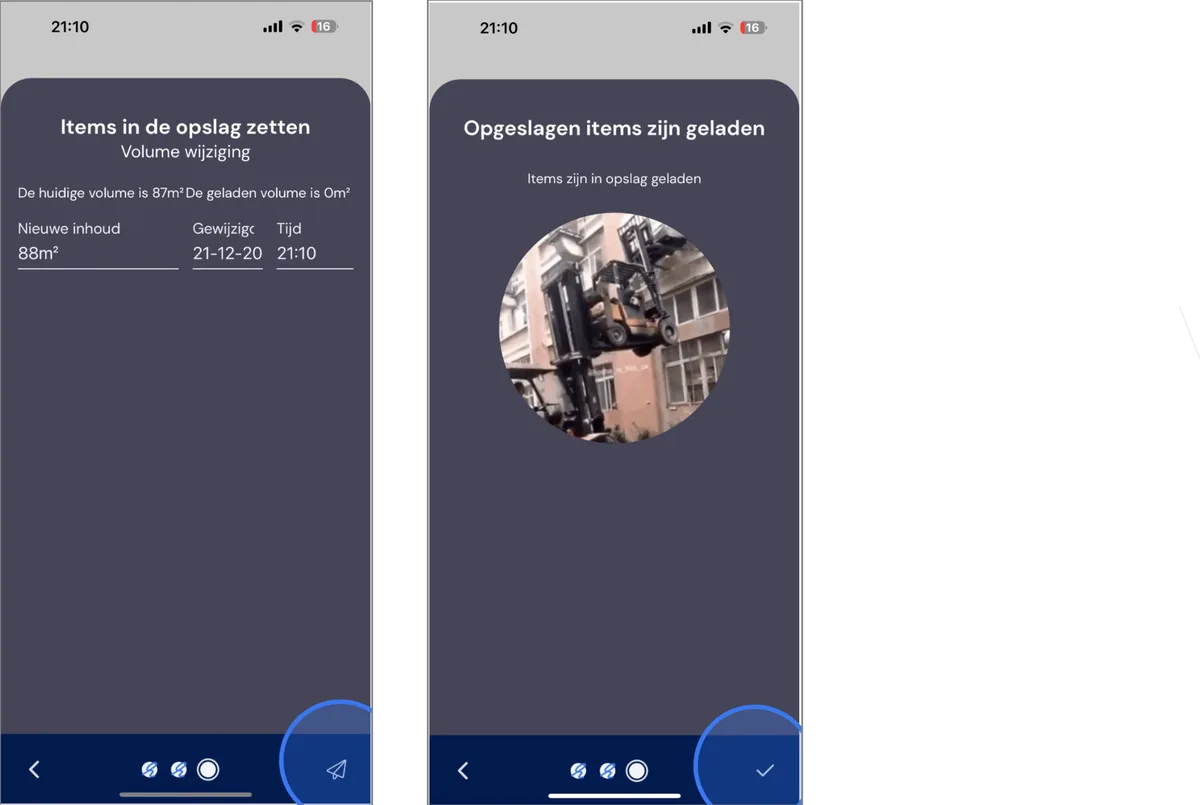
Finally, enter the details: new contents, date and time, and click send. The scanned items are now stored.
Unloading storage
To unload storage, start by scanning the storage QR code, then you can scan all the items leaving storage. If an item is not part of the selected storage, you will receive a notification and it will not be added.
In the next step, you can add handling costs, and if storage is invoiced by volume, you can also submit the volume changes.
View here our simple step-by-step guide!
Moving storage
To move storage, first scan the QR code of the storage, and then of the new storage location. Want to calculate handling costs? You can do that in the next step.
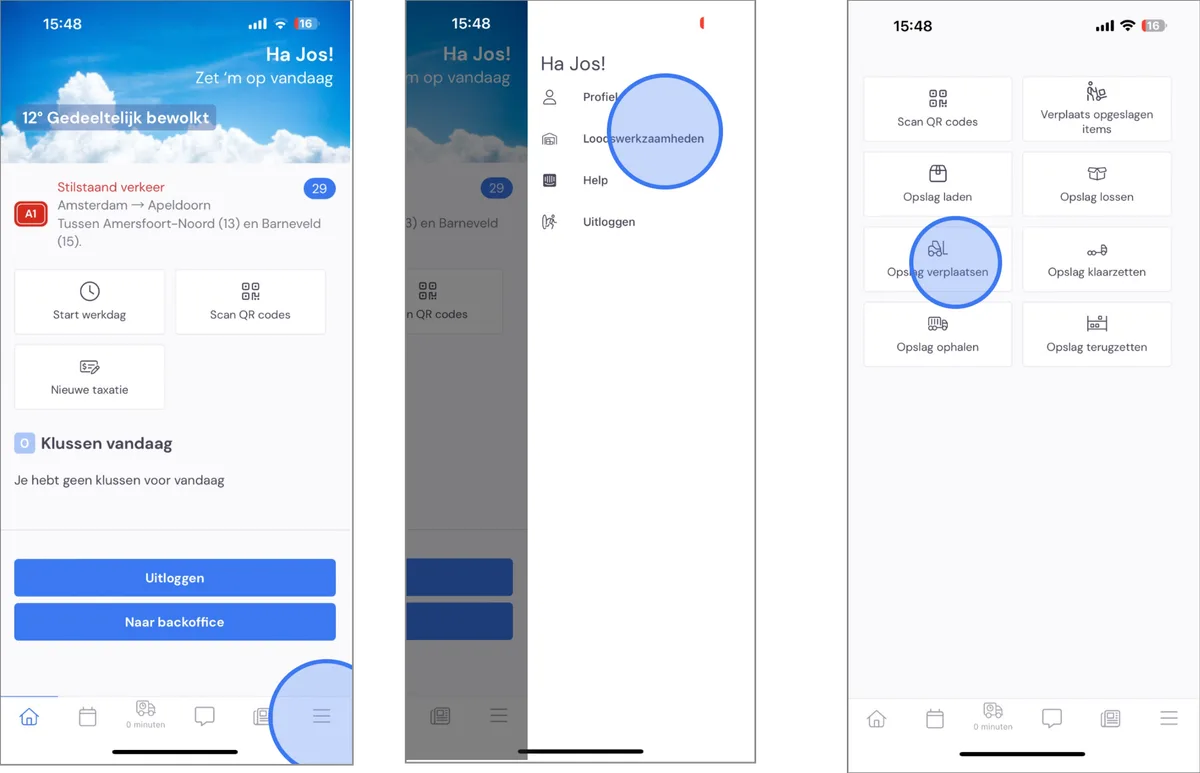
In the app menu, go to Warehouse tasks. Then select Move storage.
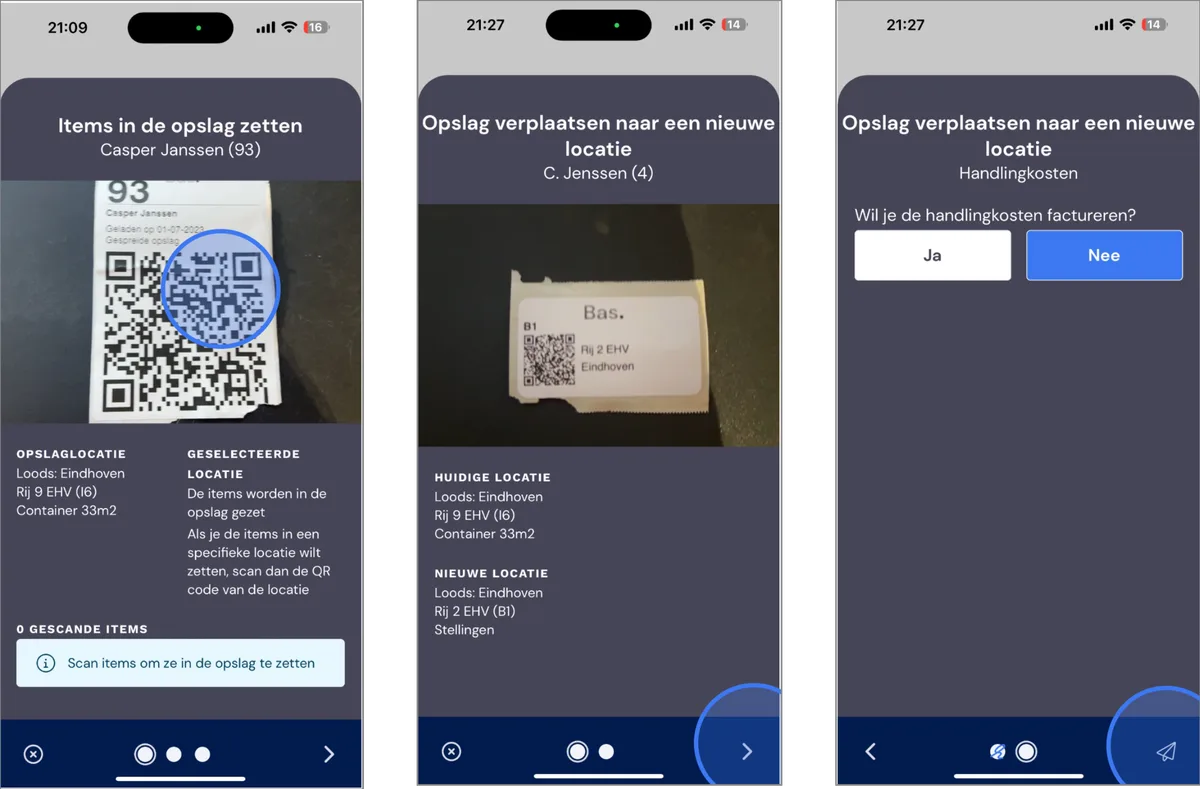
Scan the storage you want to move, then scan the new location. Add handling costs if applicable and then click 'send'.

The storage has been moved to the new location.
Preparing storage (for collection)
To have storage collected for a customer, you first need to prepare it.
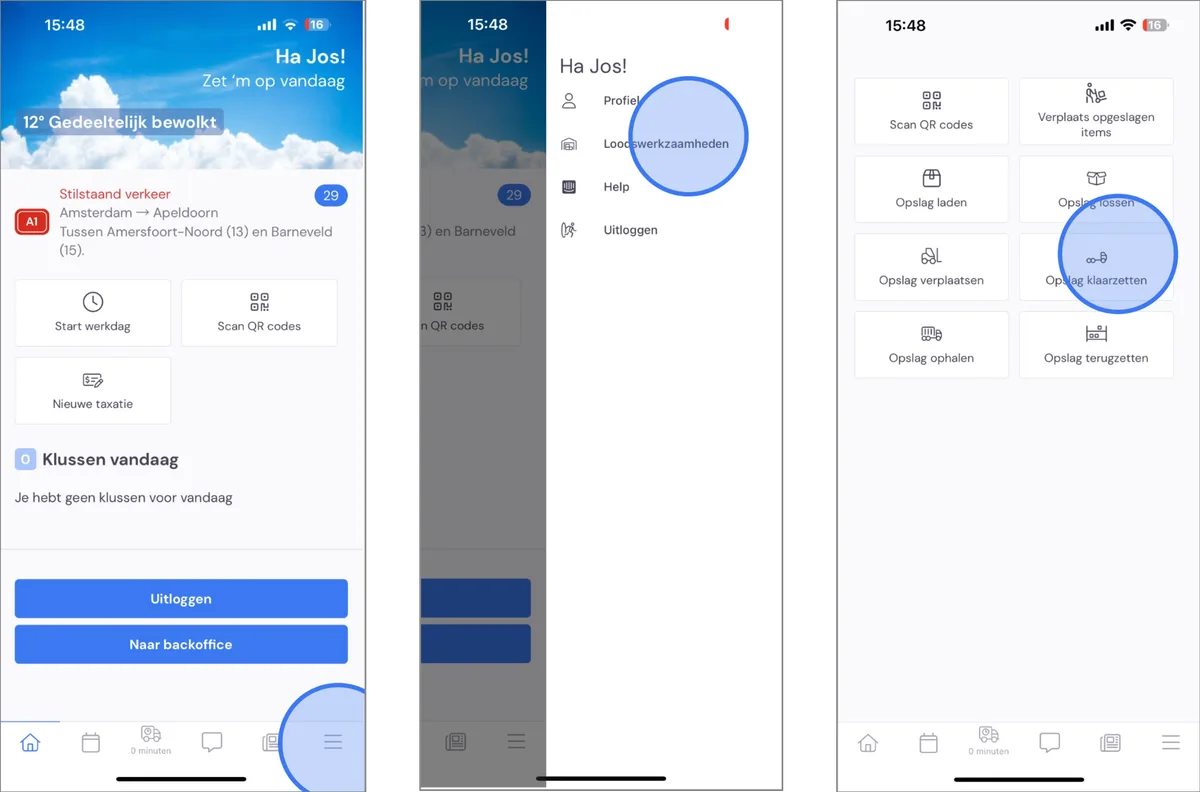
In the app, go to Warehouse tasks in the menu. Then select 'Prepare storage'.
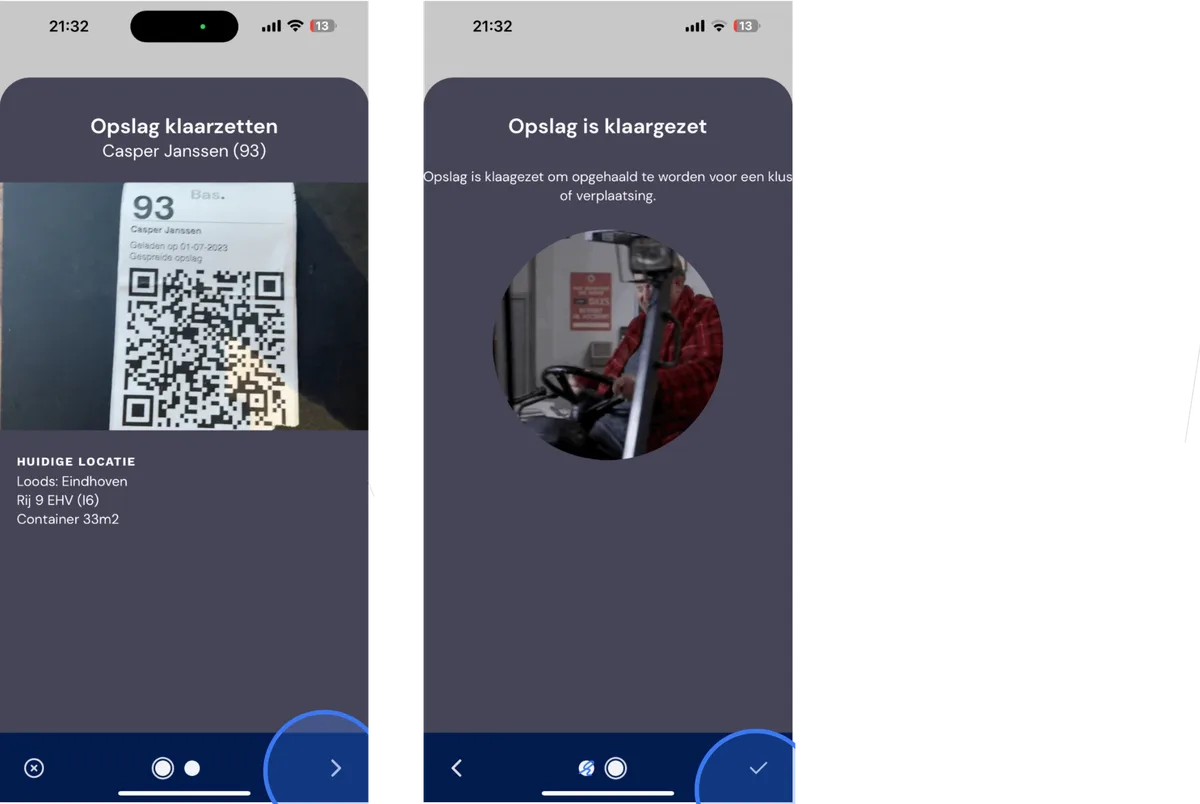
Scan the QR code of the storage you want to prepare for collection for a job or move. Then click next and your storage is prepared.
Collecting storage
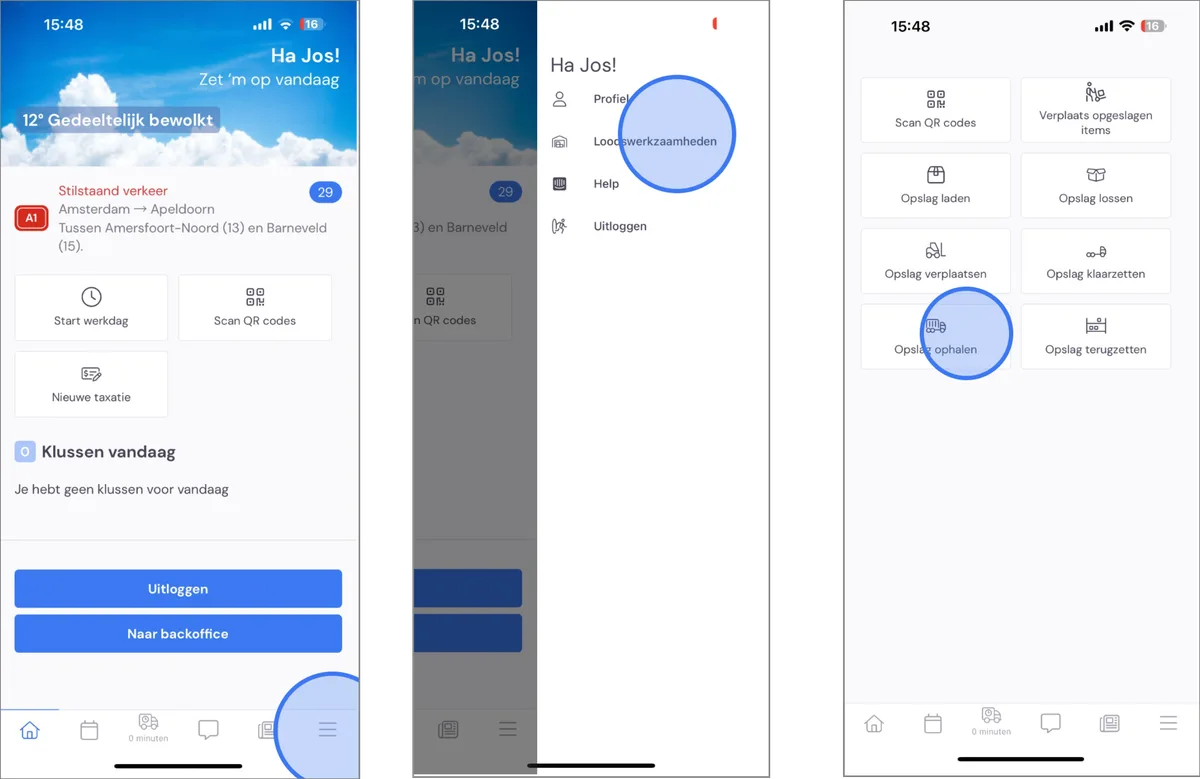
If you want to collect storage, go to warehouse tasks via the menu and then to 'Collect storage'.
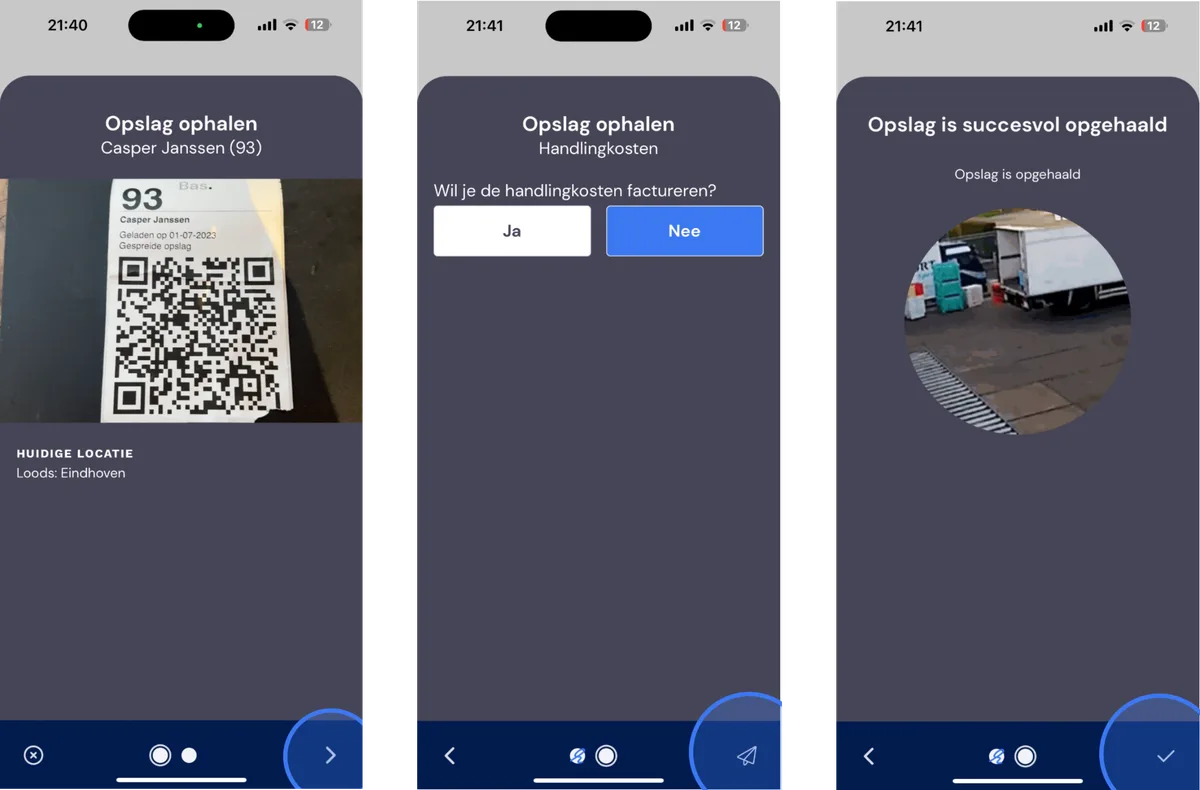
Scan the storage (which you prepared earlier! see the previous step). Click next. In the next step, you can add handling costs if you want. Finally, click send. The storage is now in the status collected.
Returning storage
If storage comes back to the warehouse, you can report it as received by returning the storage. Start by scanning the storage QR code and then scan the location where you want to place it. In the next step, you have the option to register any handling costs.
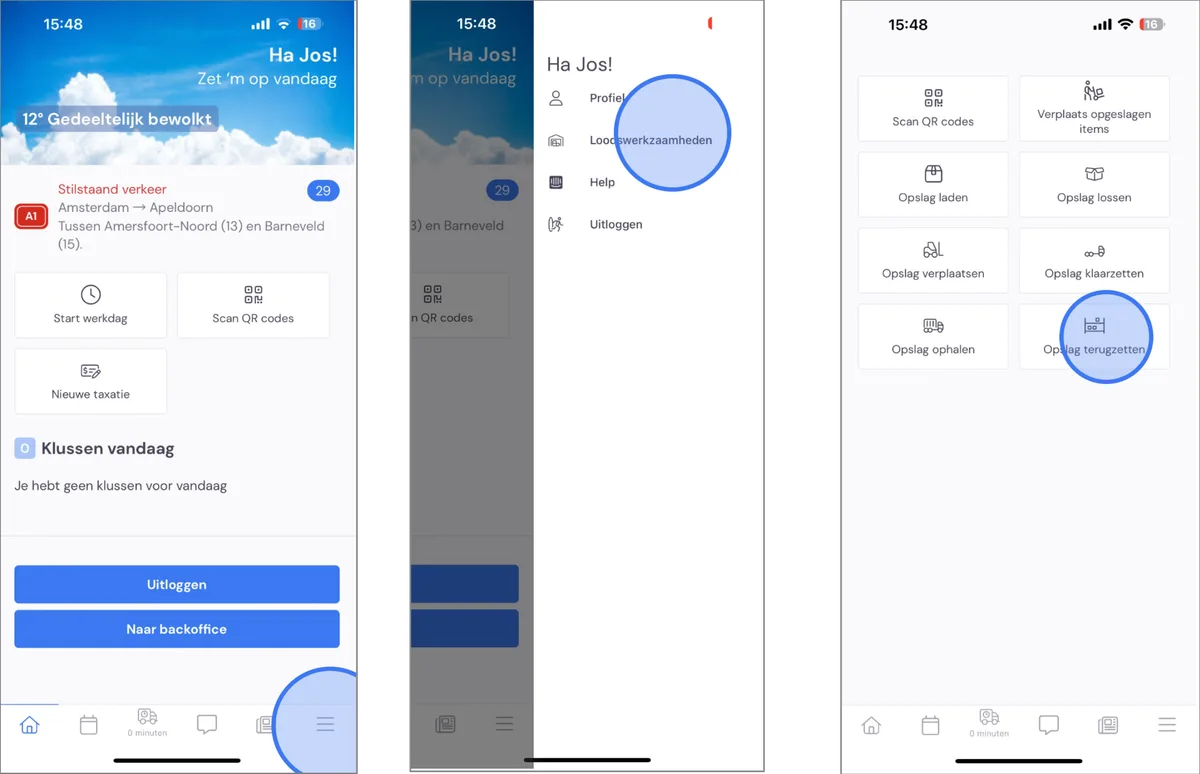
Go to warehouse tasks via the menu, then select Return storage.
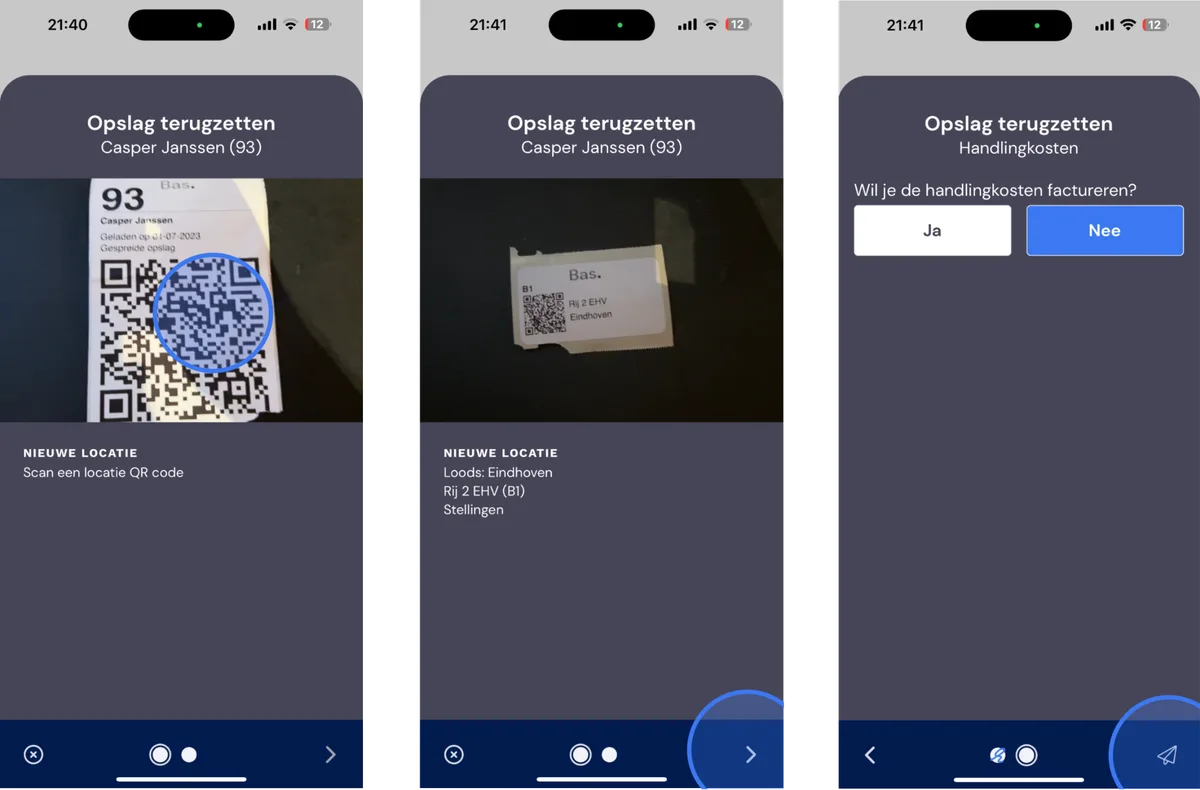
Scan the QR code of the storage, then scan the QR code of the storage location. Add handling costs if applicable. Then click send.
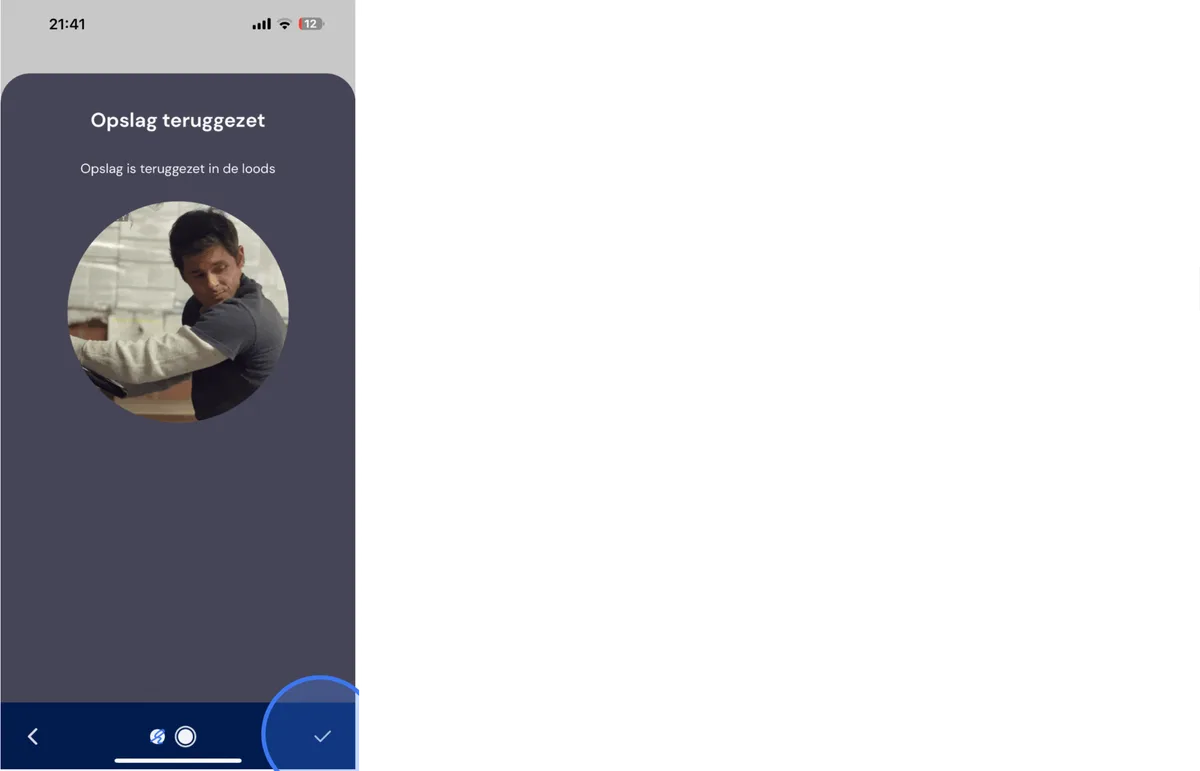
The storage has been returned to the chosen storage location.