
You can connect your website to Bas so that you can process lead requests from your website directly in Bas. You do this via Zapier. In this article you'll read exactly how.
Step 1: creating a form on your website
You create a form on your website that allows visitors to submit a lead request.
Make sure to include at least the details below in this form, as these are needed to process a lead request in Bas:
type of prospect: private or business
salutation, first name, middle name, surname
phone number, e-mail address
loading address: street, number, addition, postcode, city
unloading address: known yes/no, and if known: street, number, addition, postcode, city
desired removal date
comments
You need to include these fields separately in your form so that you can easily link them to the fields available in Zapier. This way, you get all the information correctly into Bas.
Tip: link the desired removal date from your form via Zapier to the notes field in Bas. This way, you won't get reservations in your planning based on this date, so your planning doesn't get cluttered.
Step 2: creating the integration in Bas
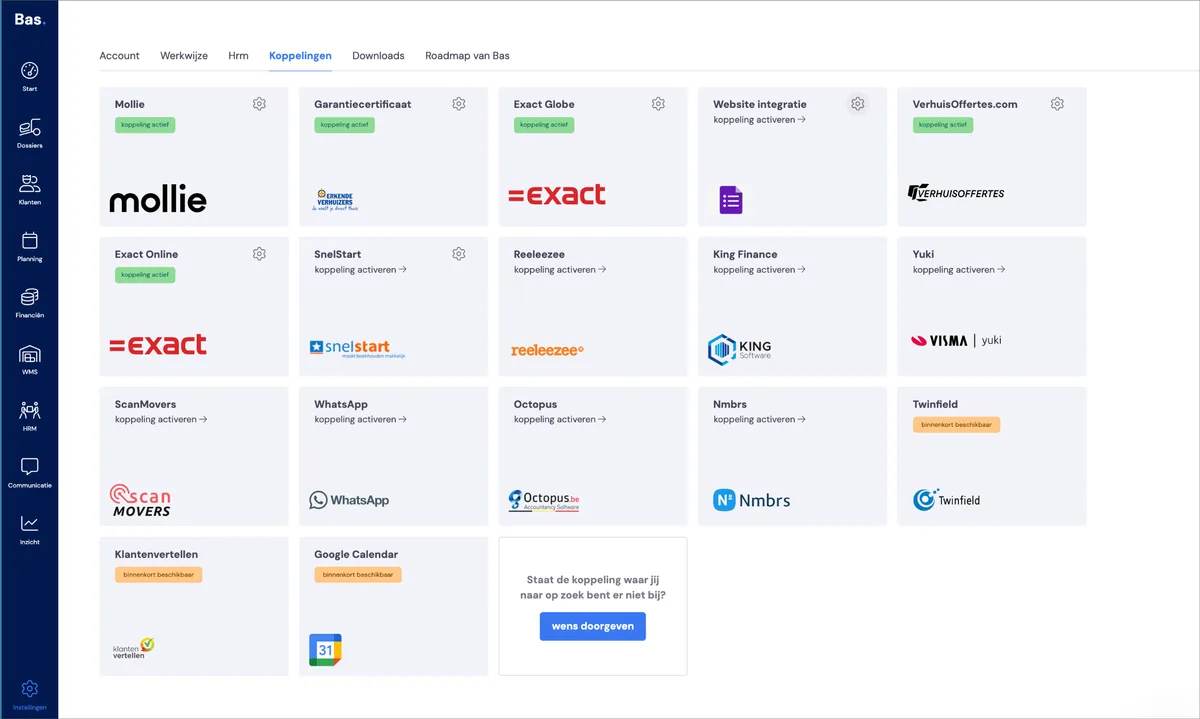
Go to settings and then to integrations. Choose website integration and click activate integration.
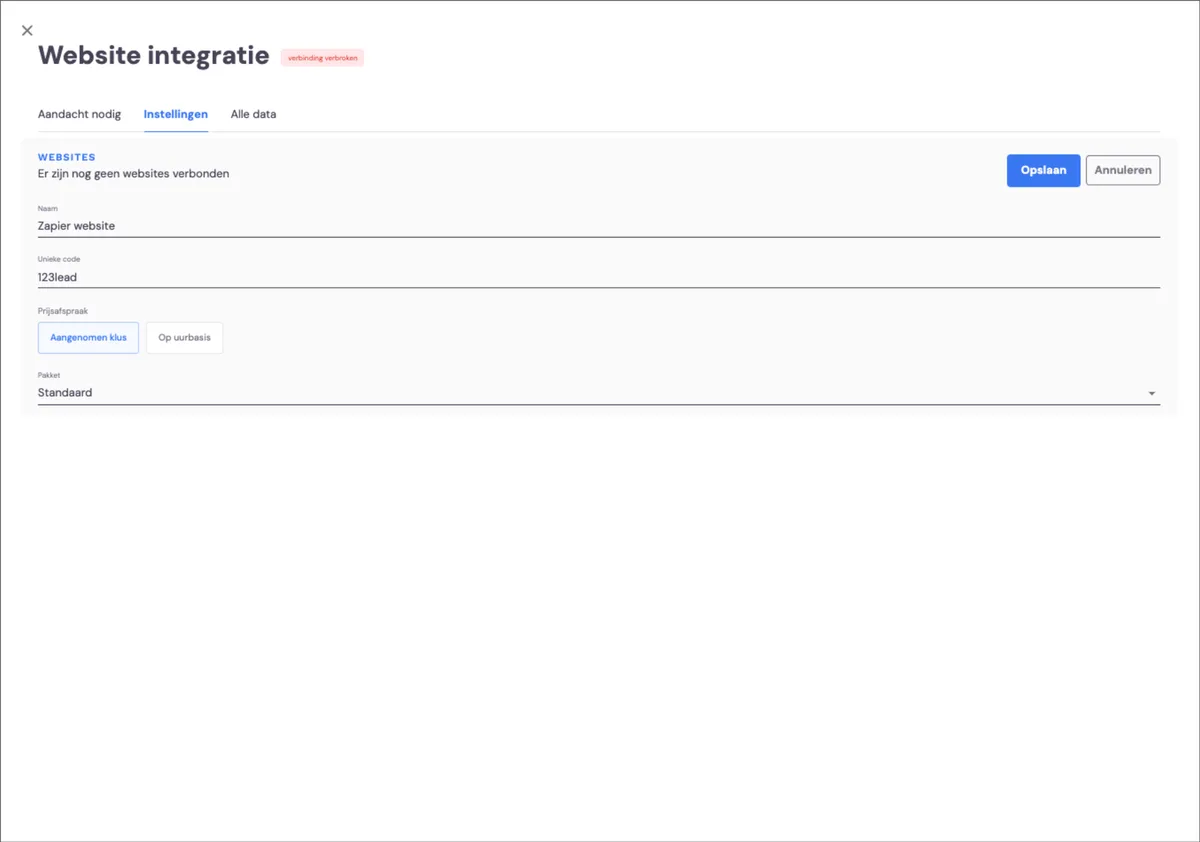
Then click 'settings' and edit the settings by hovering your cursor over the field and clicking the pencil icon.
Enter a name for the integration (this name is free to choose),
Enter the unique code you created on the website
Then choose the characteristics of the job that's created in Bas based on the lead request. You choose the package and the type of price agreement.
Then click save. The part in Bas is now complete.
Details for Zapier
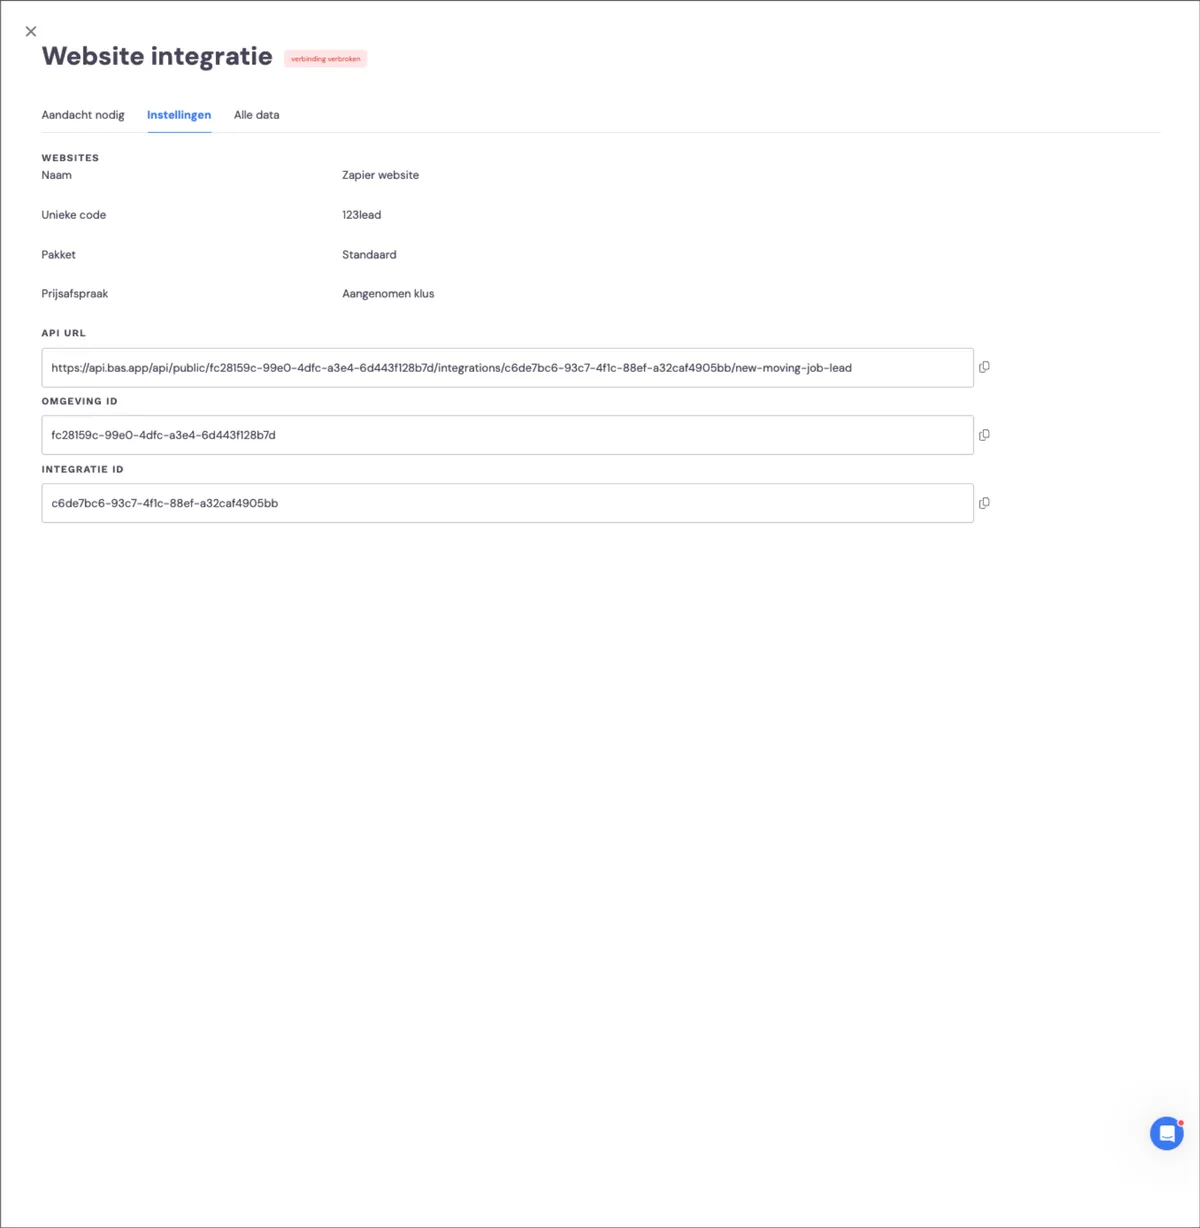
After you've entered the details for the integration and clicked 'save', you'll see the details you need for Zapier:
API url
Environment ID
Integration ID
Step 3: requesting a link for Zapier
To connect your website with Zapier, you need to receive an invitation link from Bas. You can request this via [email protected].
After clicking this link, you can create an account in Zapier and create the link between the form on your website and Bas. The screen below will appear:
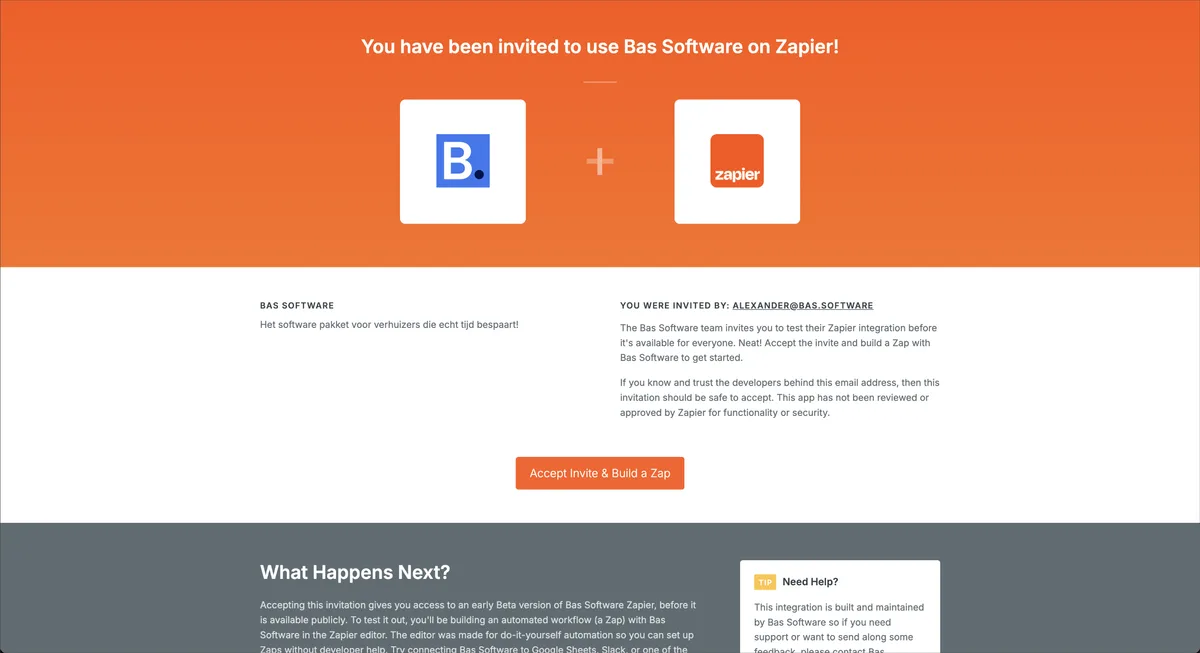
Click 'Accept and Build a Zap' in this screen. (In Zapier, a zap is an automation that lets you create the connection).
Step 4: creating the trigger for the 'Zap'
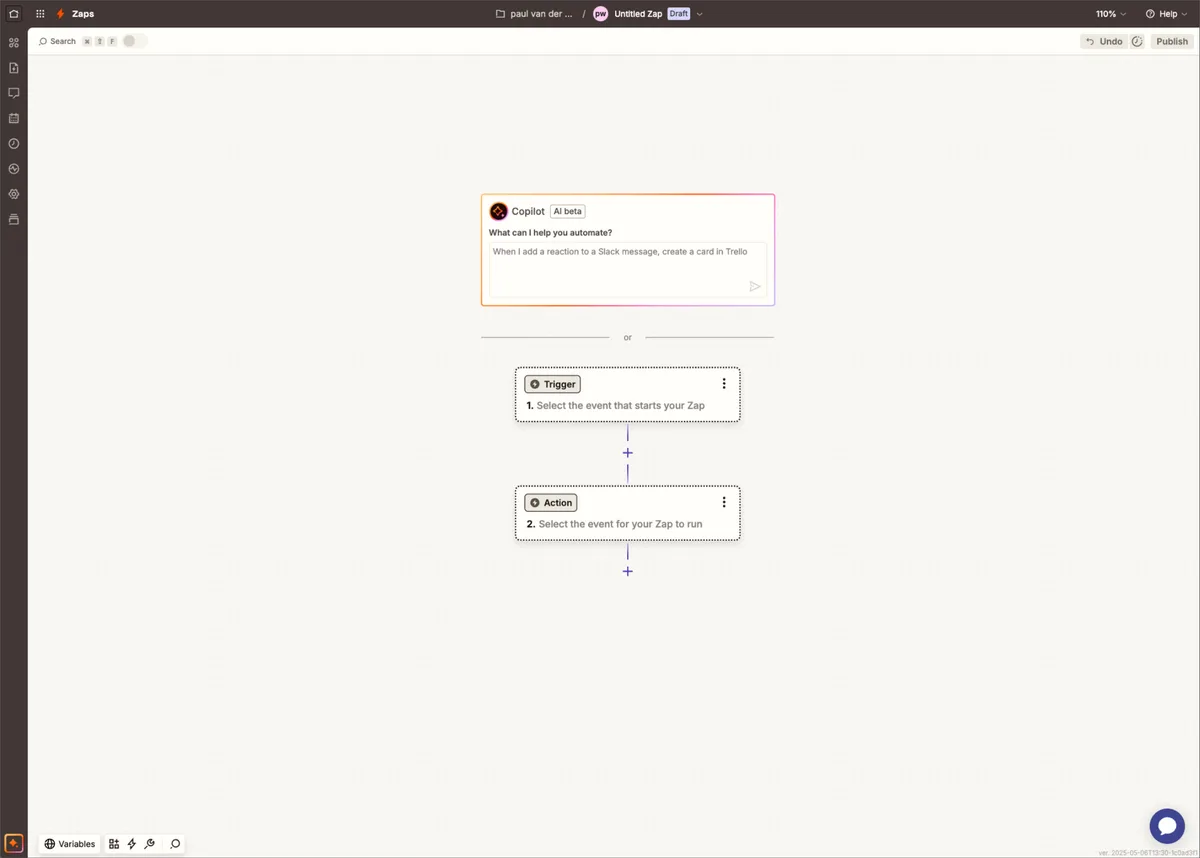
Go to the Zap and follow the steps below:
Trigger - which starts the zap
The trigger is the event that submits the request to Bas. You set this up based on the form you've created. In the example, a Google Form is used.
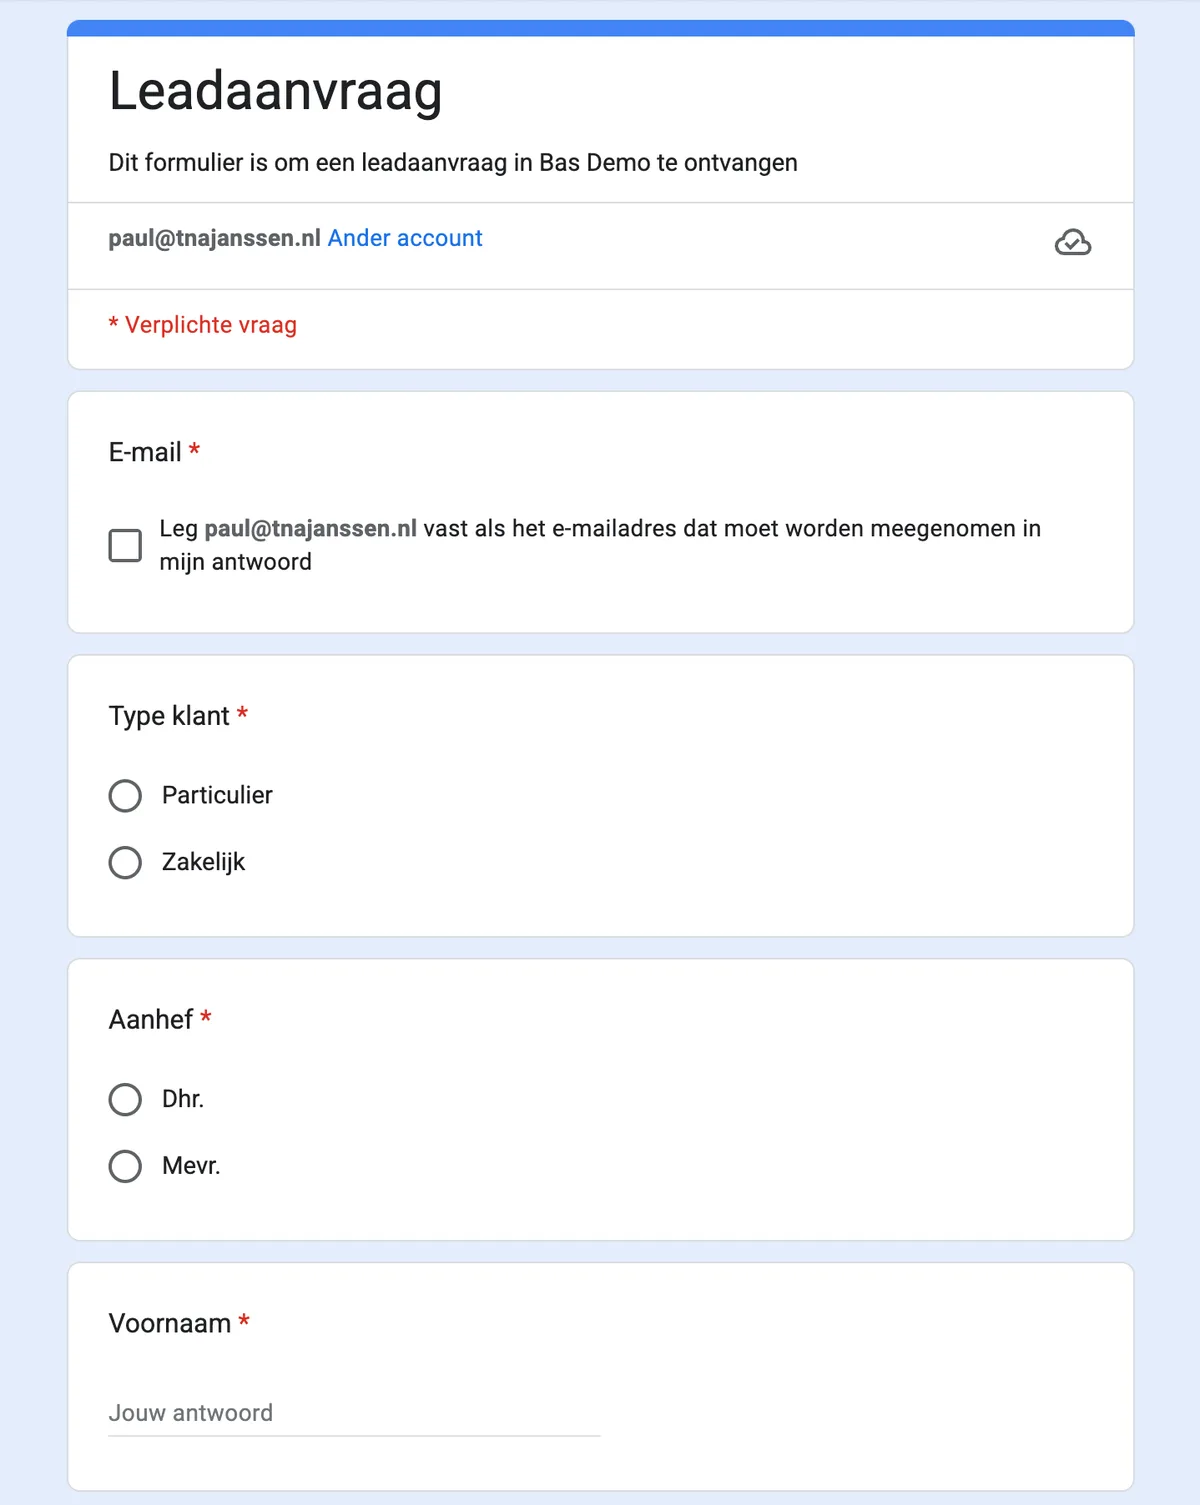
Setting up the trigger
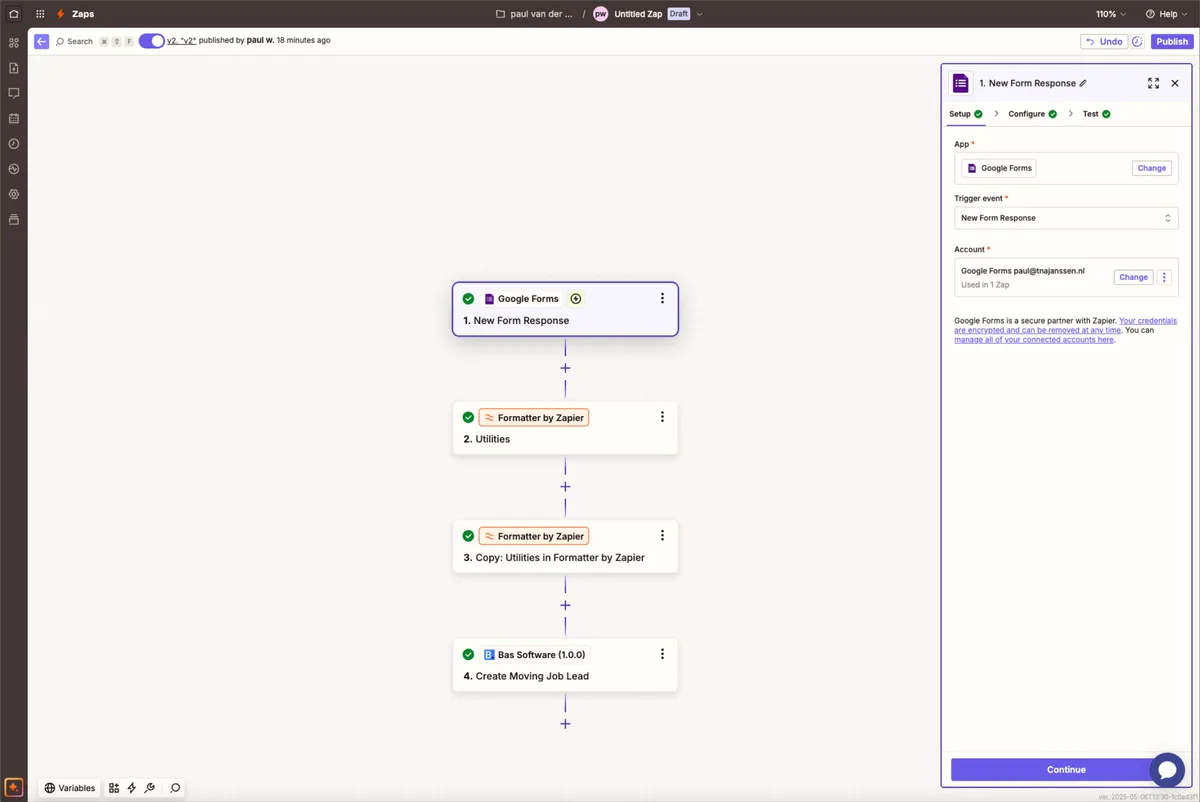
Setup
If you're using a Google Form, follow the steps below:
Choose 'Google Forms' under App.
Choose 'New form response' under trigger event
Link your account under 'Account'
Configure
Choose the correct form under 'Form'
Test
To test whether it works, submit a lead request via your form. The data should then appear. Check that you have all the required fields to be able to link them.
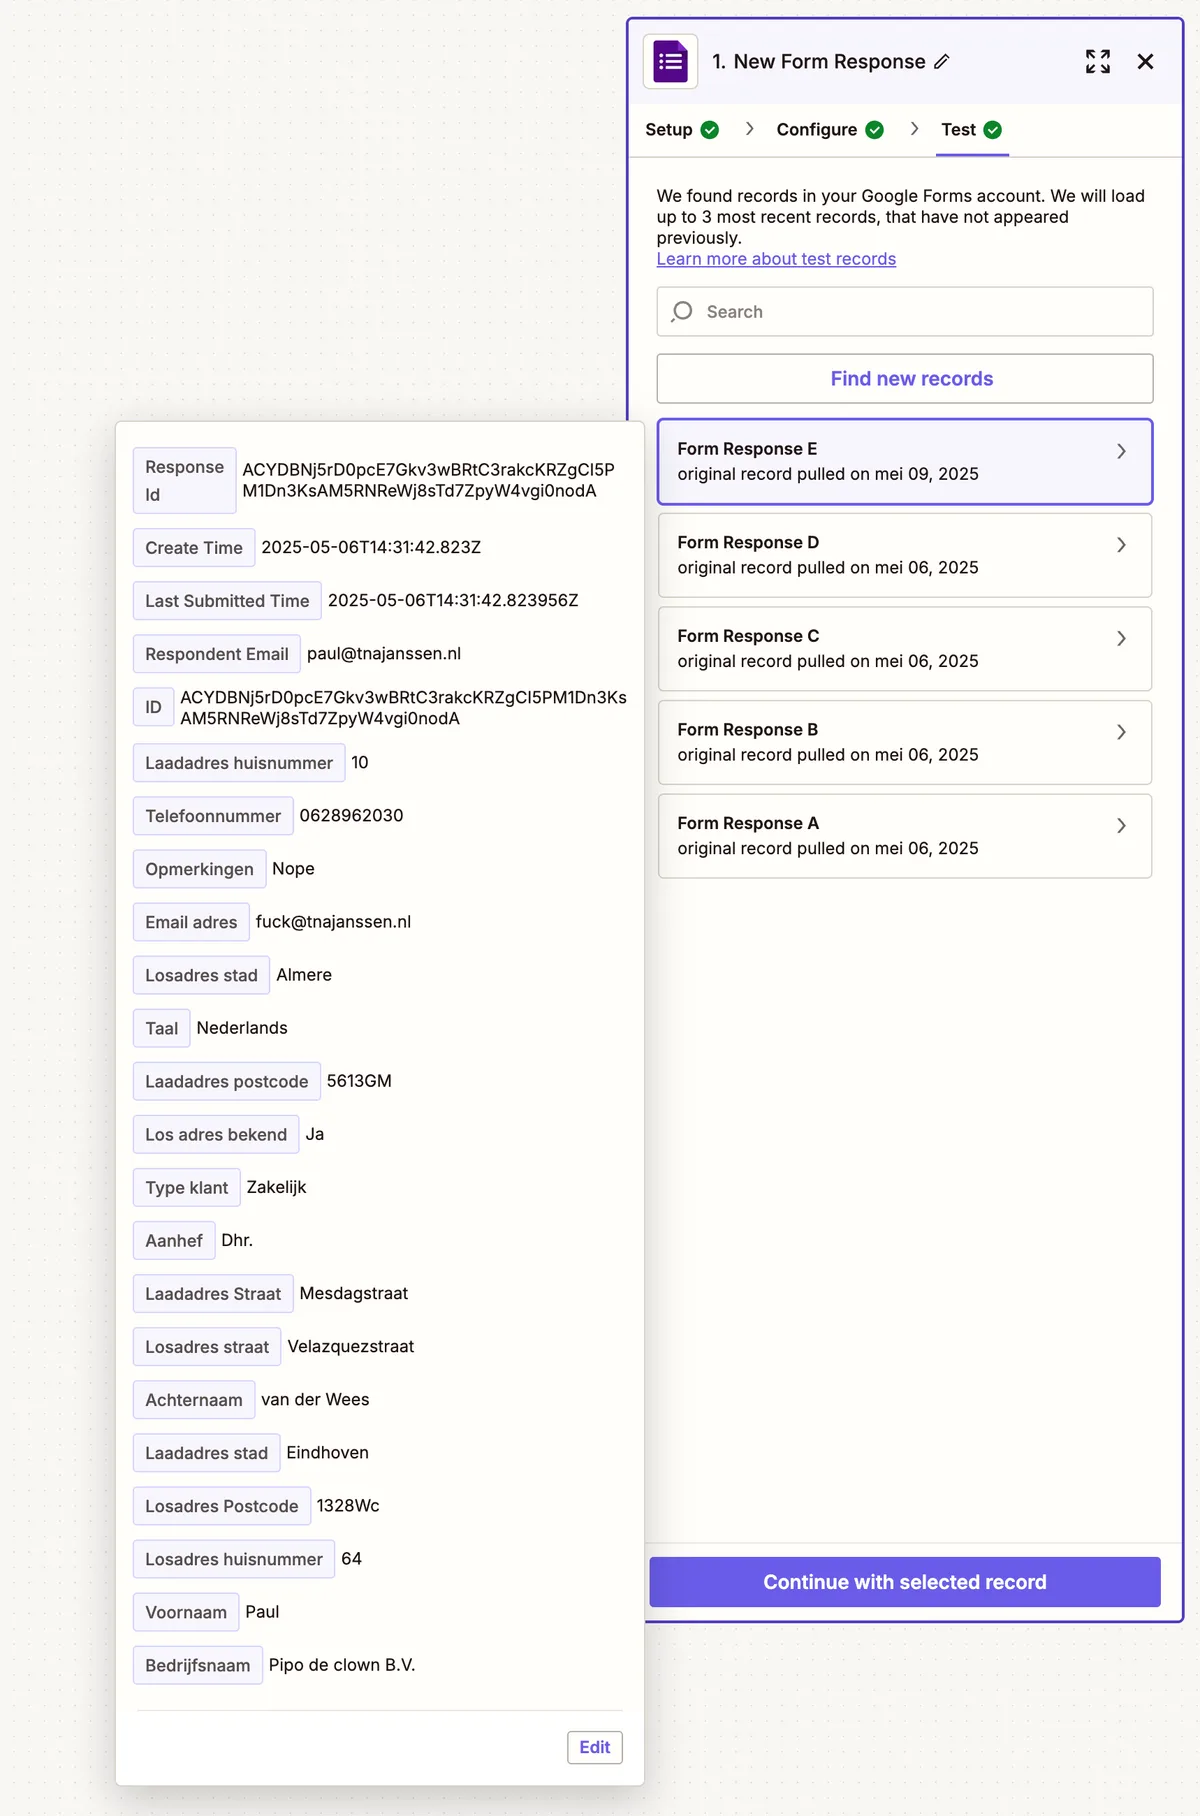
If this is successful, you're ready for the next step: formatting the information so that Bas can process it. If you're using a different app, choose it and follow the same steps.
Step 5: creating formatters
Bas expects data in a certain format. With formatters, you can convert the data from your form to the required format if needed.
Data and format:
Customer type
relationtype ='private' or 'business'
Salutation
UNKNOWN = '';
HEER = 'heer';
MEVROUW = 'mevrouw';
DE_HEER_EN_MEVROUW = 'de heer en mevrouw';
FAMILIE = 'familie';
DHR = 'Dhr.';
MVR = 'Mevr.';
FAM = 'Fam.';
MR = 'Mr';
MS = 'Ms';
FAMILY = 'family';
Gender
UNKNOWN = '';
MALE = 'male';
FEMALE = 'female';
Building type
APARTMENT = 'apartment'
STUDIO = 'studio'
HOUSE = 'house'
BUNGALOW = 'bungalow'
OFFICE = 'office'
STORAGE = 'storage'
DRIVE_IN = 'drive-in'
DOUBLE_APARTMENT = 'double-apartment'
VILLA = 'villa'
FARM = 'farm'
TWO_UNDER_ONE_ROOF = 'two-under-one-roof'
MANSION = 'mansion'
UPSTAIRS_APARTMENT = 'upstairs-apartment'
DETACHED_HOUSE = 'detached-house'
TERRACED_HOUSE = 'terraced-house'
CORNER_HOUSE = 'corner-house'
SCHOOL = 'school'
NURSING_HOME = 'nursing-home'
ASSISTED_LIVING_CENTER = 'assisted-living-center'
SENIOR_HOUSING = 'senior-housing'
COMMERCIAL_BUILDING = 'commercial-building'
DIKE_HOUSE = 'dike-house'
SCHOOL_BUILDING = 'school-building'
HOUSEBOAT = 'houseboat'
GARAGE = 'garage'
UNKNOWN = '';
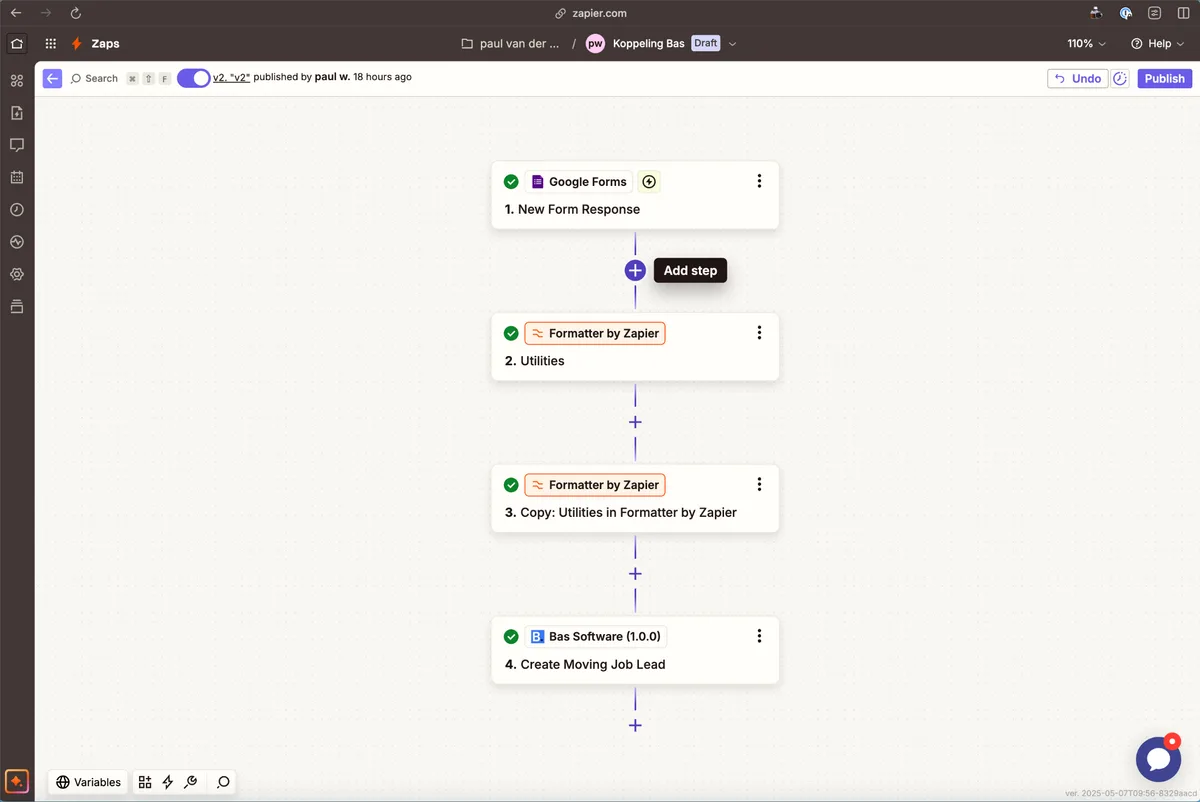
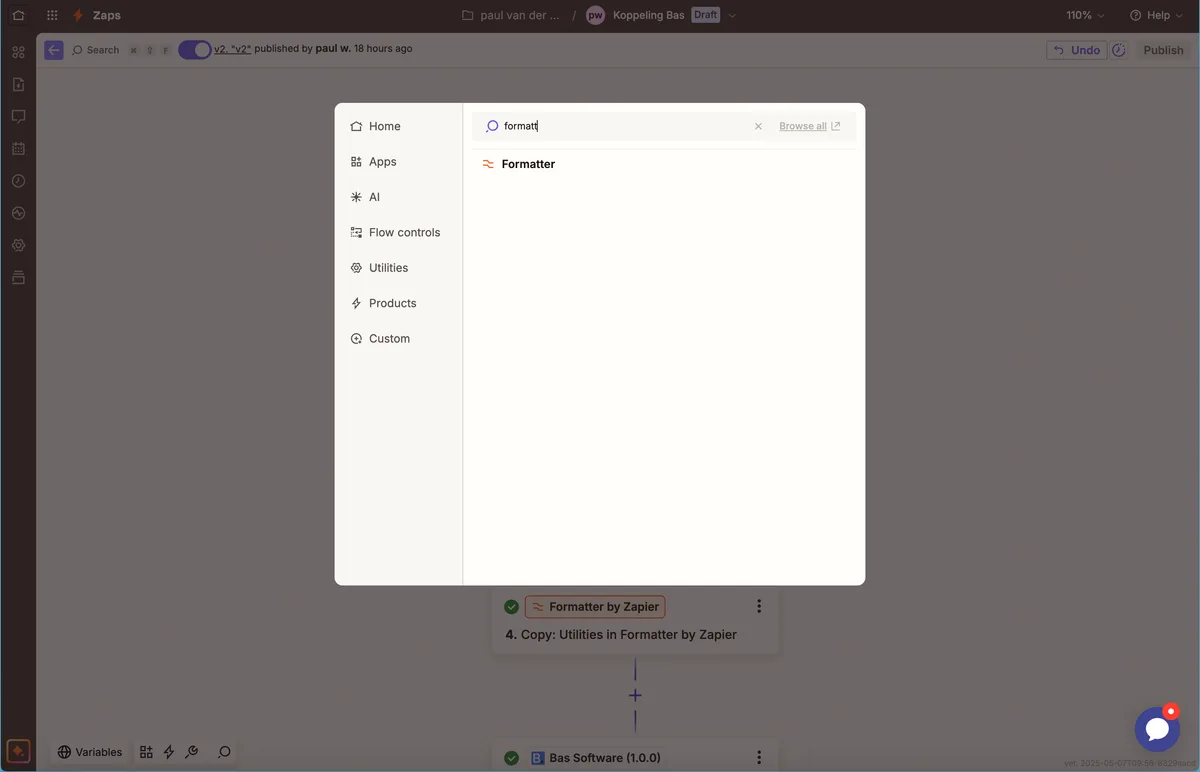
Click 'add step'. Then choose 'formatter'.
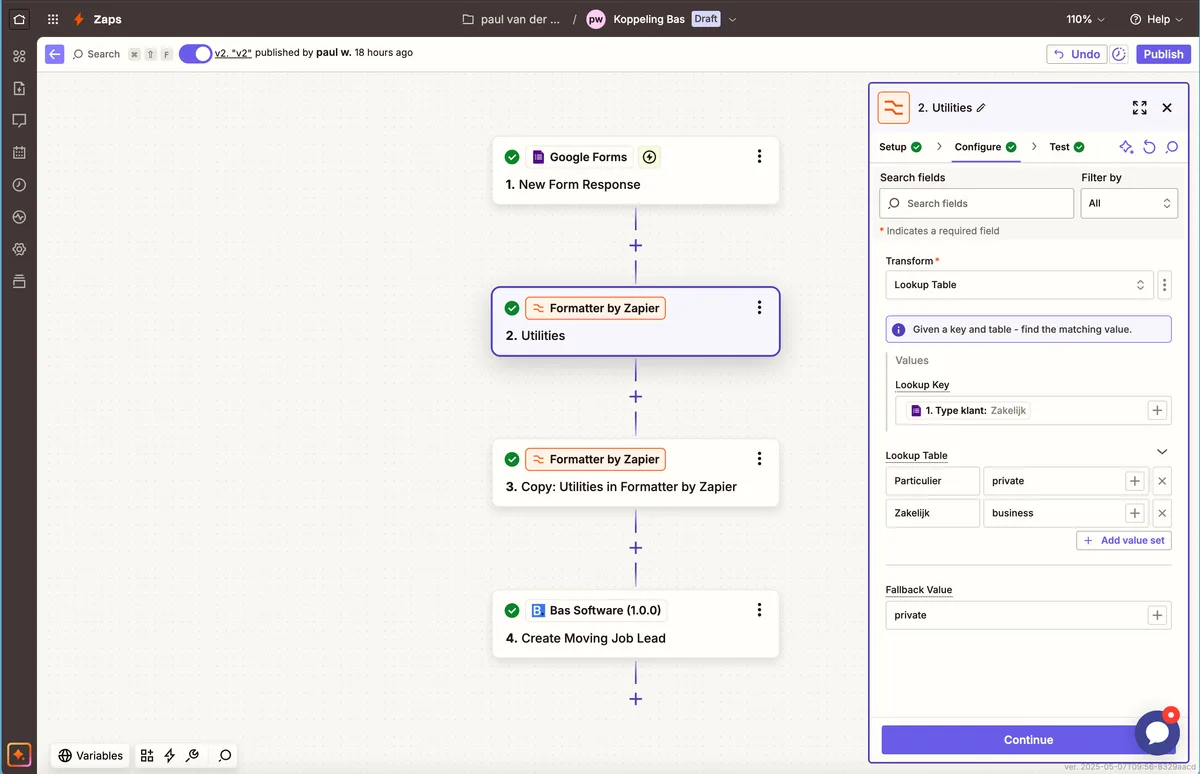
In the formatter, you convert the output of your form to the required format. Below you'll see the example where the output of the form 'customer type: private or business' is converted to the required format: private or business.
Adjust all data fields so that all fields are delivered to Bas in the correct format.
Step 6: setting up the action
Under action, you enter everything needed to receive the lead request in Bas.
Setup
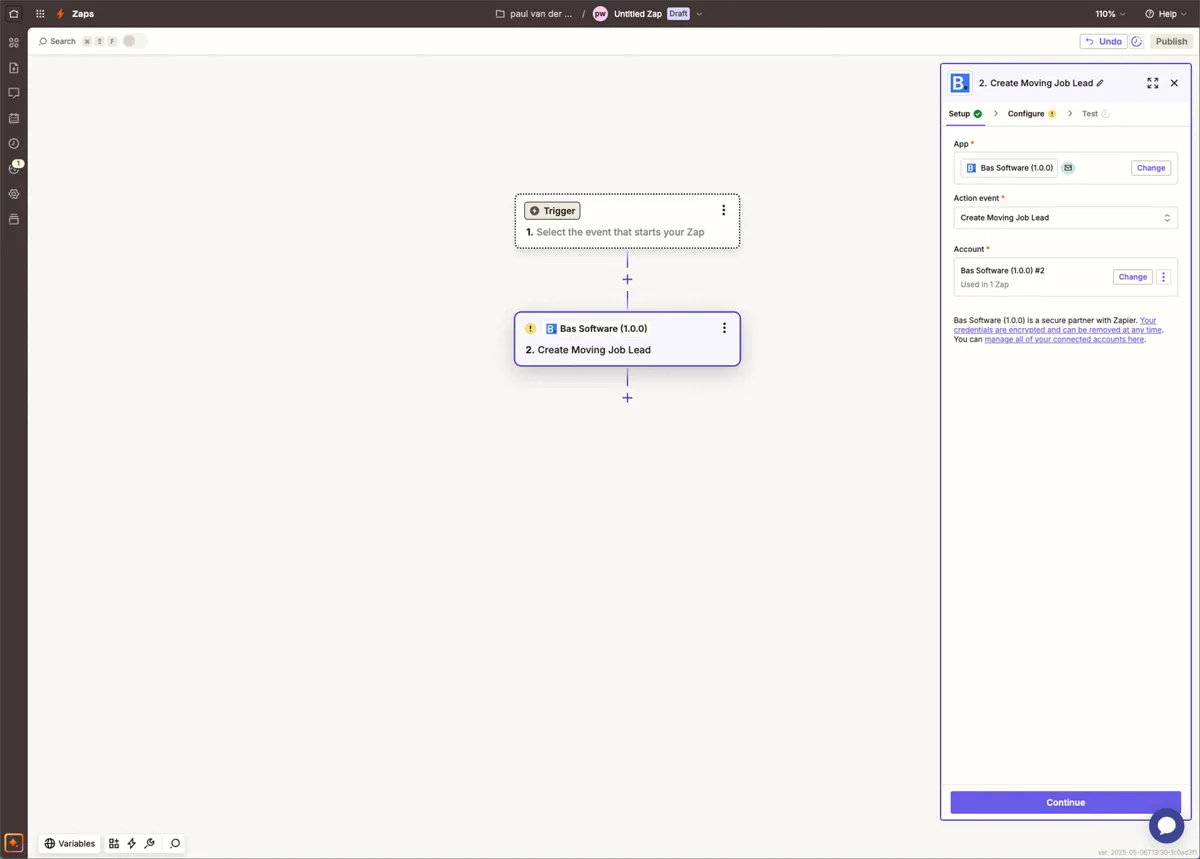
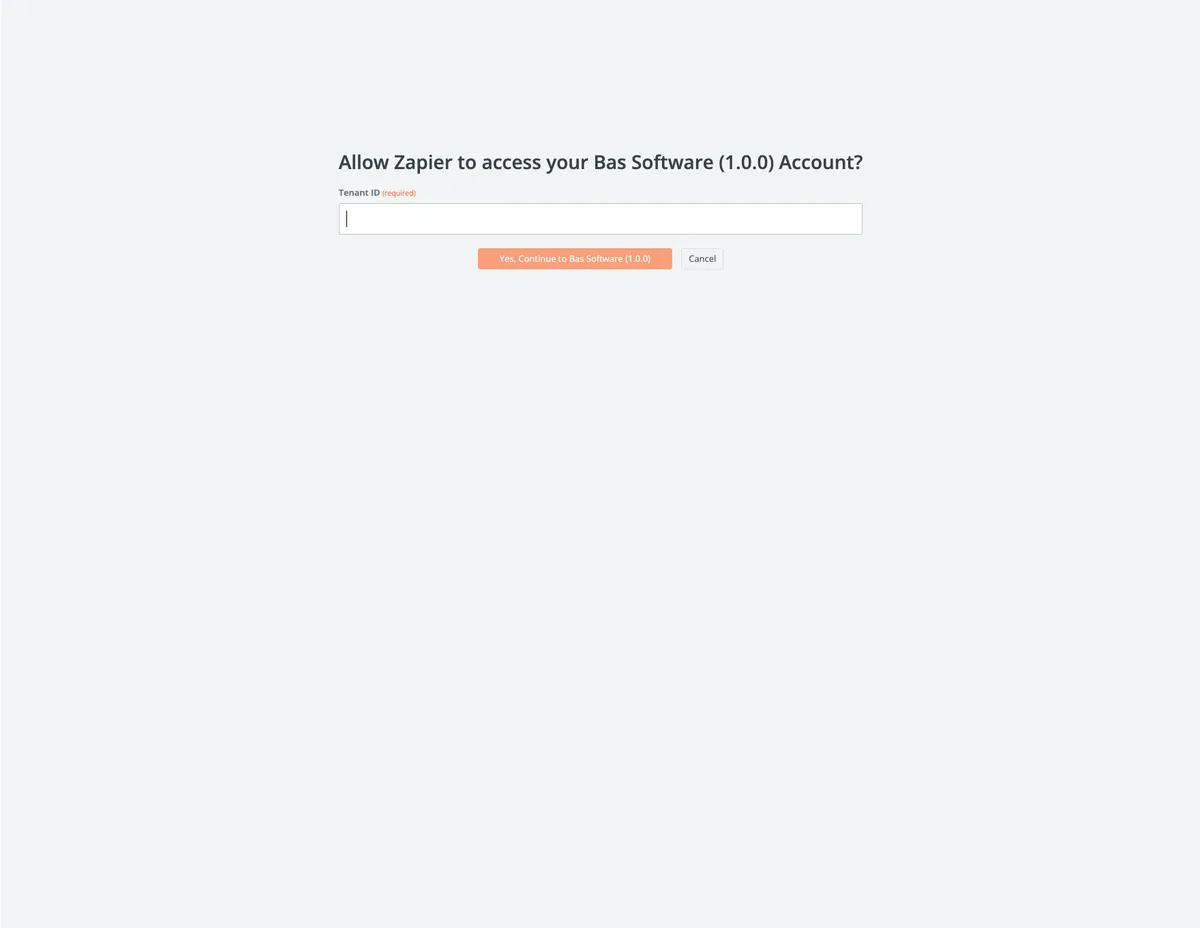
App
Select Bas Software here. In the next screen, enter the tenant ID, which is the unique number of your customer environment. (You'll find this under the integration in Bas, under 'Environment ID').
Action event
Choose 'Creating Moving Job Lead' under Action Event. This converts the request into a new job with the characteristics you previously set for the integration in Bas.
Configure
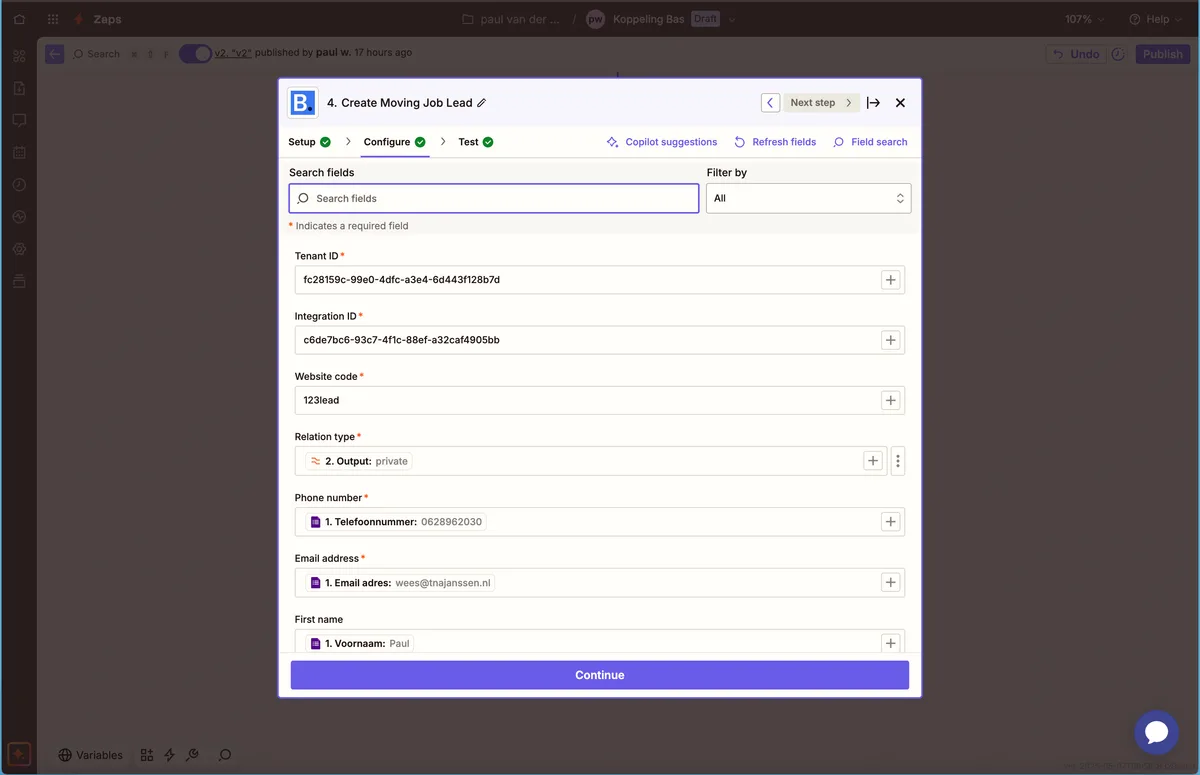
Under configure, you link the fields of your form to the fields in Zapier. The fields in Zapier are already set up.
General details
you'll find these under the integration you created in Bas:
Tenant ID
Integration ID
Website
website code: your unique code linked to your form
Form fields
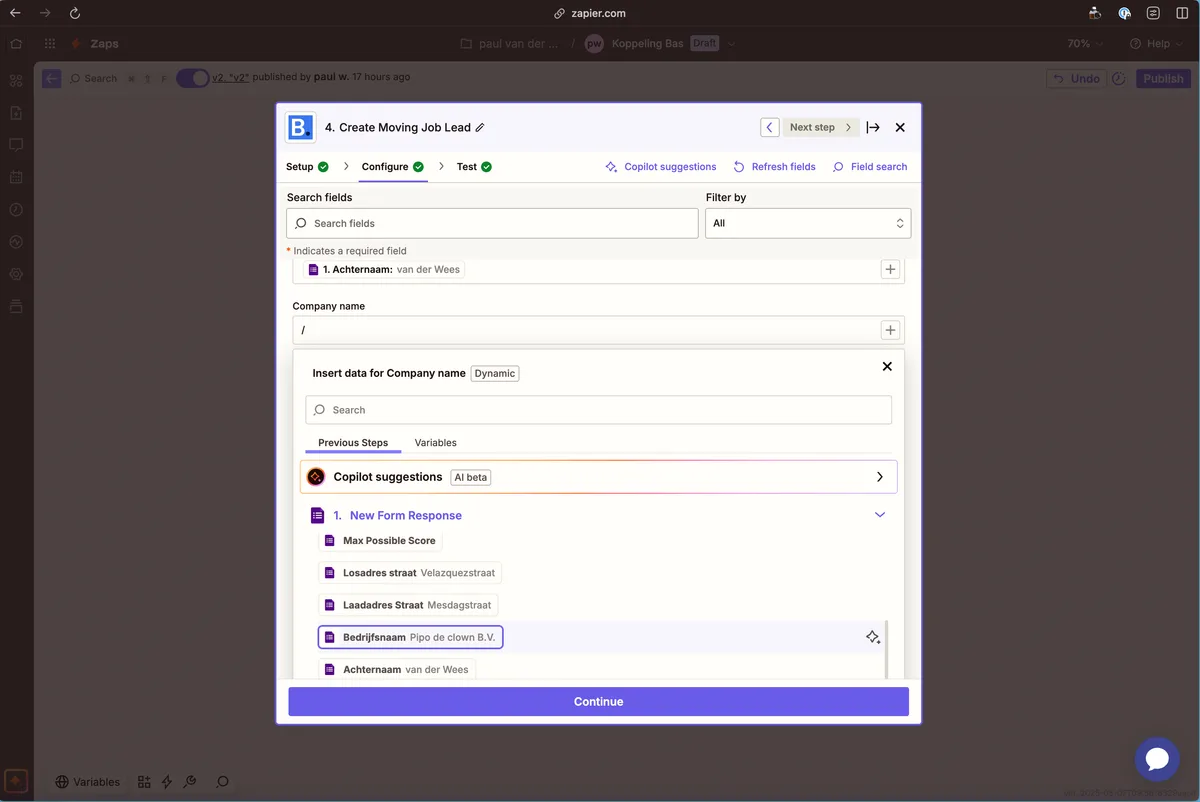
Now map all the fields of your form. See below for mapping company name between Zapier and Bas.
First type a /. Zapier will then give you the options to link a form field. In the example, you choose Company name.
Test
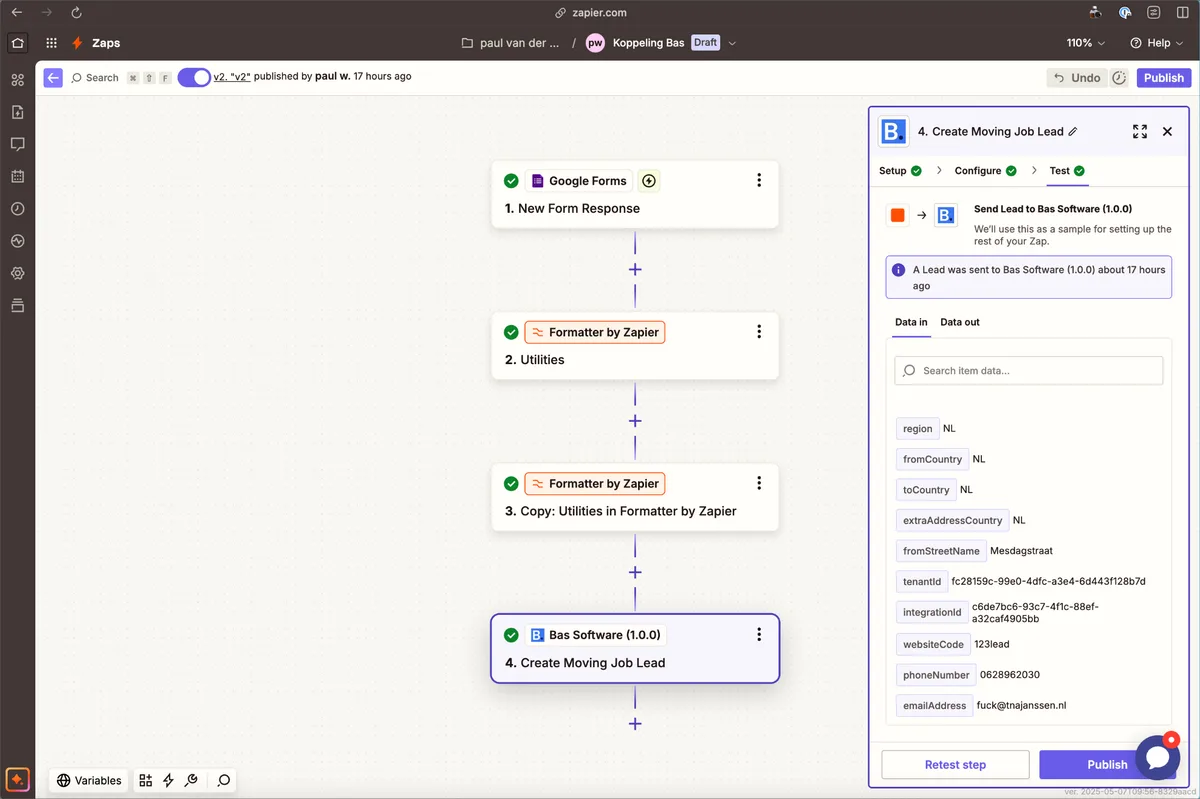
Once you've entered all the details, you can proceed to Test. Here, under Data in and Data out, you'll find an overview of all the data received and sent.
Step 7. Receiving and processing leads in Bas
When you receive a lead, it appears as a new job under jobs. From this point, you can follow up on the lead further.
Following up on a lead request
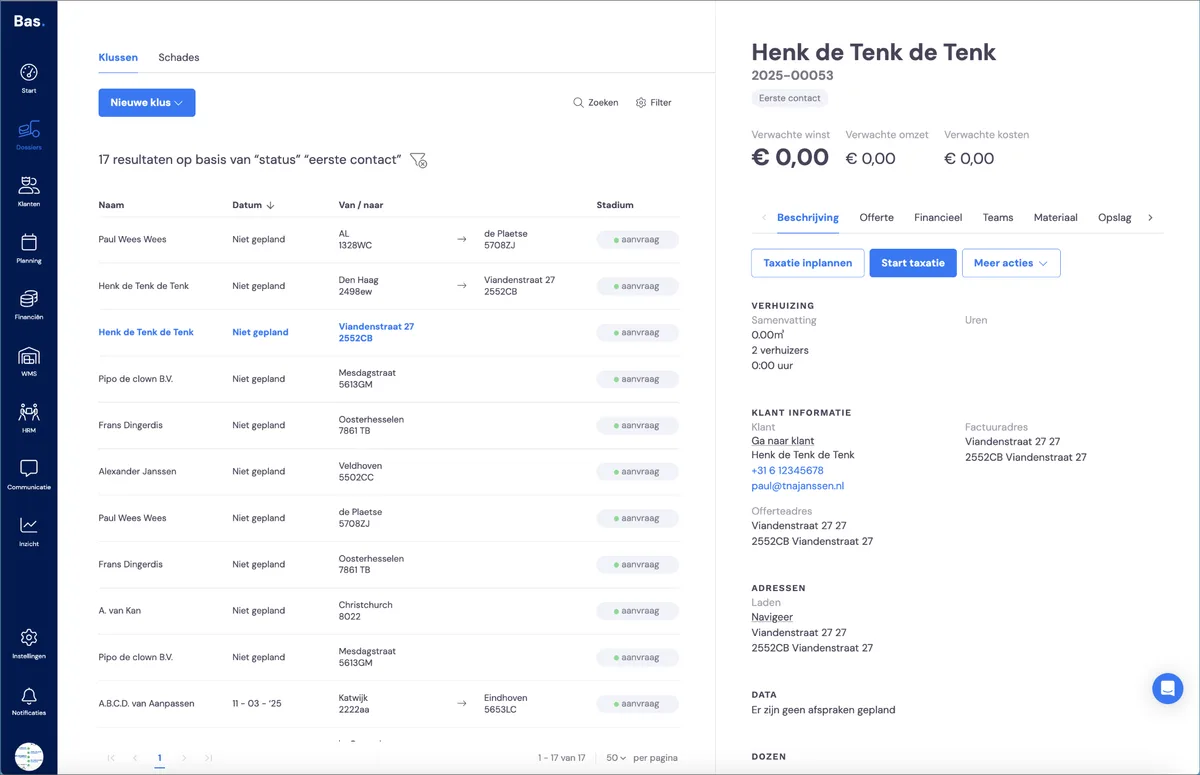
All lead requests are converted into a job, which you can follow up on directly by contacting the customer. In Bas, the task 'Schedule survey' is ready for you. (Provided you've activated the task).
Checking the integration
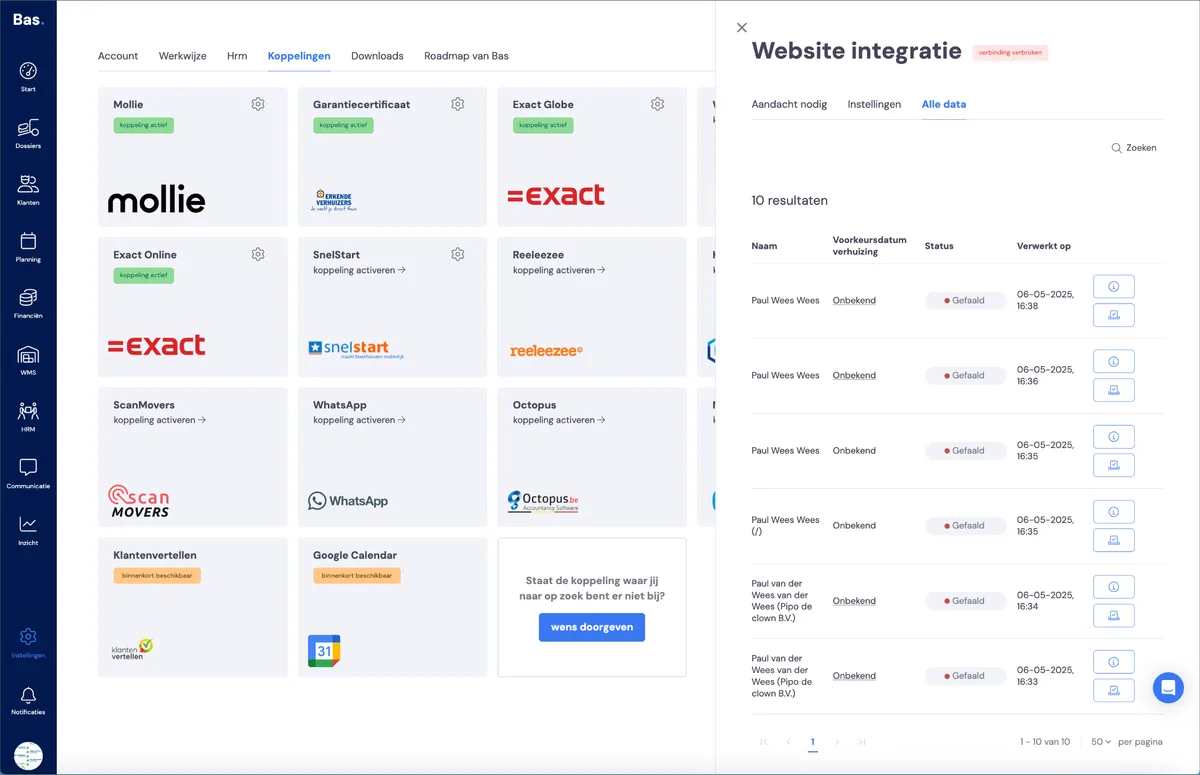
You can view the incoming lead requests via settings > integrations > website integration and then the 'All data' tab. Here you'll see a list of all requests and the corresponding data.
Resolving errors
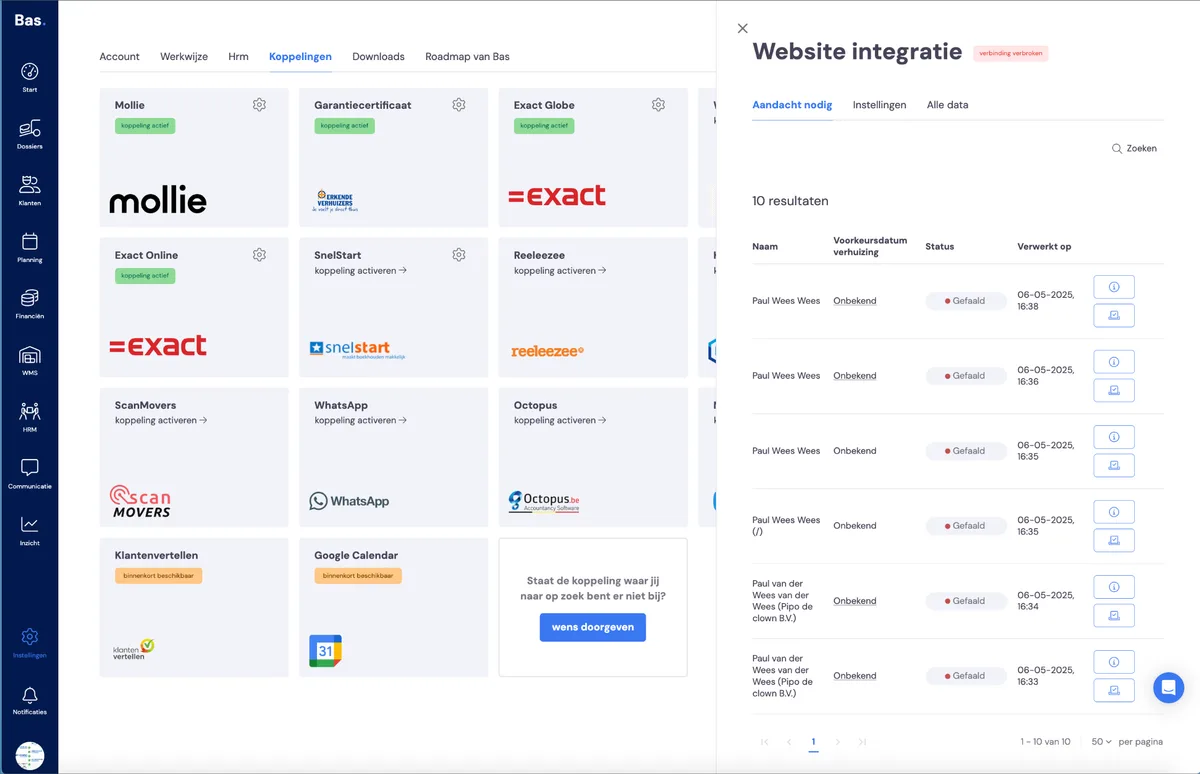
You'll find all lead requests that weren't processed correctly under 'attention needed'. If you hover your cursor over the failed status pill, you'll see the error message. You can re-mark the lead request as completed or try to process the lead request again.