
In phase 1, warehouses and storage bays were created. In this step, you'll practise storing inventory for a customer. You choose a storage unit, load it, and arrange the invoicing at the same time.
Storage
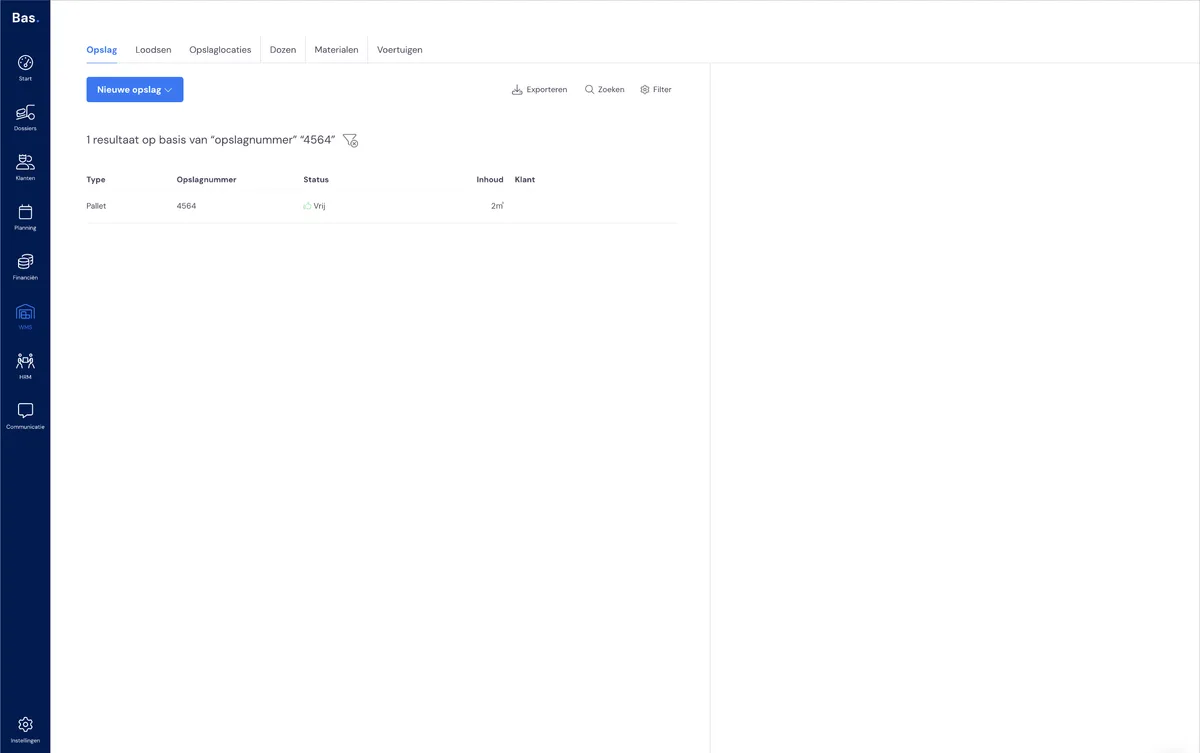
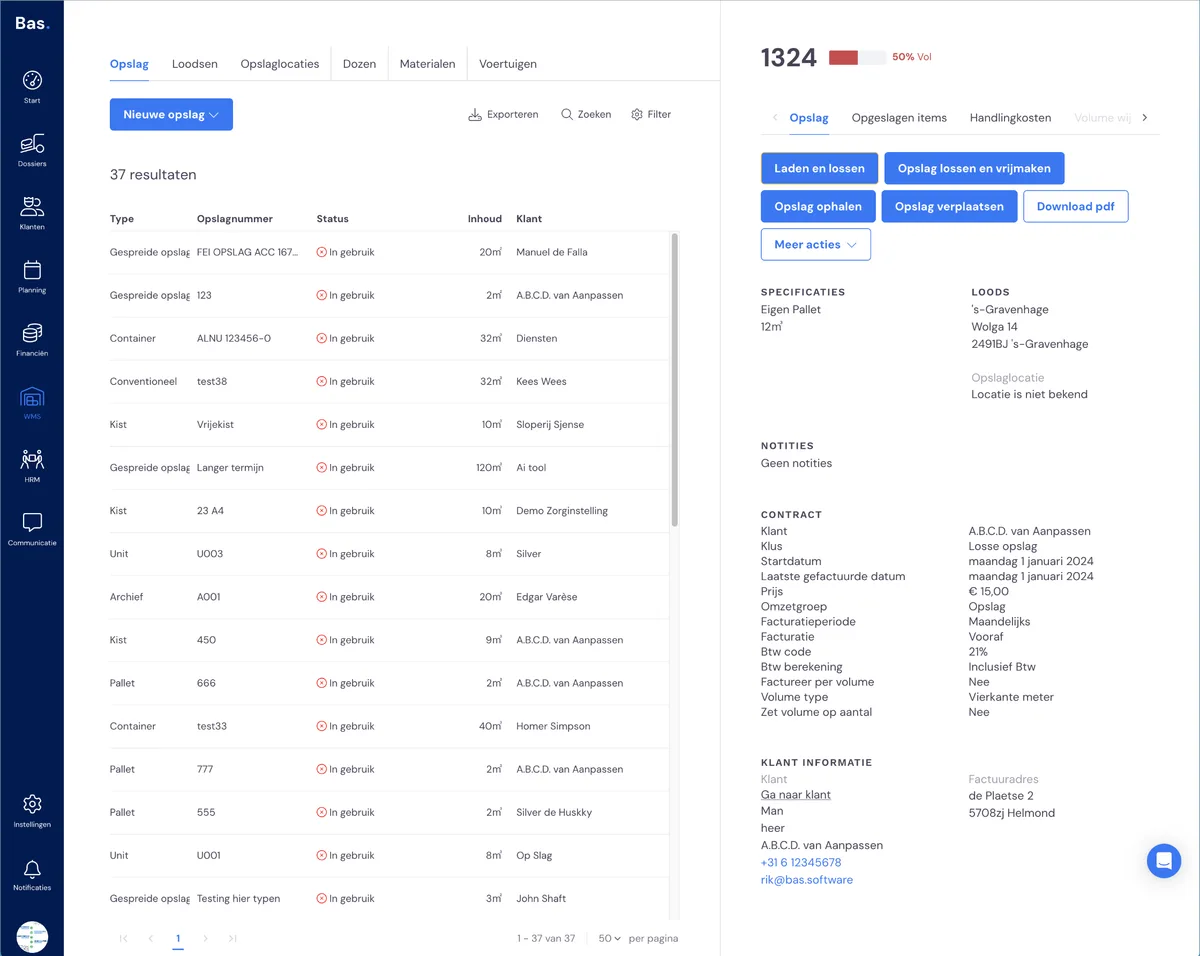
You'll find storage via WMS > and then Storage. Here you'll find all the storage units created earlier: pallets, containers, etc. If storage units are already in use for customers, they're marked 'in use'. Other storage units are 'free' - here you can store inventory for a customer.
Linking storage to a customer
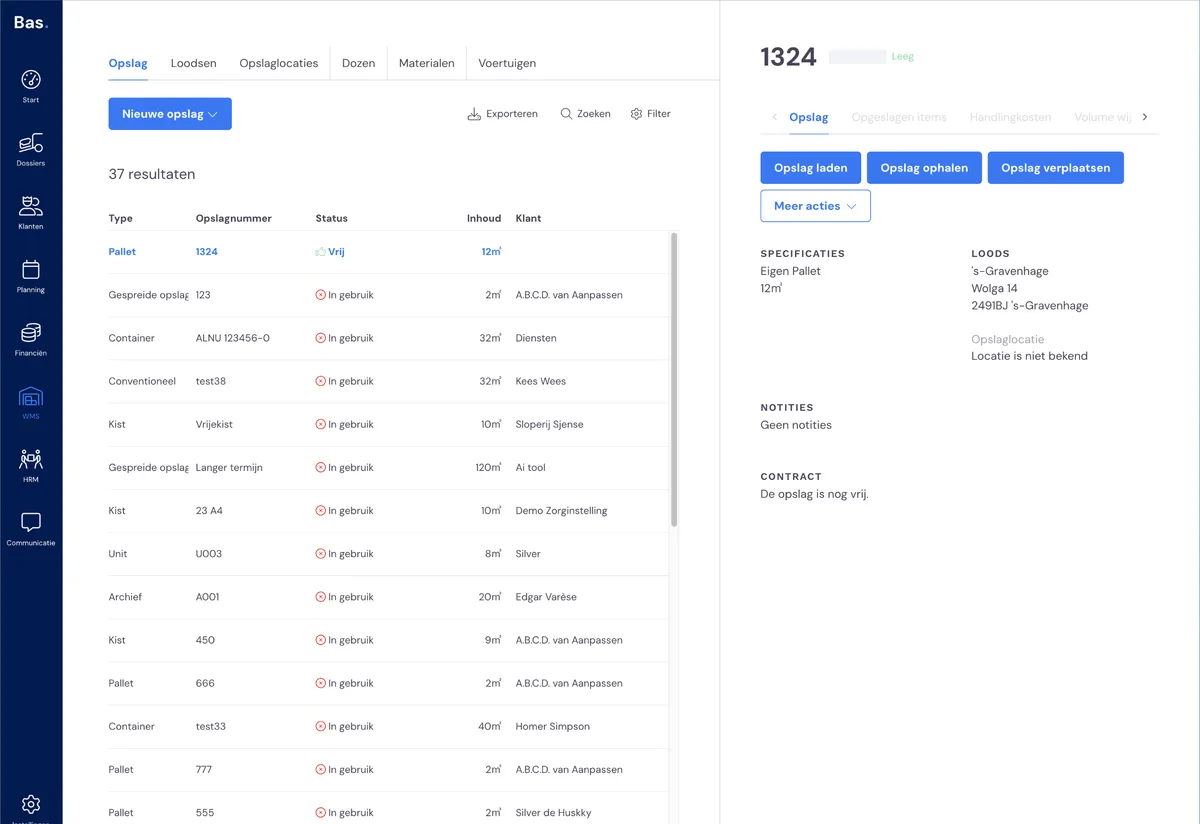
Choose one of the storage units in the list under 'storage'. Choose a storage unit that is 'free'. Then select 'load storage'. You'll then be guided through all the steps to load the storage for the customer. First choose whether you want to bring the storage into use for an existing customer or a new customer.
Step 1 - choose the customer
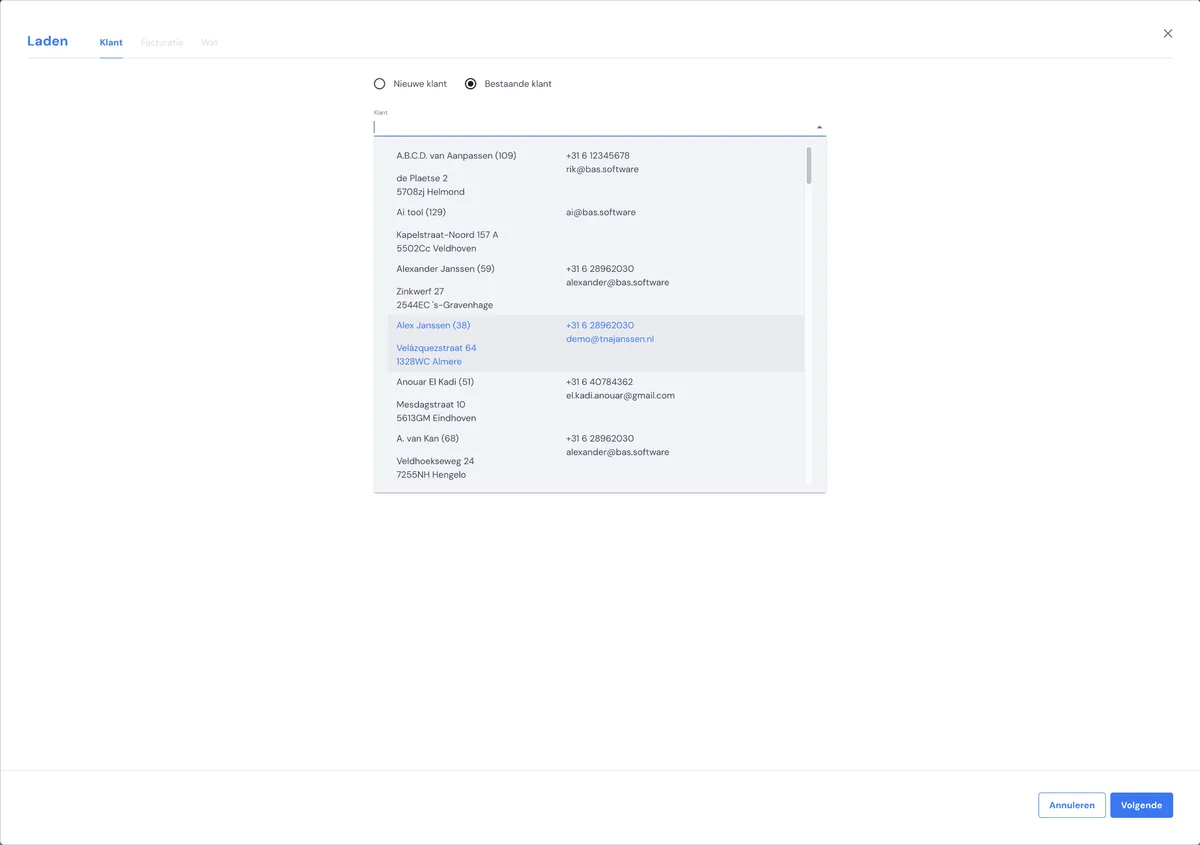
While practising, you created yourself as a customer. Choose yourself.
Step 2 - set up the invoicing
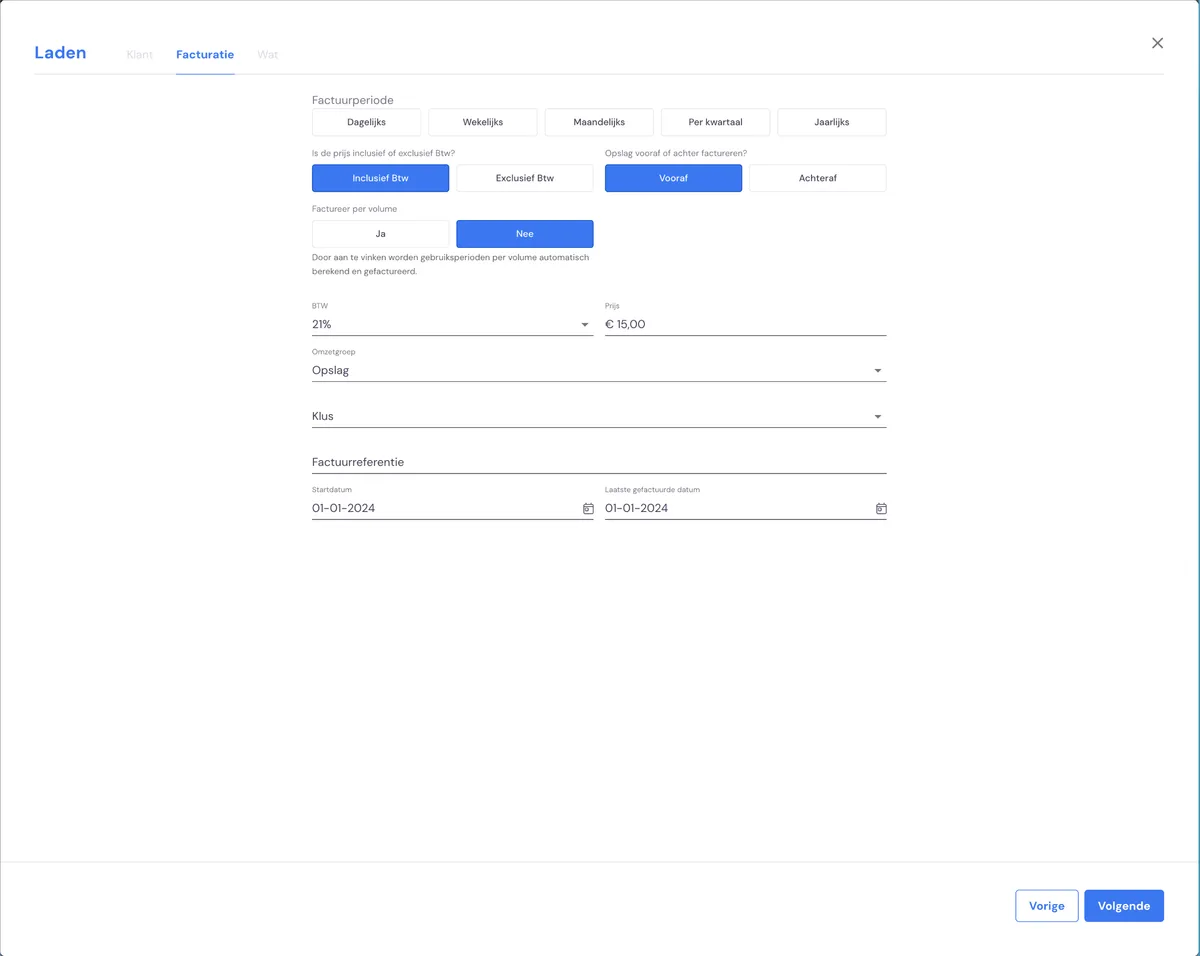
Choose an invoicing period and set up the other invoicing details.
Step 3 - add the items that have been loaded
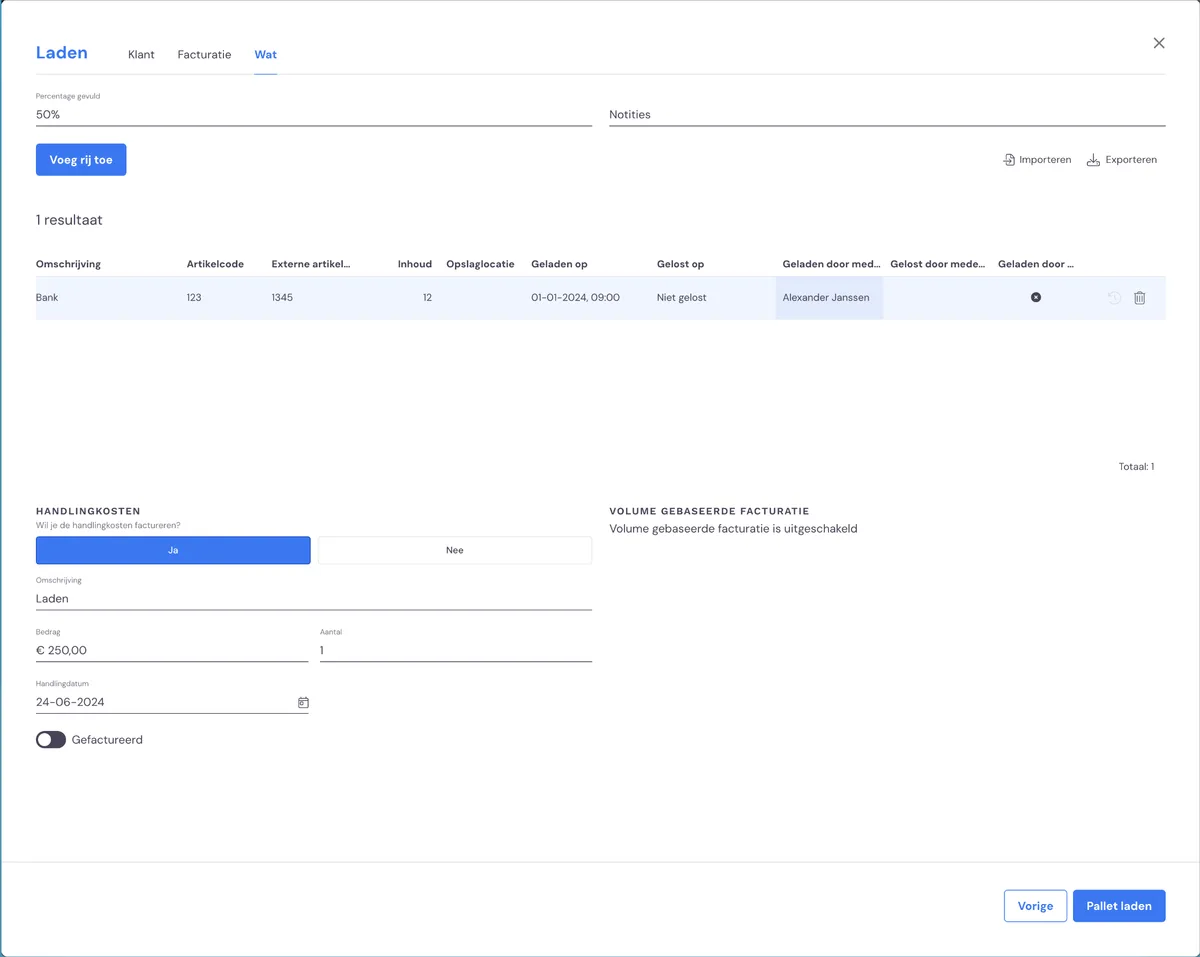
After this, you add the items that have been loaded. Optionally, you can add handling costs. After clicking 'load storage', the storage is now in use and the invoicing is arranged.
Next step
After this step, you've completed phase 3: mastering the basics. If you've followed all the steps, you're ready to go into more depth in phase 4 with the situations relevant to your specific role within your team. Now go back to the overview >