
Structure in your storage
You can place your storage units and stored items in a specific location, which makes it easy to find your stored items again. In Bas, we call these storage bays.
We recommend introducing a clear structure for your storage bays. For example, use a system with numbered aisles and bays.
Use the name and code fields on the storage bays to record this structure. This makes it easy for every employee to find the location of stored items.
Overview of storage bays
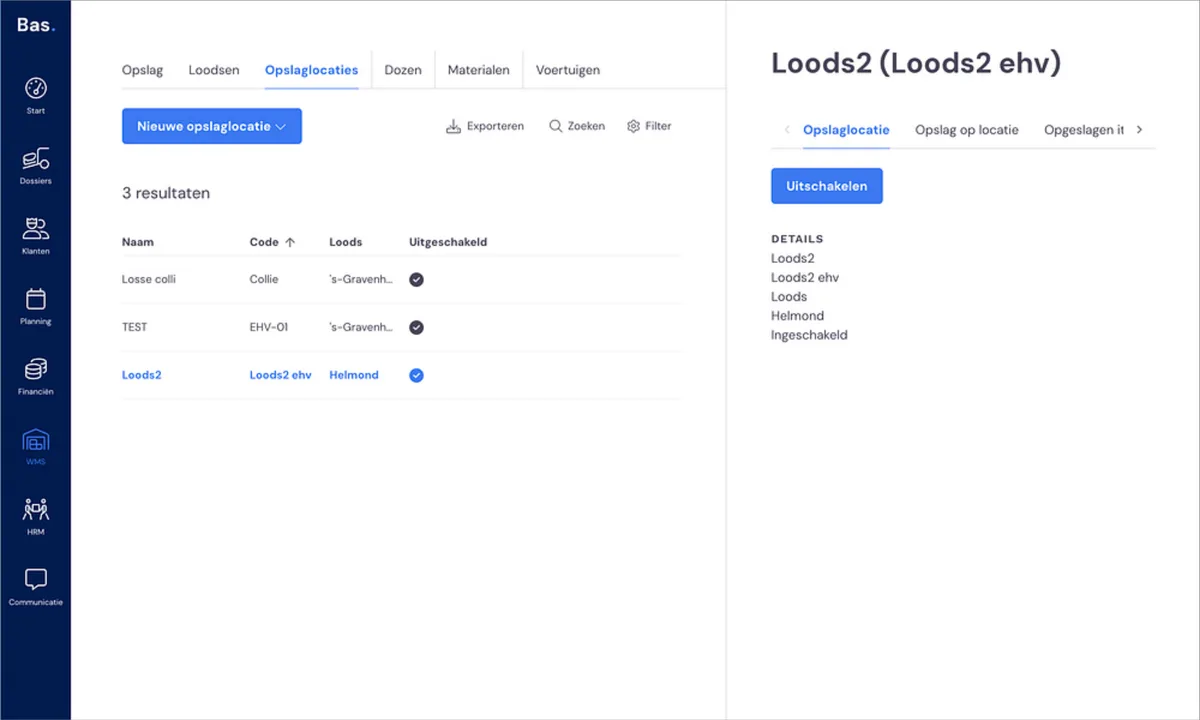
To manage your storage bays, go to 'WMS' in the main menu and click on 'Storage bays'.
If you click on a storage bay, you can edit the storage bay's details on the right-hand side. You can also view the storage units at that location (these are the various storage units you use, such as your crates and pallets). And you can view all stored items.
Adding a storage bay
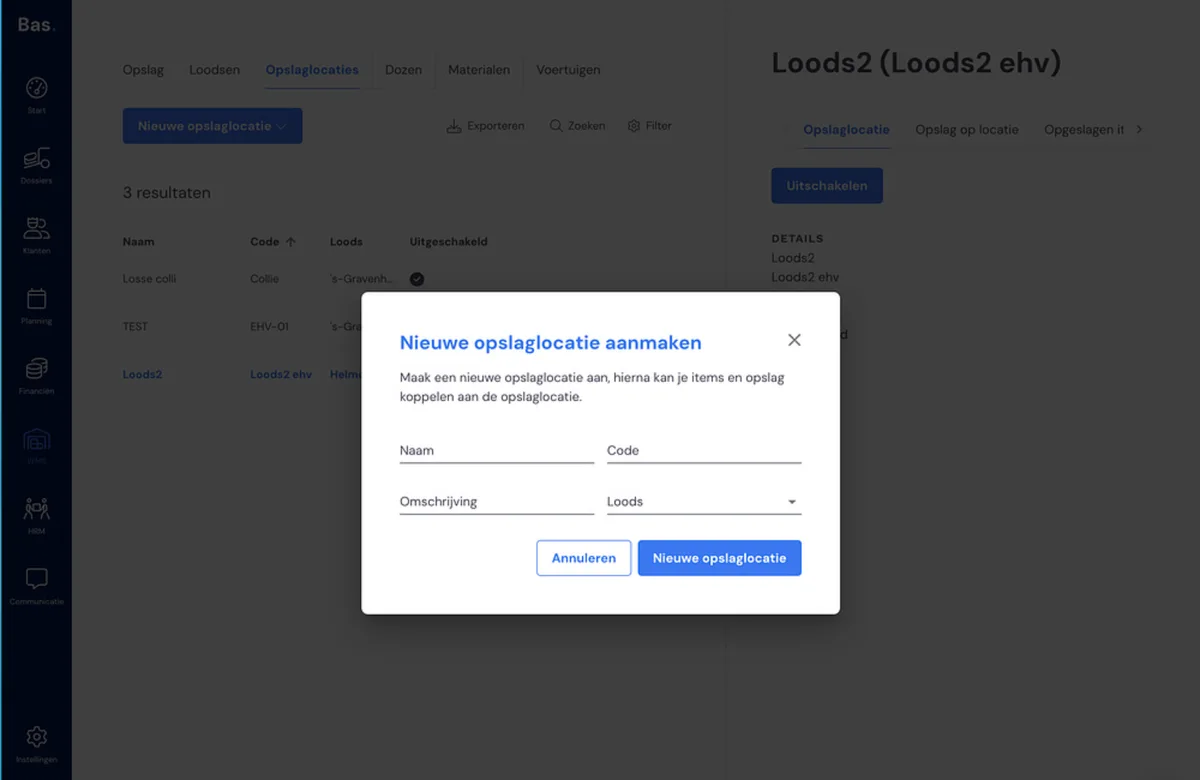
To add a new storage bay, click on 'New storage bay'. Fill in the name, code, description and warehouse. You can add extra information about the location in the description.
Adding storage bays in bulk
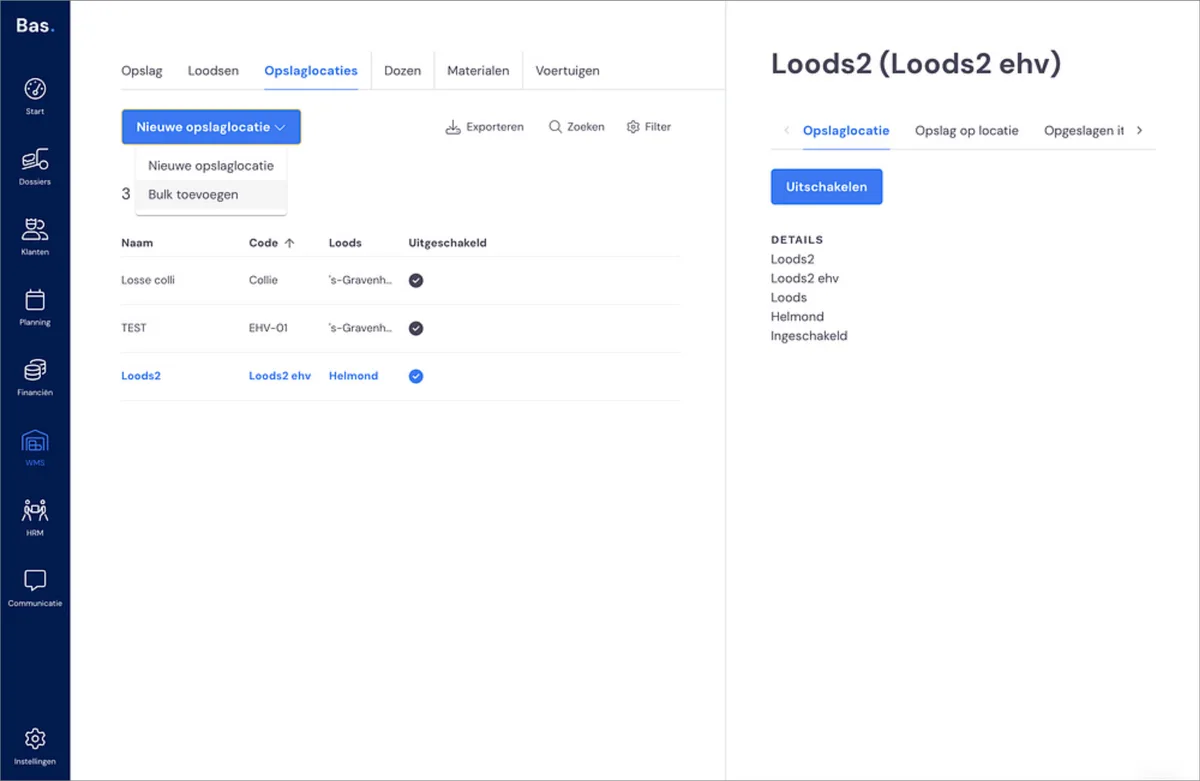
Do you need to create multiple storage bays at once? This is easy to do via 'Bulk add'.
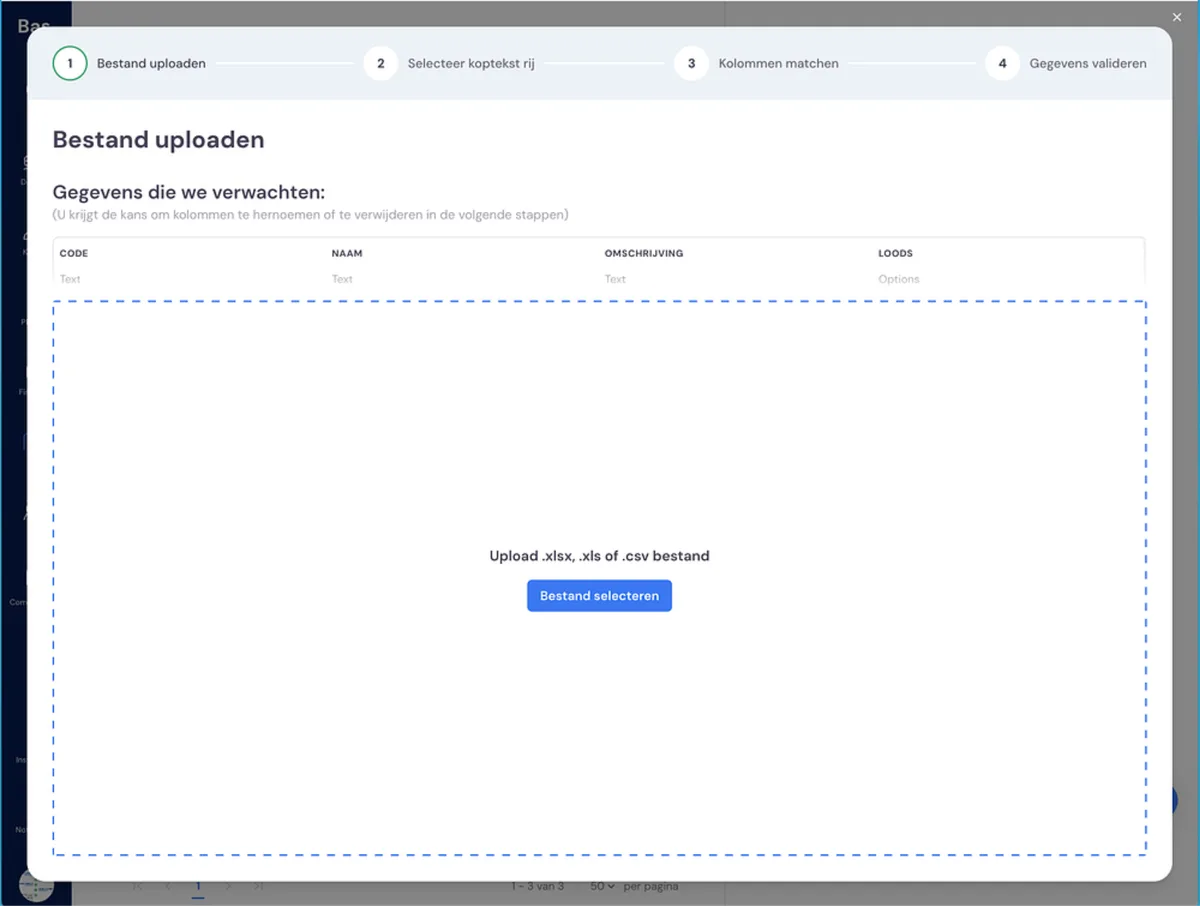
Upload a CSV or Excel file here in the correct format: start your spreadsheet with a header row containing the following names: Code, Name, Description, Warehouse. Then fill in the rows below with the required details. After entering these, you can link the warehouse in the file to the corresponding values already in Bas.
You can find more information about the import here.
Editing a storage bay
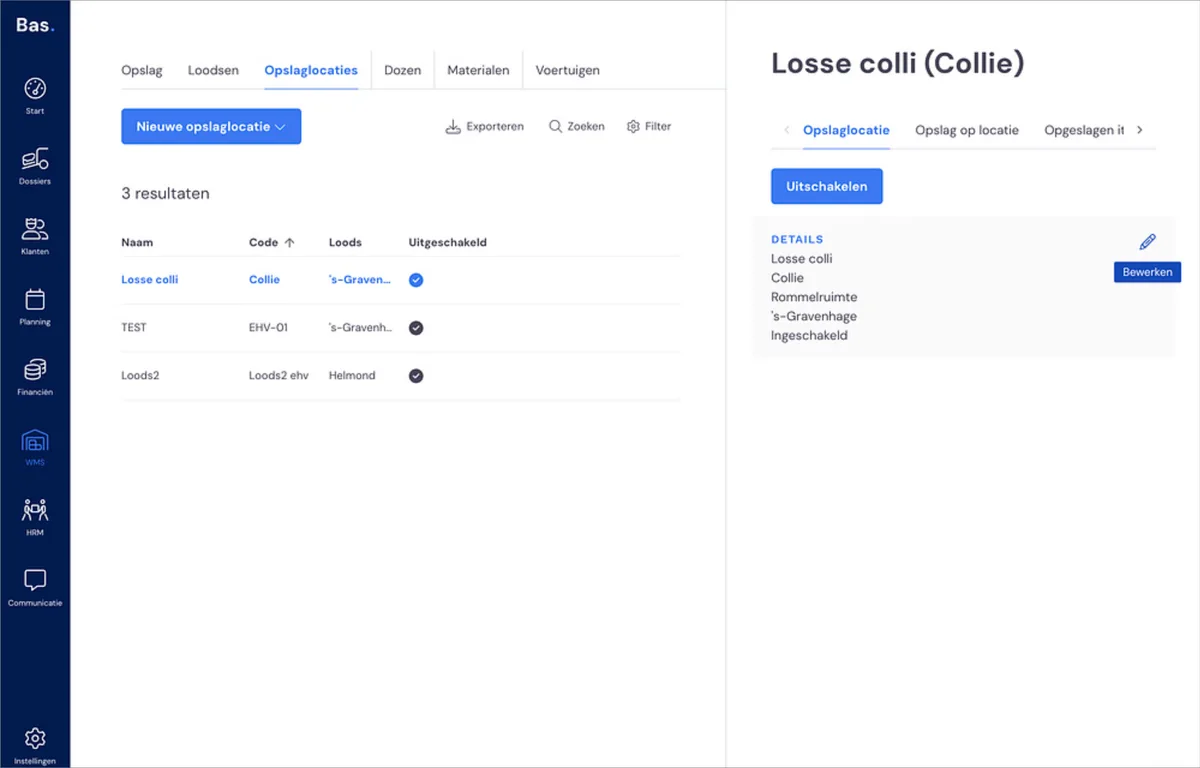
To edit a storage bay, click on the storage bay you want to edit.
If you want to change the name, hover your mouse over the 'Details' box and click the pencil icon. Change the details you want to edit here and then click 'Save'.
Printing a QR code for a storage bay
If you have a supported label printer, you can print a label for your storage bay by clicking the 'Print label' button. Select the printer and the type of label you want to print here, then click 'Print'.
Disabling a storage bay
Is a storage bay disappearing? Then you can simply disable it.
What happens when you disable a storage bay?
When you disable a storage bay, you hide it from your employees. It can then no longer be selected if they want to place storage there, but if there are still storage units or stored items there, they won't disappear and you won't lose them.
So how exactly do you do this?
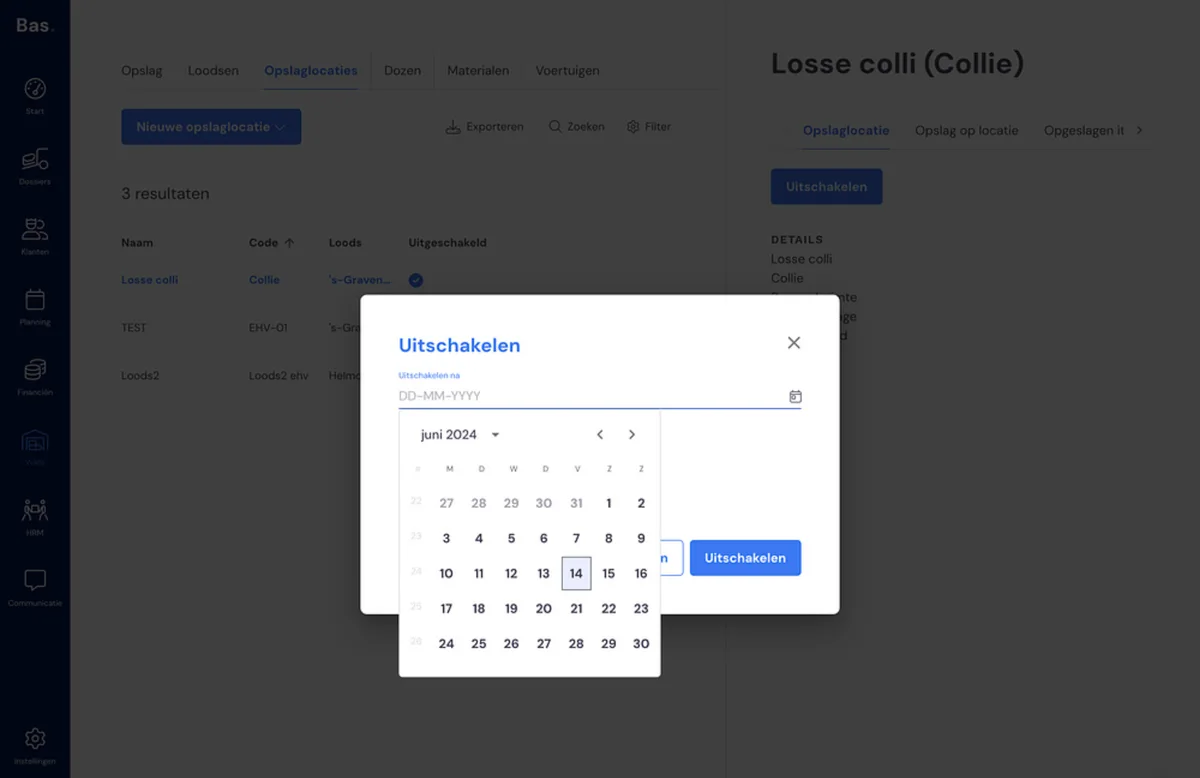
Click on the storage bay you want to disable and then on the 'Disable' button. You'll then be asked to enter a date on which the storage bay should become invisible.
Enabling a storage bay
You do this by clicking on the storage bay you want to enable and then clicking the 'Enable' button.
Creating storage
Once you've created warehouses and storage bays, you can start using them to store your customers' items.