
Employees who incur costs while carrying out their work can claim these expenses. They can do this themselves via the app, or ask a backoffice employee to add and process it for them.
In this step, you'll practise by creating and approving an expense claim via the backoffice.
Expense claims
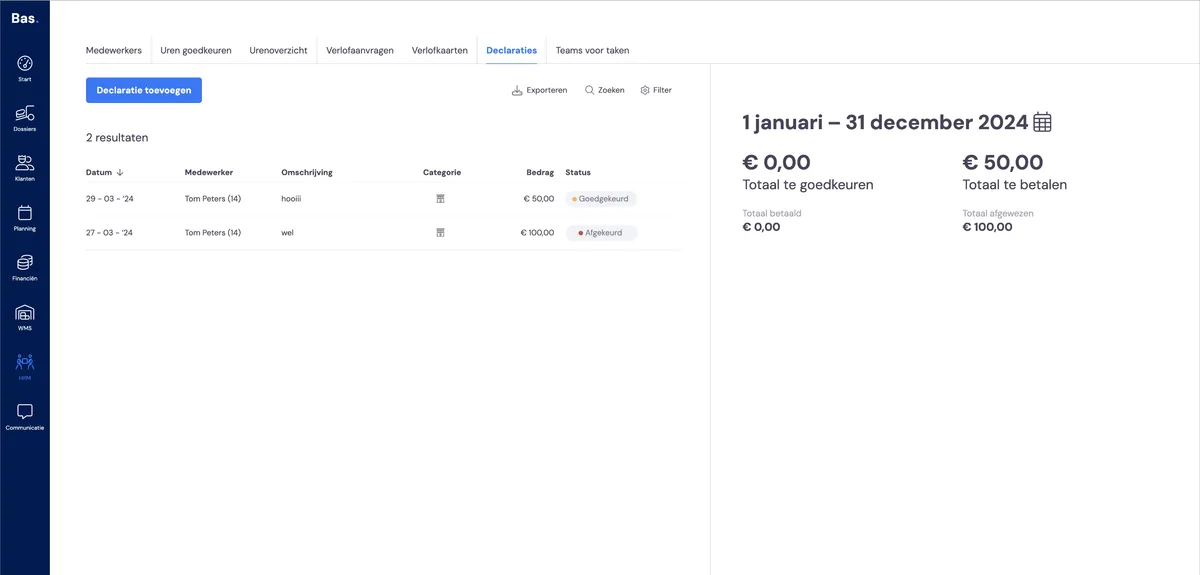
You'll find expense claims under HR and then Expense claims. Here you'll see all the expense claims submitted by employees via the employee app or added via the backoffice.
Adding an expense claim via the backoffice
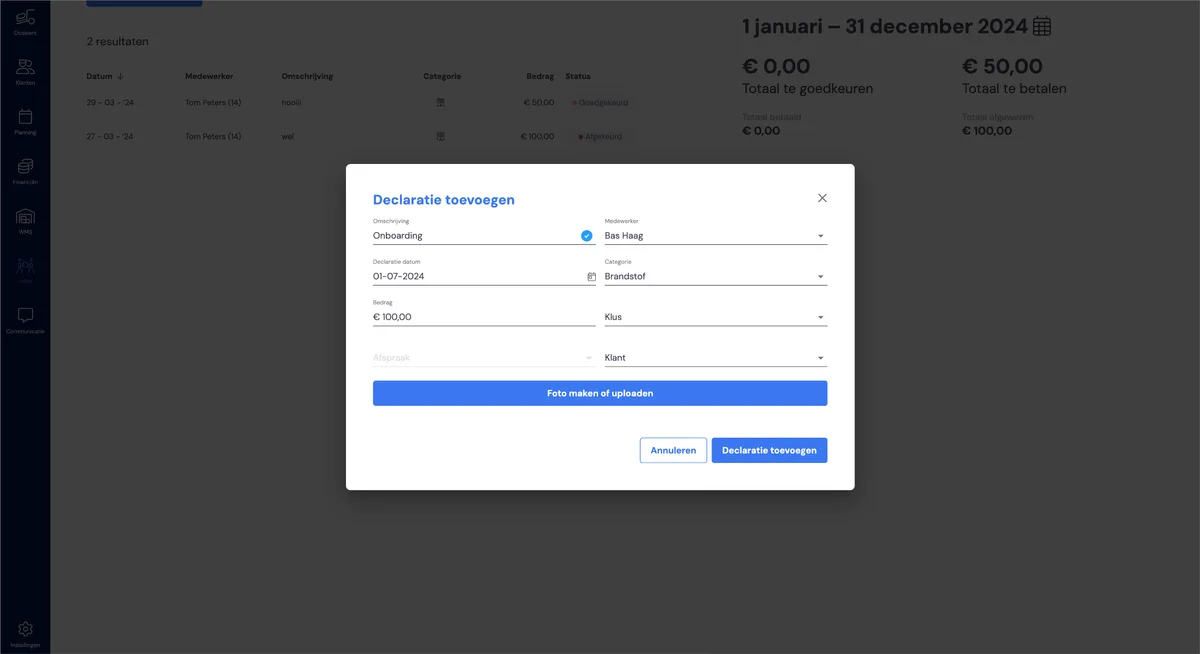
You add an expense claim using the 'Add expense claim' button. Here, you enter a description, choose the employee the expense claim is for, and enter the expense category and the amount. You can also optionally select a job and/or a customer, so that you can later bill this to that customer and/or job.
Adding an expense claim via the app
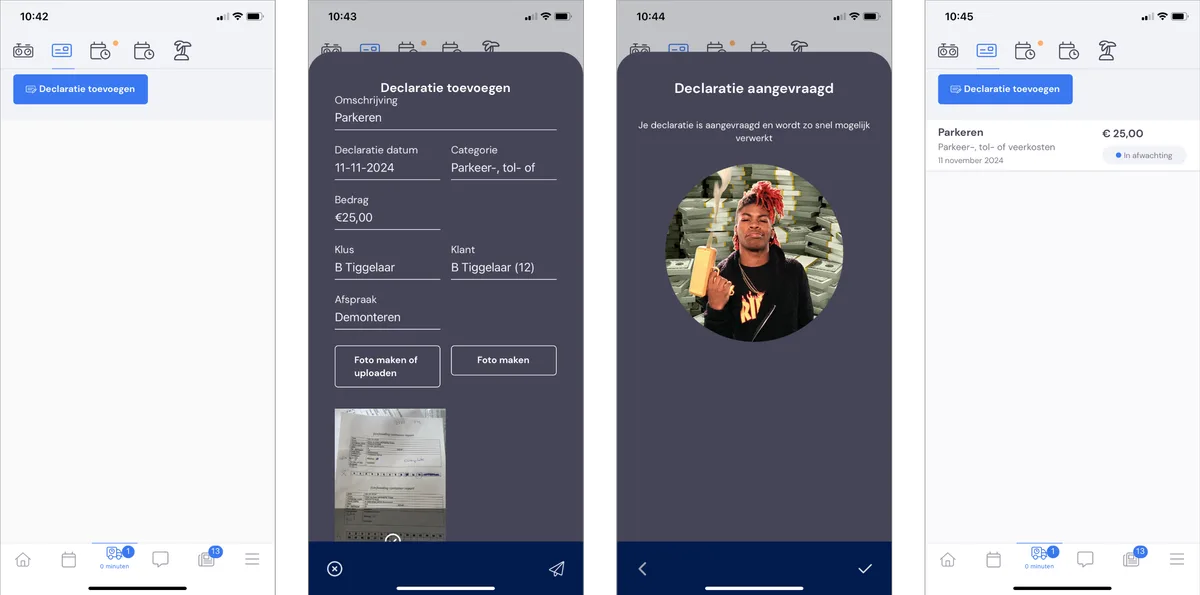
You add an expense claim using the 'Add expense claim' button. Here, you enter a description, choose the employee the expense claim is for, and enter the expense category and the amount. You can also optionally select a job and/or a customer, so that you can later bill this to that customer and/or job.
Approving an expense claim
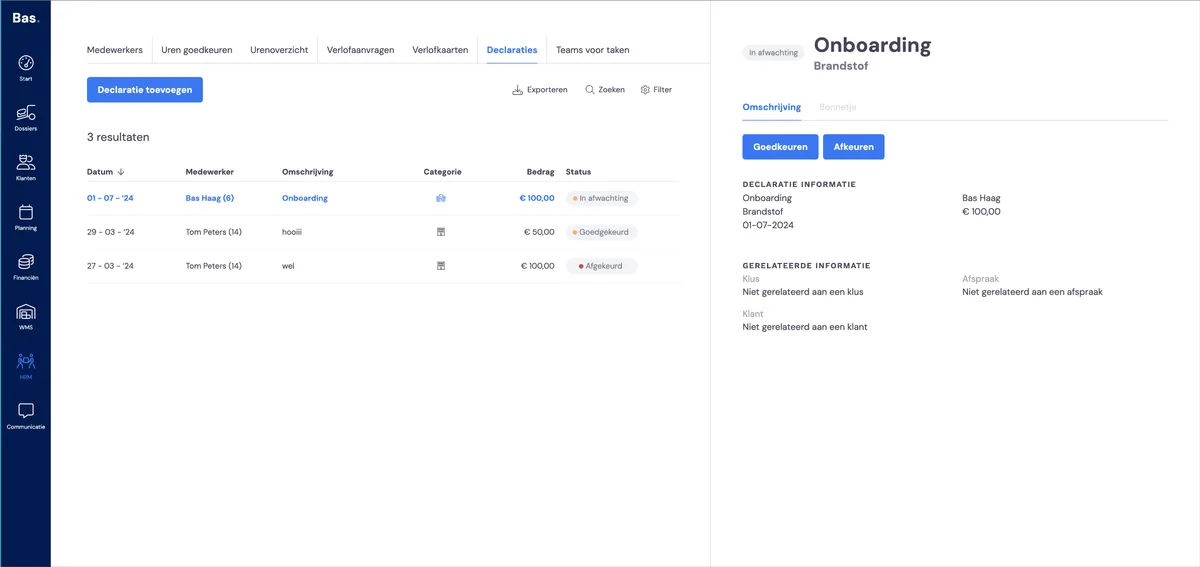
You approve the expense claim. Do this by clicking the expense claim you created in the list of expense claims. Then click 'Approve' on the right of the screen.
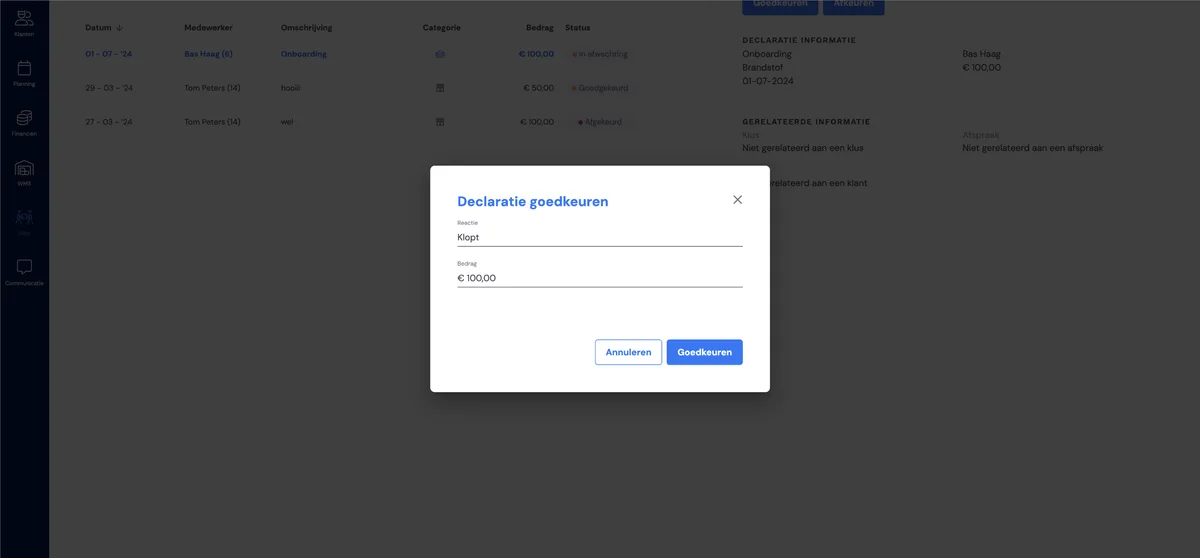
Add your comment here, along with the amount you want to approve.
Paying an expense claim
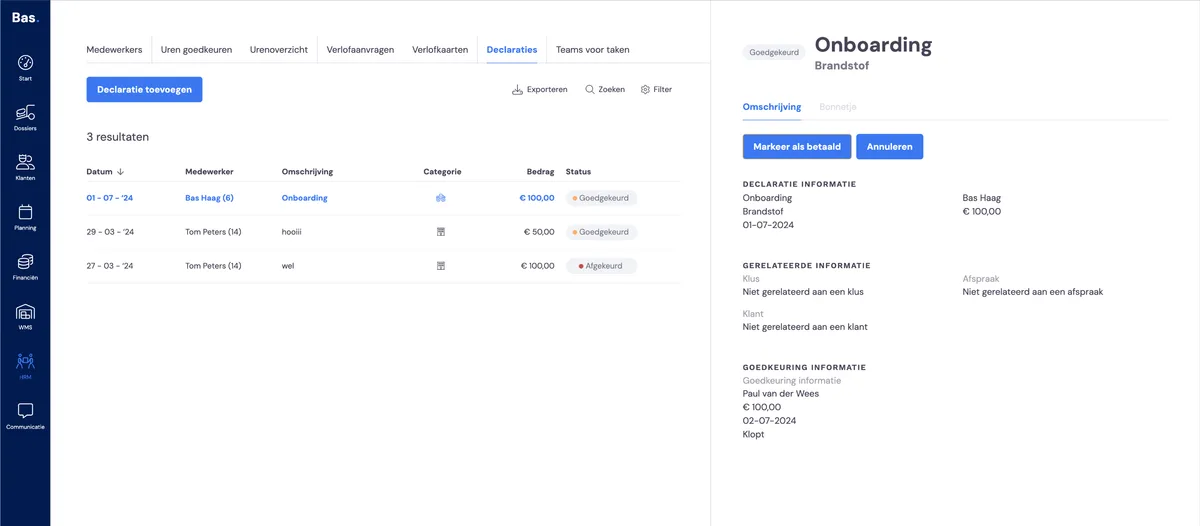
After approving an expense claim, it automatically moves to the status 'To pay'. You can't pay via Bas, but you can register the payment. Click 'Mark as paid'.
Using the filters
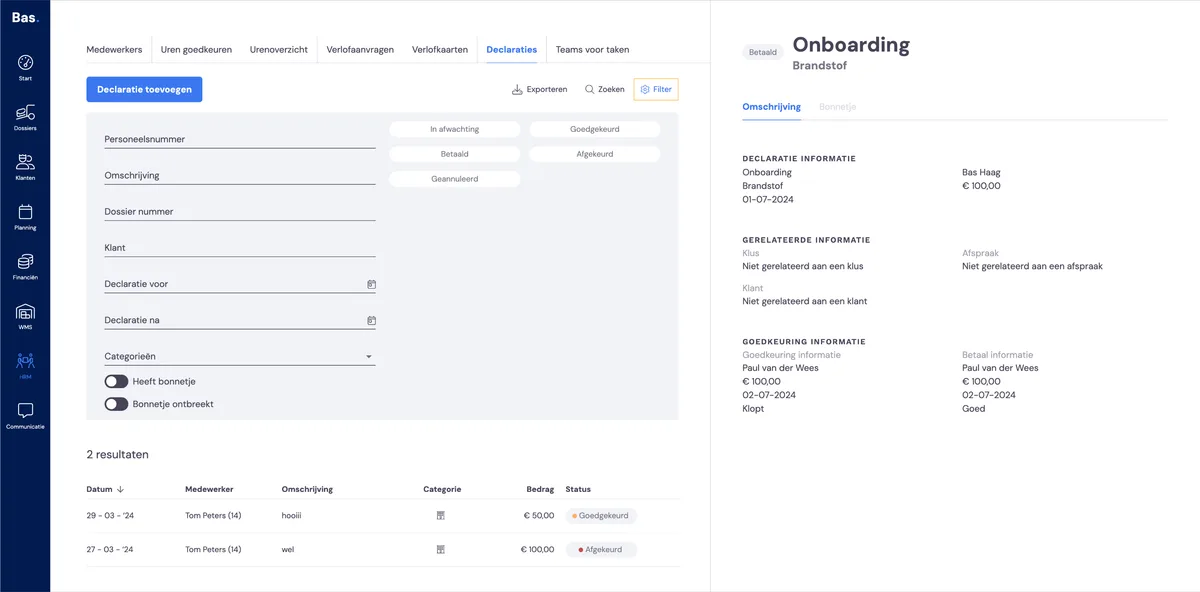
The expense claim you just created and processed now automatically disappears from the list. Use the filter and select the status 'Paid' to find the expense claim you just processed again.
Volgende stap
The next step is working with tasks that give structure to your work >