
Invoices are sent automatically based on the status of a job. This is defined in the package you selected when creating the job. You can check when this happens by looking at the job and then at Financial.
In this step, we'll take an alternative route: we'll send the invoice manually. Since you're the customer yourself, you'll receive the result in your own mailbox.
Sending the invoice
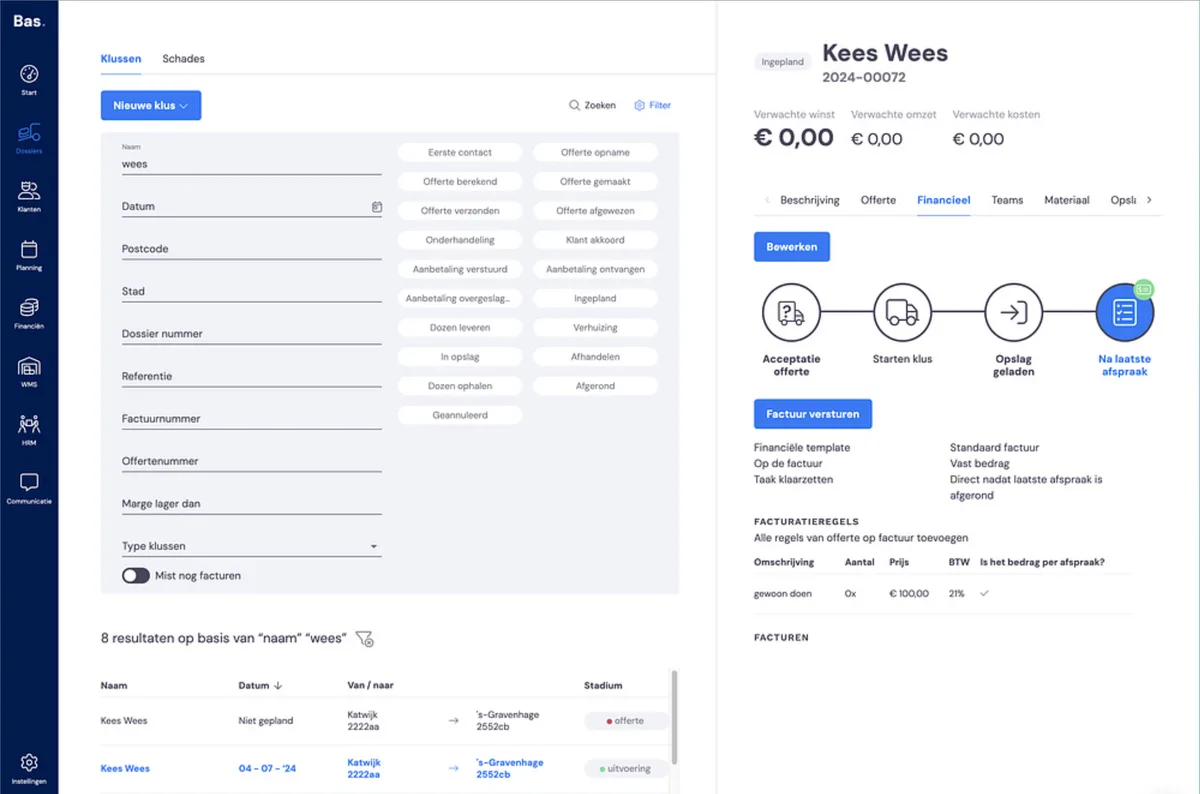
We'll now send the invoice manually. To do this, go to the job overview, select the job you created earlier, and go to Financial. Here, choose Send invoice. After clicking Send invoice, you'll be guided through a wizard.
Step 1: Choose customer, contact person and invoice address
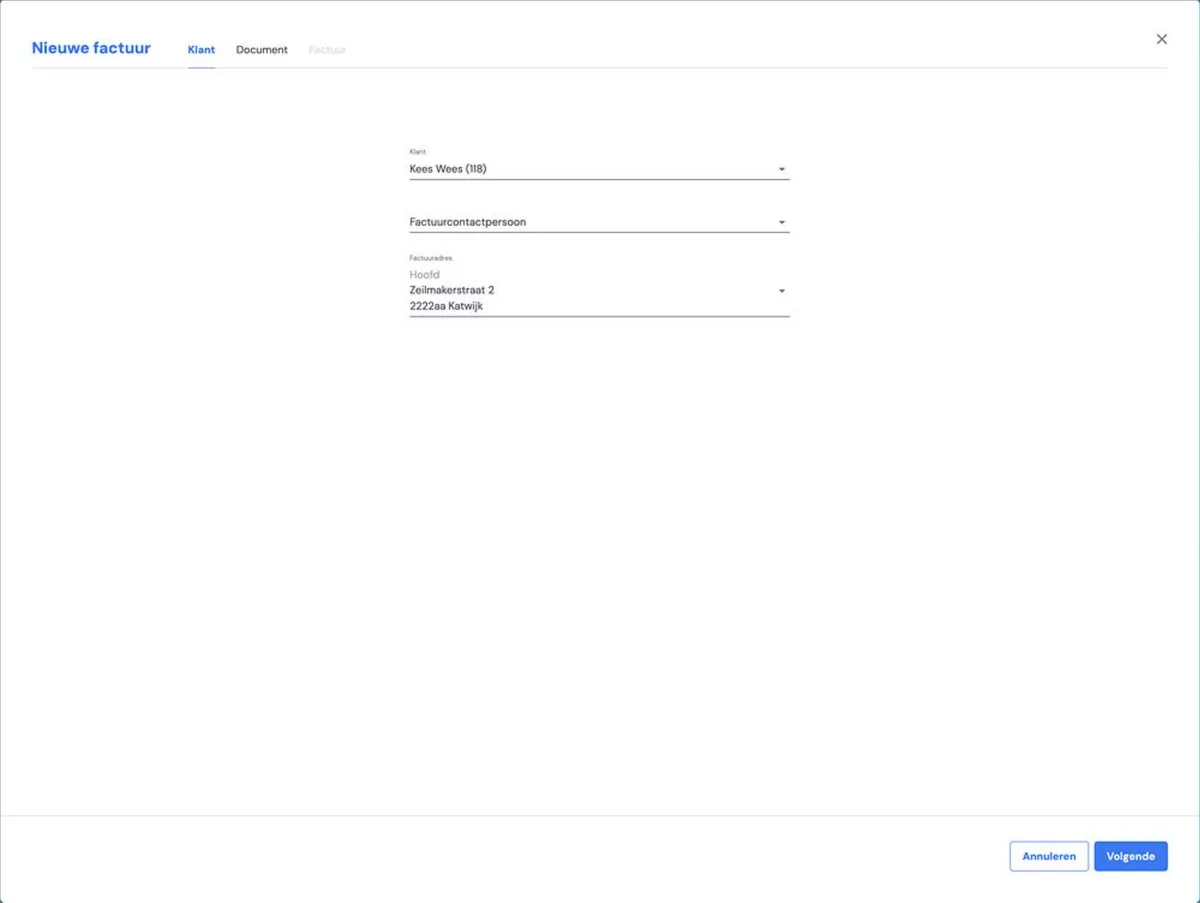
In this wizard, you can choose the customer, contact person and address. You don't need to change anything here; everything should be in your own name. Click Next.
Step 2: Choose document and enter reference
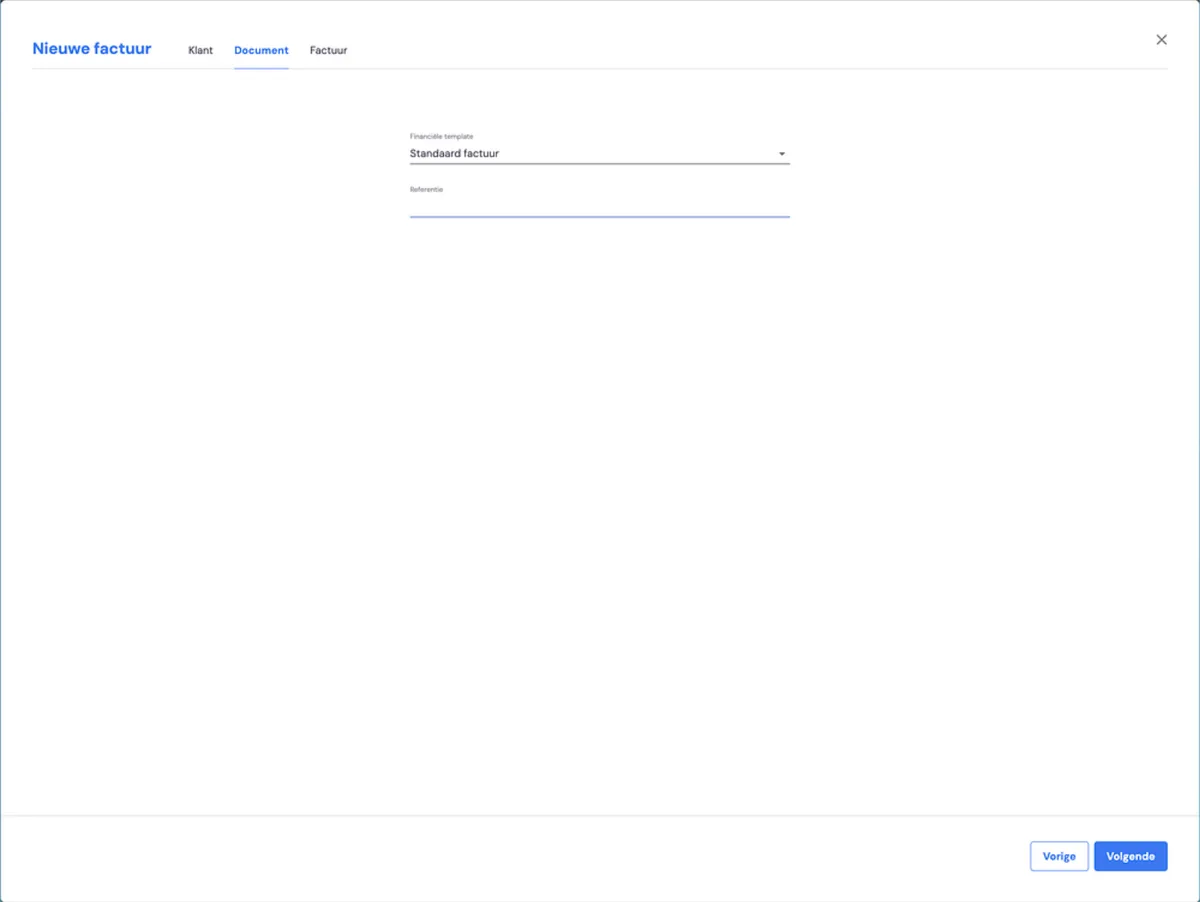
Here, you can choose to use a different invoice template. You can also add a reference here. You don't need to change anything. Click Next.
Step 3: Invoice
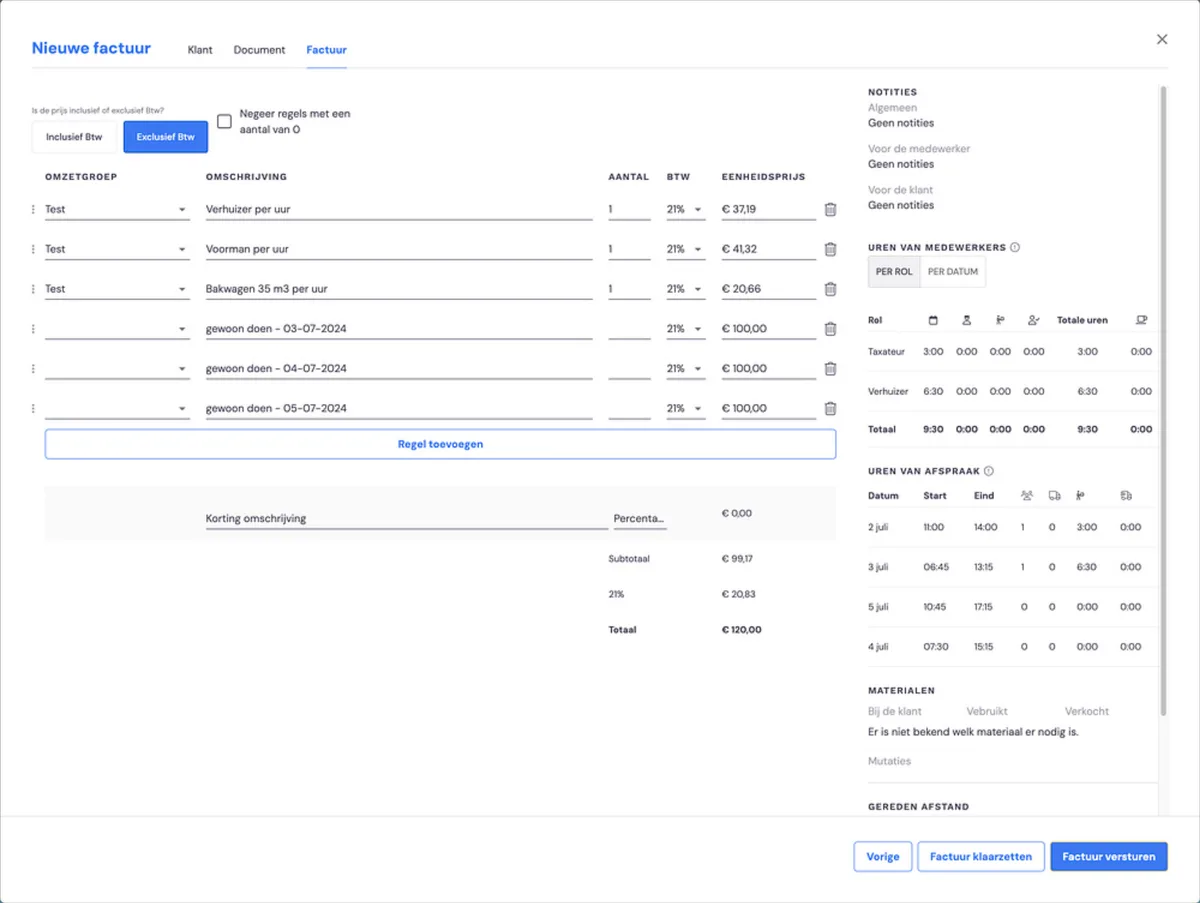
In this step, you can check the content of the invoice and amend it if needed. You don't need to change anything here either. Click 'Send invoice'. You'll receive the invoice in your own mail account.
Receiving the invoice
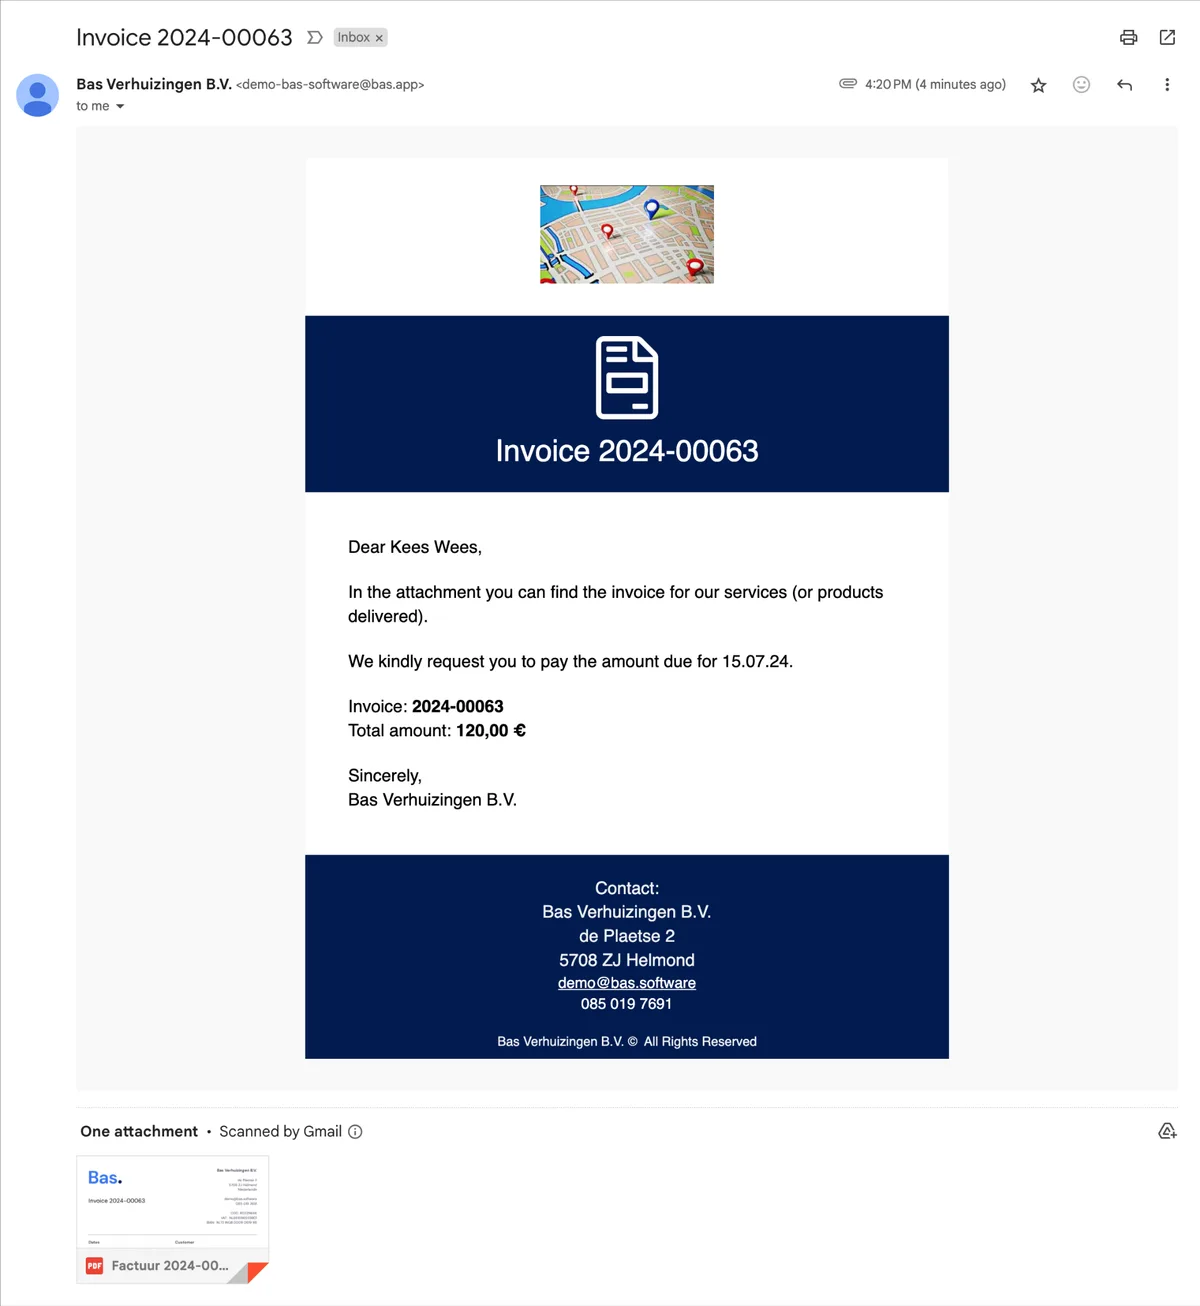
You'll receive the invoice in your mailbox. Soon, customers will also be able to pay online (if a Mollie integration is active); for now, we'll register the payment manually.
Invoice and payment
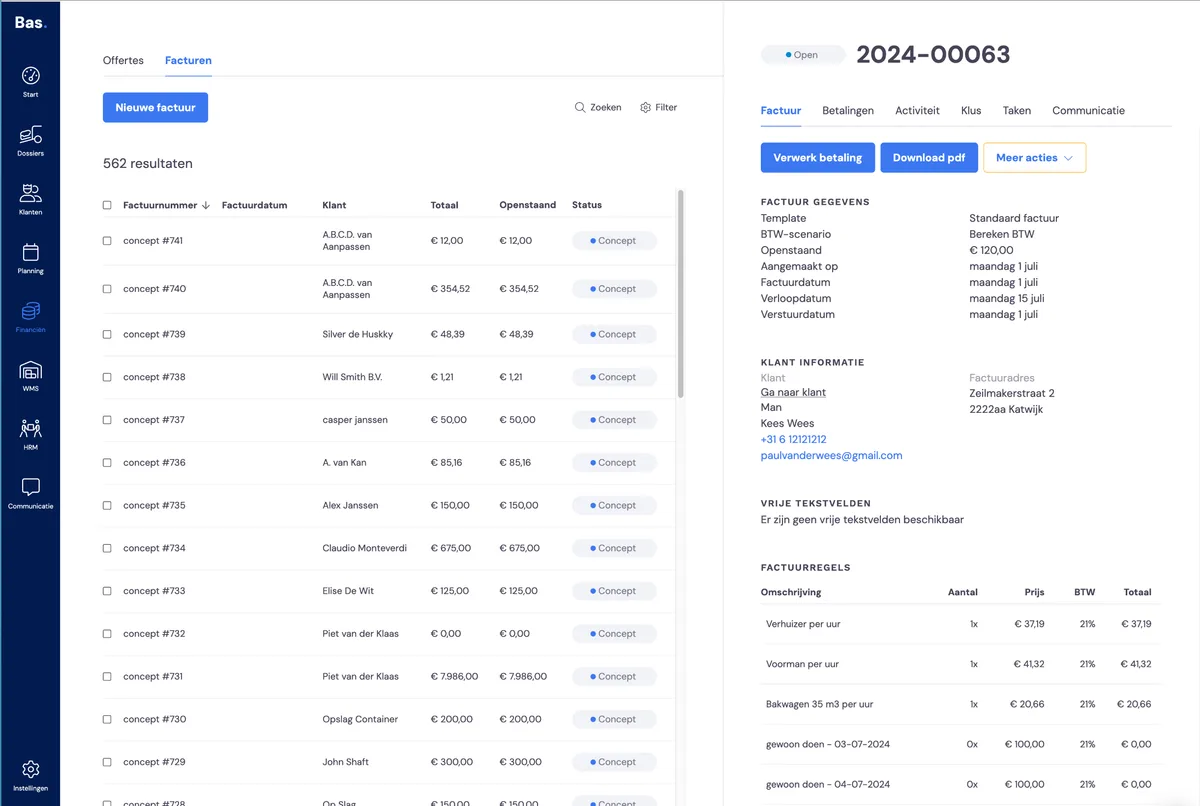
Go to the invoice and click 'Process payment'.
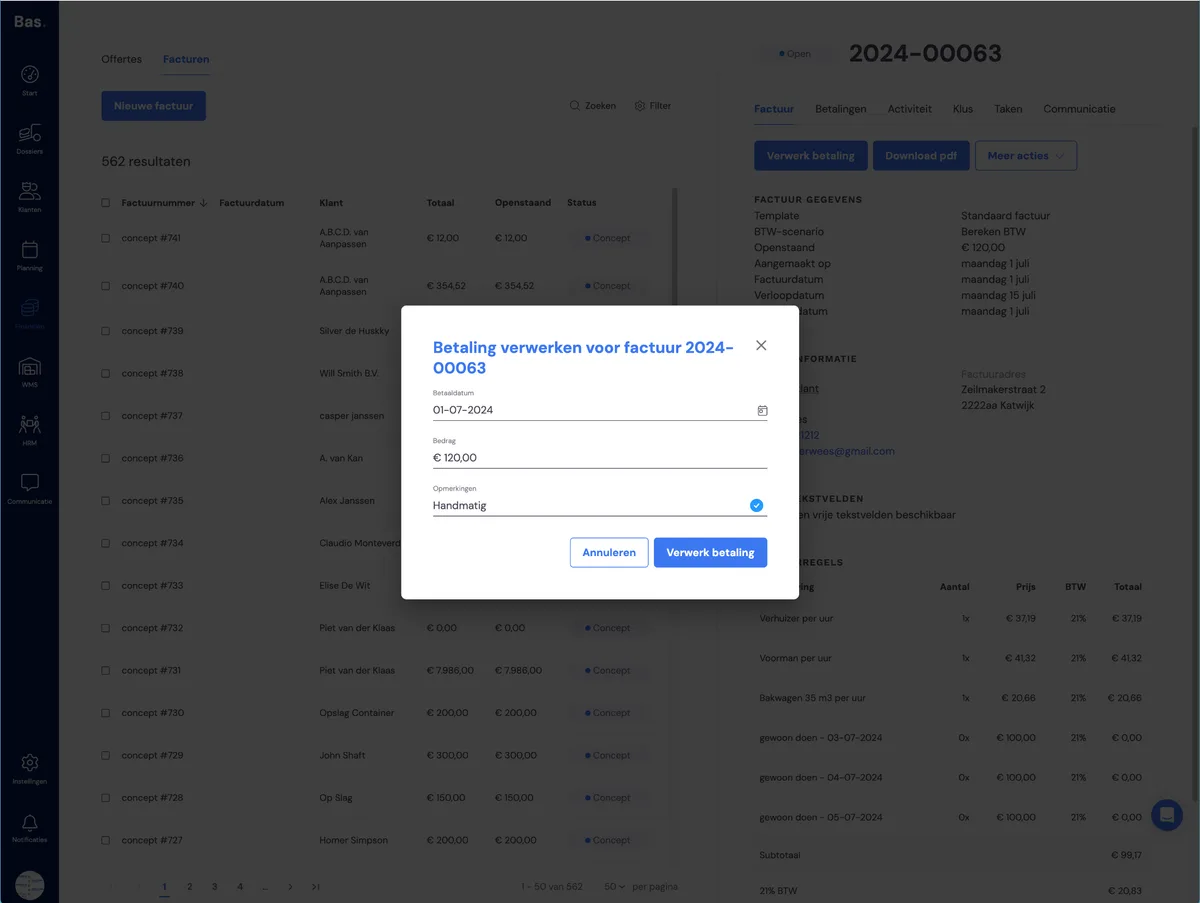
Enter the details, making sure you enter the correct amount for the job.
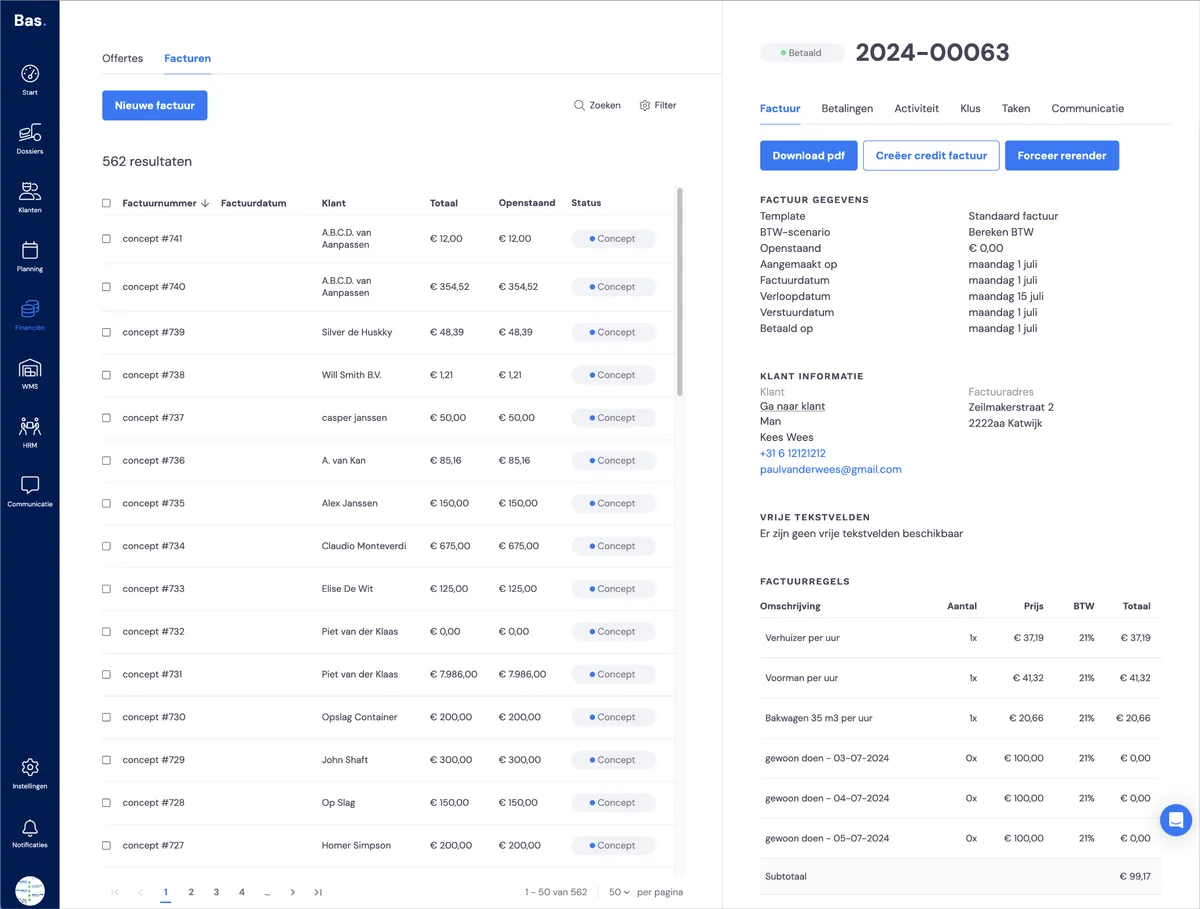
The payment has now been registered.
Next step
In the next step, you'll practise registering and processing leave and sickness
>
Next step: Invoice and case file completion: tips and points to note
Next step: Invoice and case file completion: tips and points to note
Next step: Invoice and case file completion: tips and points to note