
For a clear overview of an employee's leave and sick days, go to the leave card. On this screen you can also easily add new leave days, approve requests and find out how many hours an employee still has available.
The leave card
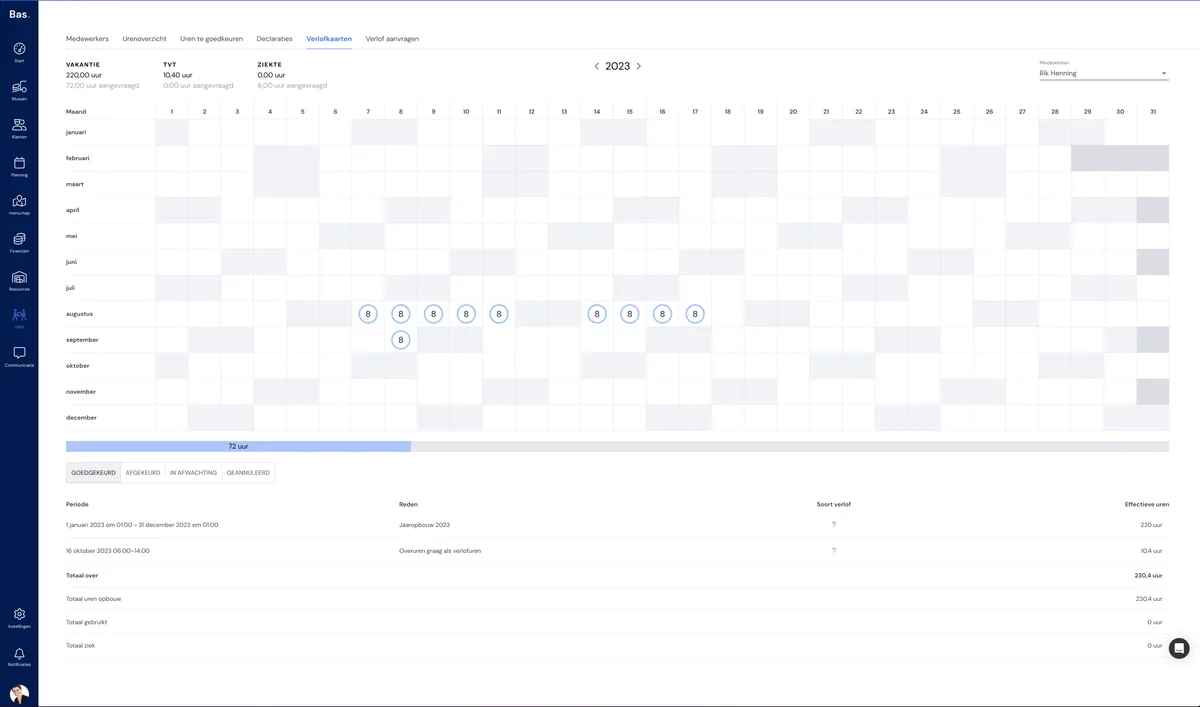
To view a leave card, click on 'HRM' in the main menu and then on 'Leave cards' in the tabs.
Adding leave days
On the leave card, you can add all the leave days and leave periods already granted for the coming year. You can add these one by one by clicking on a date. When you do this, a screen appears in which you add a leave request.
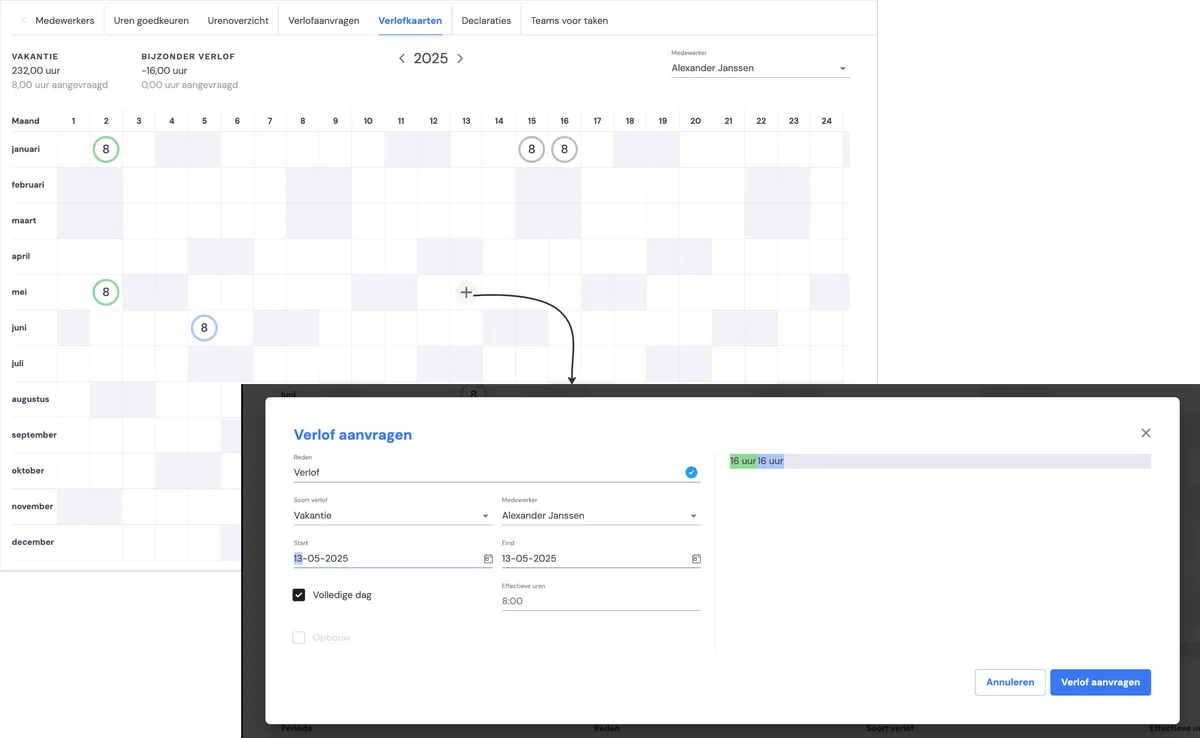
You'll see the request appear on the leave card. You can recognise the request by the blue circle on the day. You still need to approve this request. You do this by clicking on the date again:
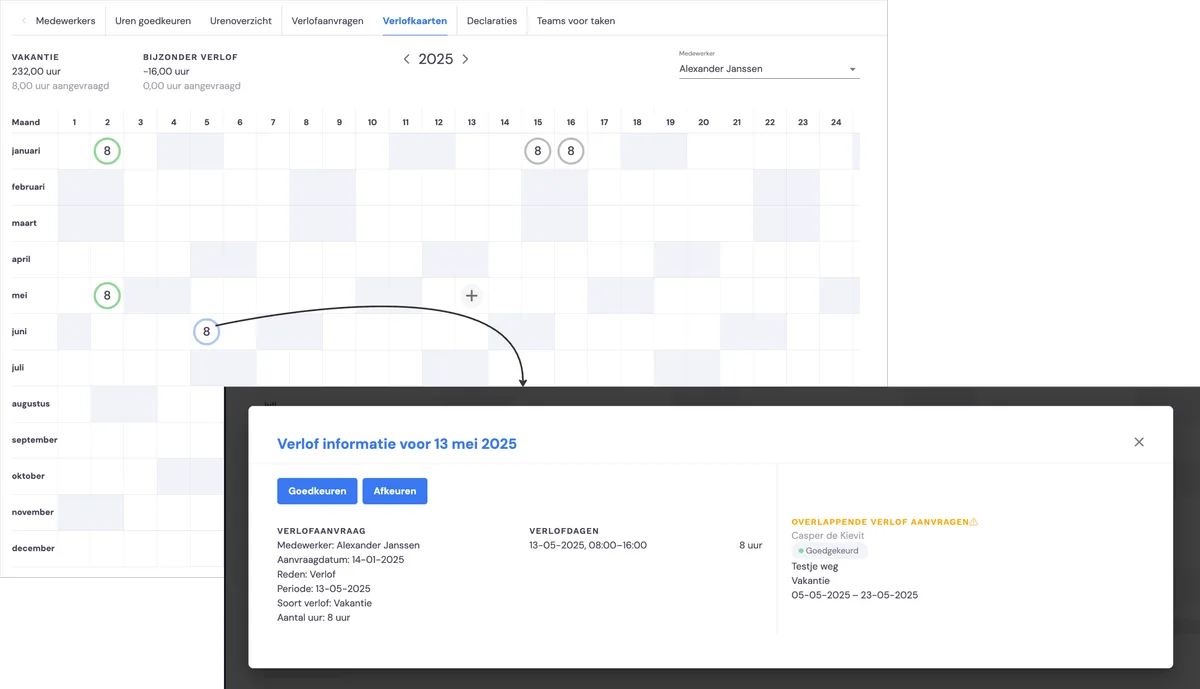
Once you've approved the request, you'll see it as a green circle on the leave card. You've now registered the leave day.
Once you've done this, the balances are correct and the leave days are registered.
Further information on the leave card
Viewing balances
At the top of the screen you'll see the various balances. First, you'll find the holiday balance and how many holiday hours have already been requested. Next to this, you'll see the same information for the balance of accrued time-off-in-lieu hours. Finally, on the right, it shows how many hours the employee has already been off sick and how many sick hours have been reported.
Calendar table
In the calendar table, you'll see the day of the week at the top and the days of the month on the left. If a month has fewer than 31 days, the box turns dark grey. If an employee doesn't work on a particular day (for example, at the weekend or with a 32-hour working week), the box turns light grey.
Leave or sick leave appears in the relevant box that corresponds to the day of the month. In the middle of the circle you'll see the number of hours of leave or sick leave, and the circle around it indicates the status of the hours. Light blue means 'Pending', 'Approved' is indicated in green and declined requests automatically disappear from this calendar.
Leave records
At the bottom of the screen you'll see a table with leave records. By default, these are filtered by the status 'Approved'. You'll also find the totals of accrued hours, hours taken and sick hours.
If you want to view the records with a different status, you can simply do this by clicking one of the buttons that corresponds to the status of the leave records you want to view.
Next step
Find out how an employee submits a leave request via the app >